9
5. Close the battery compartment lid.
6. Turn the Analyzer on to test the function of the new batteries.
7. Check the display is functioning correctly to prevent misinterpretations due to defective display elements.
• If you think the display screen does not appear for long enough, you can hold down the button (the next time you switch
on the Analyzer). The display screen is then shown for the time the button is pressed.
• After inserting or replacing batteries, con rm that the time and date are set correctly. If they are not, reset the Analyzer before
testing.
• Always replace all four batteries at the same time because batteries with di erent capacities may impair the function of the
Analyzer. Do not use rechargeable batteries.
STEP 2. Set the Analyzer
Brief overview of the Analyzer settings
The following table provides an overview of the available settings.
Stage Setting Options
1 Beep On, O
2 Year YYYY
3 Date Format m-d, d-m
4 Date mm-dd, dd-mm
5 Time Format 12h, 24h
6 Time hh:mm
7 Sample. Type (for Lipid) SE, BL
8 Unit of the Test Result mg/dL, mmol/L
9 Auto Printing On, O
10 Printing Page P-1, P-2
11 Hypo warning (for glucose) O , 60, 70, 80
12 Alarm O , 4 Alarms
13 Bluetooth with PC* On, O
14 Bluetooth with Printer* On, O
15 Repairing Printer* On, O
* Only for 02LA20G
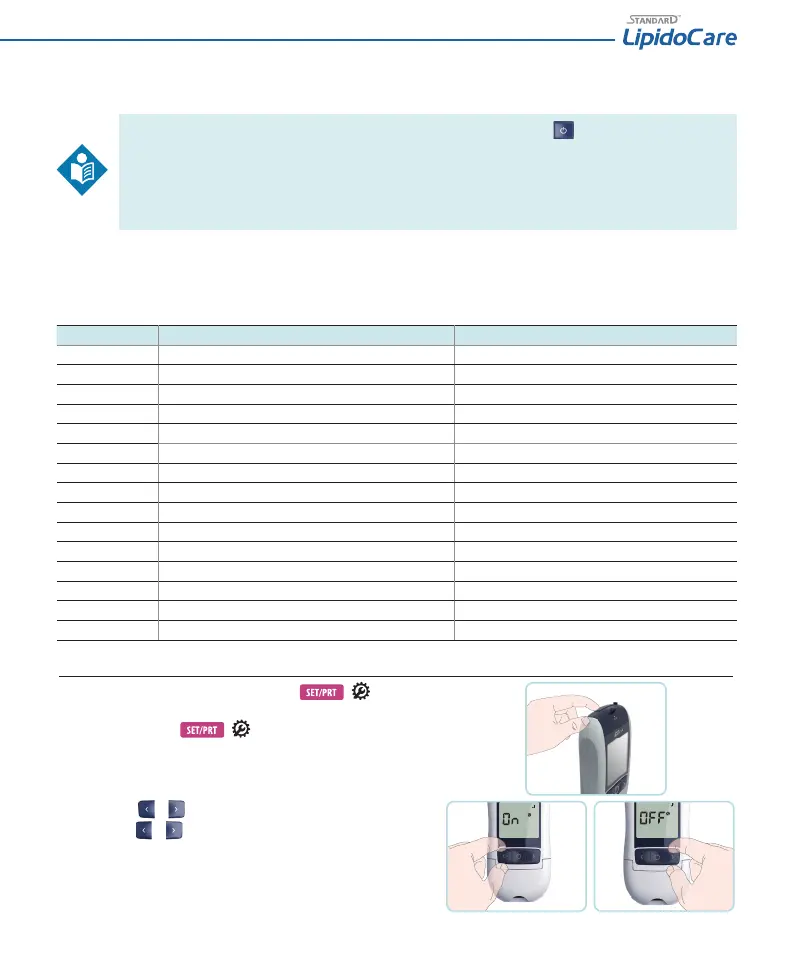
Stage 0) Entering set mode
1. Turn on the meter and then press and hold the
( ) button (on the
top side of the Analyzer) for 3 seconds to enter set mode. If you want to leave the
set mode, press the
( ) button.
2. Press the or button to change the currently ashing setting. You can
press the
or button as many times as needed (or keep it pressed) until
the desired setting (value) is reached.