Do you have a question about the Seagull Models PC-9 and is the answer not in the manual?
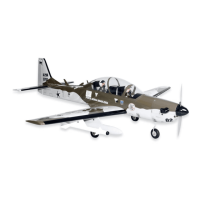
Detailed technical specifications for the PC-9 model, including wingspan, wing area, weight, and dimensions.
Crucial safety warning regarding risks and responsibilities associated with model aircraft use and potential injury.
Step-by-step guide to securely glue hinges for aileron control surfaces using thin C/A glue.
Instructions for installing the control horn onto the aileron for proper control surface connection.
Procedure for gluing elevator hinges in place using techniques similar to those for ailerons.
Method for attaching rudder hinges securely using C/A glue, mirroring aileron hinging.
Steps for correctly mounting the engine to the aircraft firewall, including template use.
Guide for assembling and installing the fuel tank stopper, including fuel pick-up and vent tubes.
Instructions for installing the fuel tank, ensuring proper alignment of tubes and securing the stopper.
Steps for fitting and securing the fiberglass cowl over the engine, ensuring proper alignment and fit.
Guide for installing the spinner backplate, propeller, and spinner cone, ensuring clearance.
Instructions for fitting and securing servos within the fuselage, noting potential size adjustments.
Procedure for installing the power switch into the pre-cut hole on the fuselage side.
Instructions for installing landing gear components, including servos, arms, and connectors.
Detailed instructions and diagrams for assembling and installing the main landing gear components.
Steps for installing aileron servos, including threading servo leads through the wing.
Instructions for joining the wing halves, including fitting the wing tube and applying epoxy.
Procedure for attaching the horizontal stabilizer to the fuselage, involving covering removal and epoxy.
Guide for attaching the vertical stabilizer to the aircraft, including marking and epoxy application.
Installing pushrod horns for elevator and rudder control surfaces, connecting to servo arms.
Instructions for mounting the nose wheel assembly onto the landing gear structure.
Steps for securing the battery pack within the fuselage using tie wraps and screws.
Steps for connecting servo leads and switch to the receiver and securing it within the fuselage.
Procedure for securely bolting the assembled wing to the main fuselage structure.
Critical procedure for achieving the correct center of gravity for stable flight.
Recommended control surface throws for initial test flying and sport flying.
Steps to check the operation and direction of all control surfaces and throttle.
Essential checks before flight, including battery charge, glue joints, balance, and control surfaces.
| Brand | Seagull Models |
|---|---|
| Model | PC-9 |
| Category | Toy |
| Language | English |