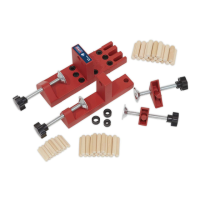
5.1.3. Selectdowelsizeandrelevantdrillbit.Setthedepthgaugeonthedrillbittoensuresucientholedepthtopreventthedowelfrom
bottoming out when jointing thus preventing the boards from fully meeting. Drill both upper and lower holes at this position.
TIP: To prevent build up of swarf, withdraw the drill bit from the work frequently.
5.1.4. Tocontinuedrillingfurtherholes,loosenthedrilljigclampsandcarefullyslidethedrilljigtoit’snewposition.TIP: Spacing can be
achieved by placing a dowel into an existing hole and using a spacer-block between this and the drill-jig to set the new location.
IMPORTANT: When moving the drill jig location at least one set of clamps must be holding the boards in position to prevent movement
and misalignment of the dowels.
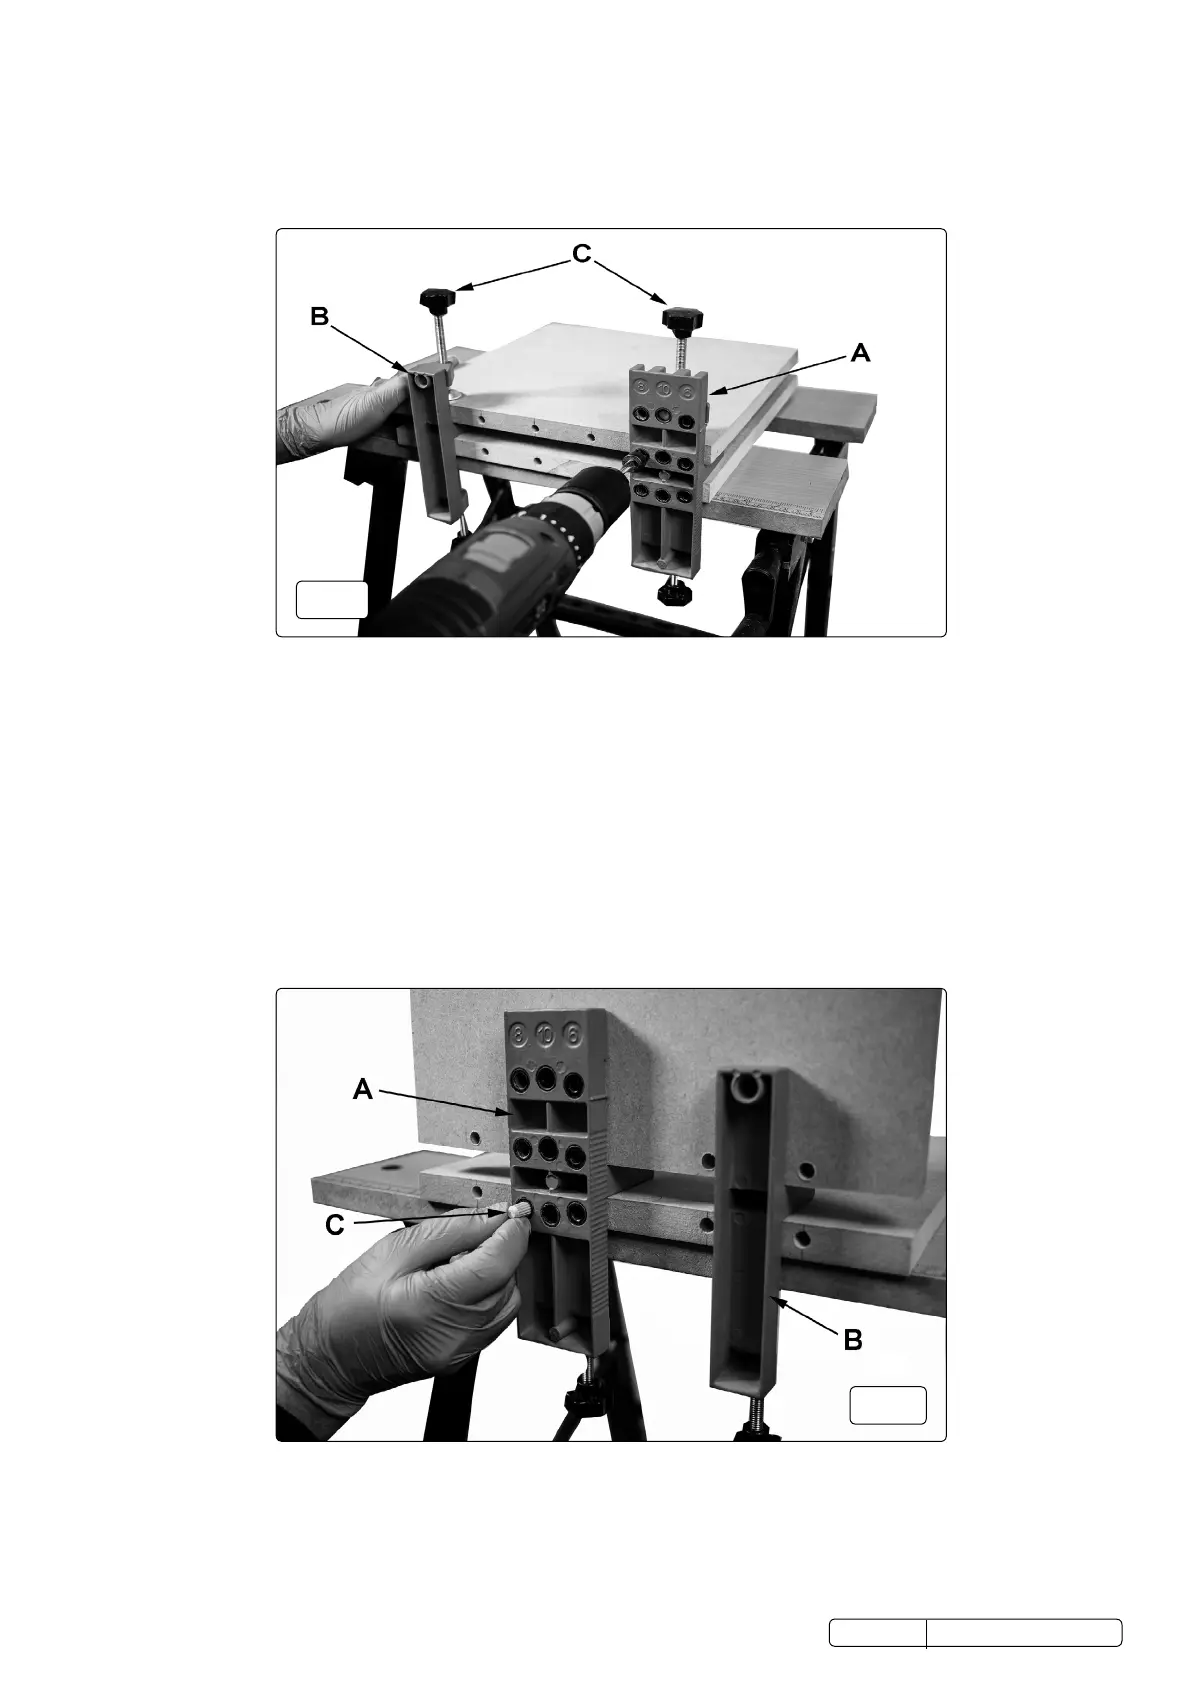
5.2. EDGE TO CORNER JOINTING (g.2)
5.2.1. Clamptherstboardinpositionontheworkbenchusingdrilljig(g.2.A)andclampblock(g.2.B)thussettingthelocationfortherst
dowel hole.
5.2.2. Stand the second board on edge onto the drill jig and secure with upper clamps. TIP: Support the vertical board securely so that the
boardslieatrightanglestoeachotherandensurethatedgesareinline.Additionalclampingmayberequiredtosecurelyandrmly
support the vertical board.
5.2.3. Selectdowelsizeandrelevantdrillbit.Setthedepthgaugeonthedrillbittoensuresucientholedepthtopreventthedowelfrom
bottoming out on jointing thus preventing the boards from fully meeting. Drill all holes in the horizontal board. TIP: Spacing can be
achieved by placing a dowel into an existing hole and using spacer-block between this and the drill-jig to set the new location.
5.2.4. Re-adjust drill depth gauge to suit hole depth required in vertical board. To continue drilling further holes, loosen the drill jig clamps
andcarefullyslidethedrilljigtoit’snewposition.TIP: Alignment of upper and lower holes can be achieved by using a dowel placed in
matchinghorizontalhole(g.2C)TIP: To prevent build up of swarf, withdraw the drill bit from the work frequently.
IMPORTANT: When moving the jig location at least one set of clamps must be holding the boards in position to prevent movement and
misalignment of the dowels.
Original Language Version
© Jack Sealey Limited
DJ01 Issue 1 24/01/18
fig.
1
fig.
2
 Loading...