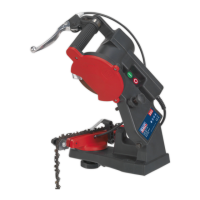
2. INTRODUCTION & SPECIFICATIONS
Portable electric multipurpose sharpener, aimed at the DIY user. Sharpens all HSS drill bits from 3mm to 10mm, straight edged knives and
scissors. Also regrinds chisels and plane blades up to 50mm wide.
© Jack Sealey Ltd
Model No: ...................................SMS2004
Input: .....................................230V, 50Hz
Free Speed:.................................. 6700rpm
Wheel Diameter: ...............................Ø48mm
Minimum Drill Diameter: ..........................Ø3mm
Maximum Drill Diameter: .........................Ø10mm
Weight:........................................1.65kg
3. INSTALLATION
4. OPERATION
3.1. INSTALLATION
3.1.1. Screwthesharpenersecurelytoareproofworkbench,usingthescrewholesinthebaseasatemplate.
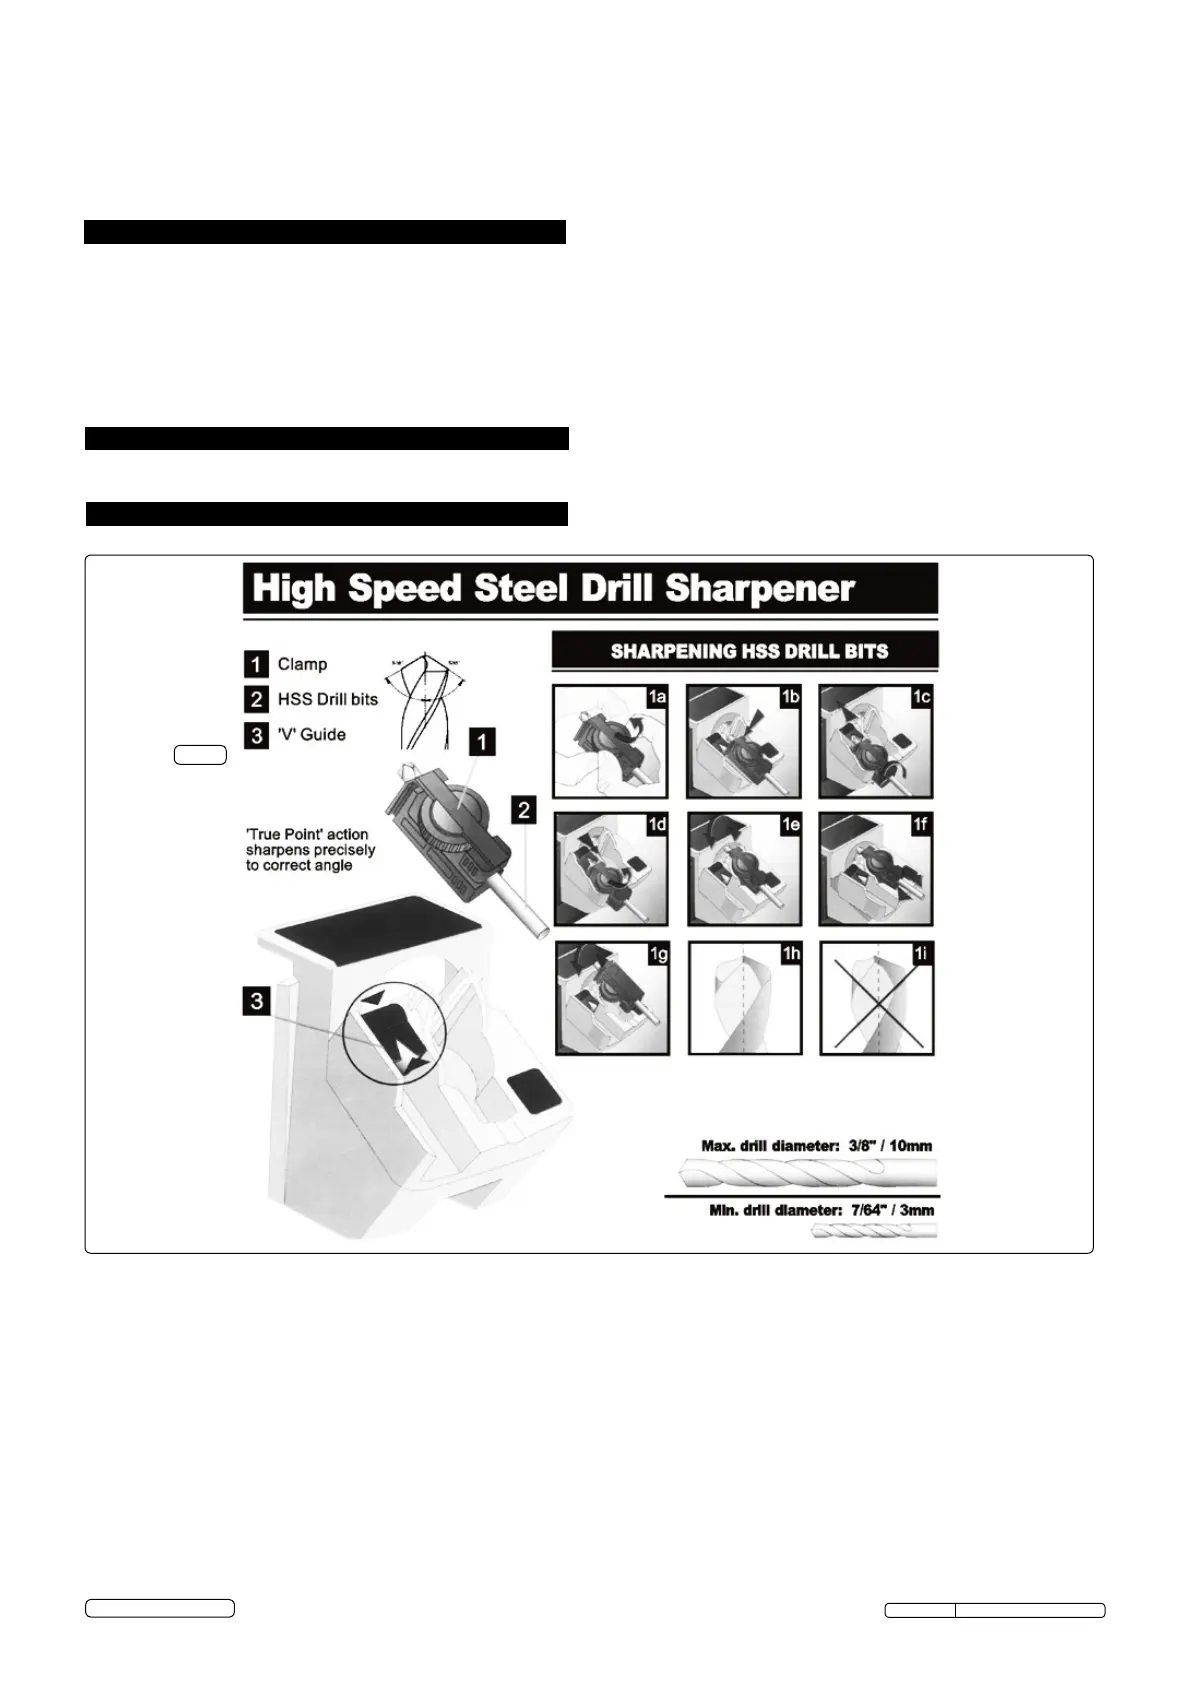
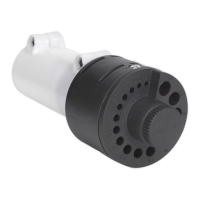
4.1. HIGHSPEEDDRILLSHARPENER(Refertog.1).
4.1.1. Slide module labelled 'High Speed Drill Sharpener' (1) onto the power unit.
4.1.2. Remove the clamp from the clamp holder and insert the drill bit (2) to be sharpened (1a). Tighten the clamp lightly to leave the drill bit
still free to move.
4.1.3. Placetheclampcontainingthedrillbitintothesettingslotonthelefthandtop(see3ing.1),usingthegroovesinthesidetoloweritin
correctly (1b).
4.1.4. Move the drill bit cutting end forward, so that it lays in the V guide and touches the metal end stop (1c).
4.1.5. Turn the drill bit until the V guide fully drops over it (1c), all four drill corners should now be touching the V guide sides.
4.1.6. Ensure that the drill and holder are fully down in the setting slot. With the drill in this position, tighten the clamping ring (1d).
4.1.7. Lift up the V guide and remove the clamp holder and drill bit.
4.1.8. Transfertheclampholdertothesharpeningposition,ontherighthandtop(1e),secureitwithlightngerpressure(1f).
4.1.9. Switch the power unit on.
Fig.1
4.1.10. Movetheclampholderfromsidetoside,securingwithlightngerpressure.
4.1.11. Remove the drill bit and holder and turn it over to sharpen the other face of the drill (1g).
4.1.12. Checkthattheleadingedgeofbothutesareequallysharp(1h).
4.1.13. Switch the power unit off. Before removing the module, ensure the grinding wheel has stopped.
DO NOT touch the sharpening disc whilst operating, or whilst plugged into the mains power.
DO NOT leave the sharpener running unattended.
DO NOT operate the sharpener when you are tired or under the influence of alcohol, drugs or intoxicating medication.
DO NOT attach modules if the wheel is still moving and DO NOT use without a module in place.
The motor is specially rated for intermittant use, use a maximum of 15 minutes continuous use.
When not in use switch sharpener off, remove plug from power supply.
DO NOT try to cool the sharpening wheel with water or other lubricants.
1. SAFETY
Original Language Version
SMS2004 Issue:4 (H,F) - 22/01/18