If and when272
Changing the dipped beam headlight bulb
The procedure for changing the bulb is the same on both
sides.
– Switch off the ignition and the lights.
– Raise the bonnet.
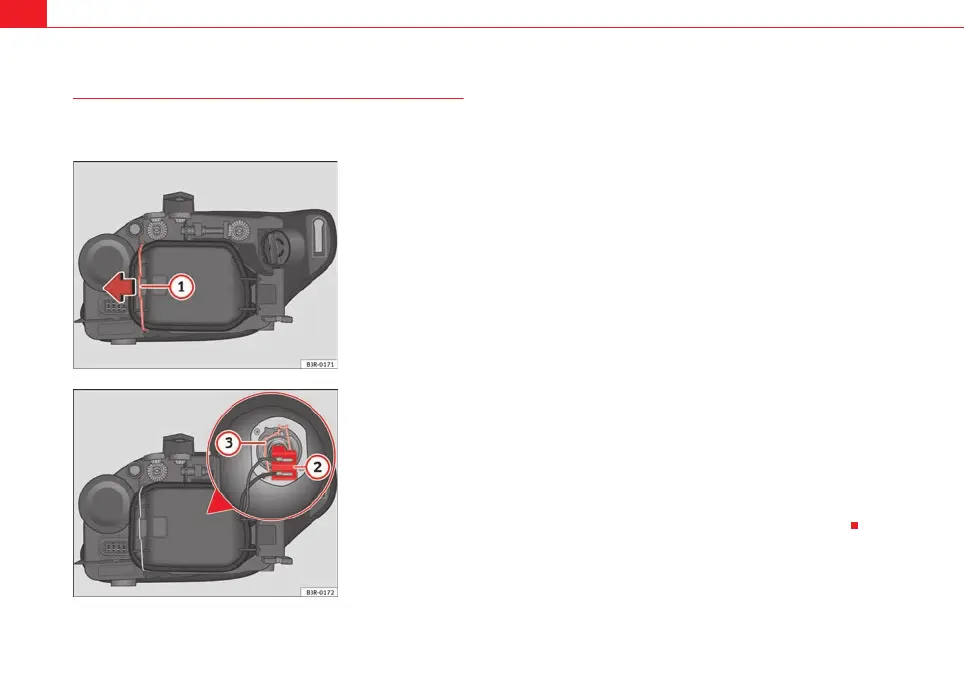
– Move the brace ⇒ fig. 208 in the direction of the arrow and
remove the rigid cover, separating the brace side and then
removing the two tabs from the other end of the cover.
– Pull the connector ⇒ fig. 209 from the bulb.
– Unclip the retainer spring ⇒ fig. 209 pressing inwards to the
right.
– Remove the bulb and fit the new one in the headlight casing with
the tab upwards, starting to position it from below.
– Clip on the spring, raising it and pressing it slightly while turning
it anti-clockwise. To ensure correct lighting, the filament must be
vertical. When changing the bulb, you can check the position of
the bulb through the headlight glass.
– Connect the connector to the bulb.
– Fit the cover, first inserting the side tabs and then closing the
cover and the brace. Make sure that the gasket sits well on the
casing cover during the operation.
– Check whether the new bulb is working.
– Have the headlight settings checked as soon as possible.
Fig. 208 Dipped beam
headlights
Fig. 209 Dipped beam
headlights
1
2
3
ExeoST_EN.book Seite 272 Freitag, 3. September 2010 11:41 11



 To Next Page