13
4. Assembly
Before permanently installing the track on deck, we recommend that you do a temporary assembly to make
sure that the deck mounts, track and car do not interfere with any other deck ttings or structures above or
below deck. Parts of the assembly need to occur whilst on the deck of the boat. For actions such as sawing
or grinding, it is recommended this is done away from the boat in a suitable work space.
4.1 Step by step assembly instructions
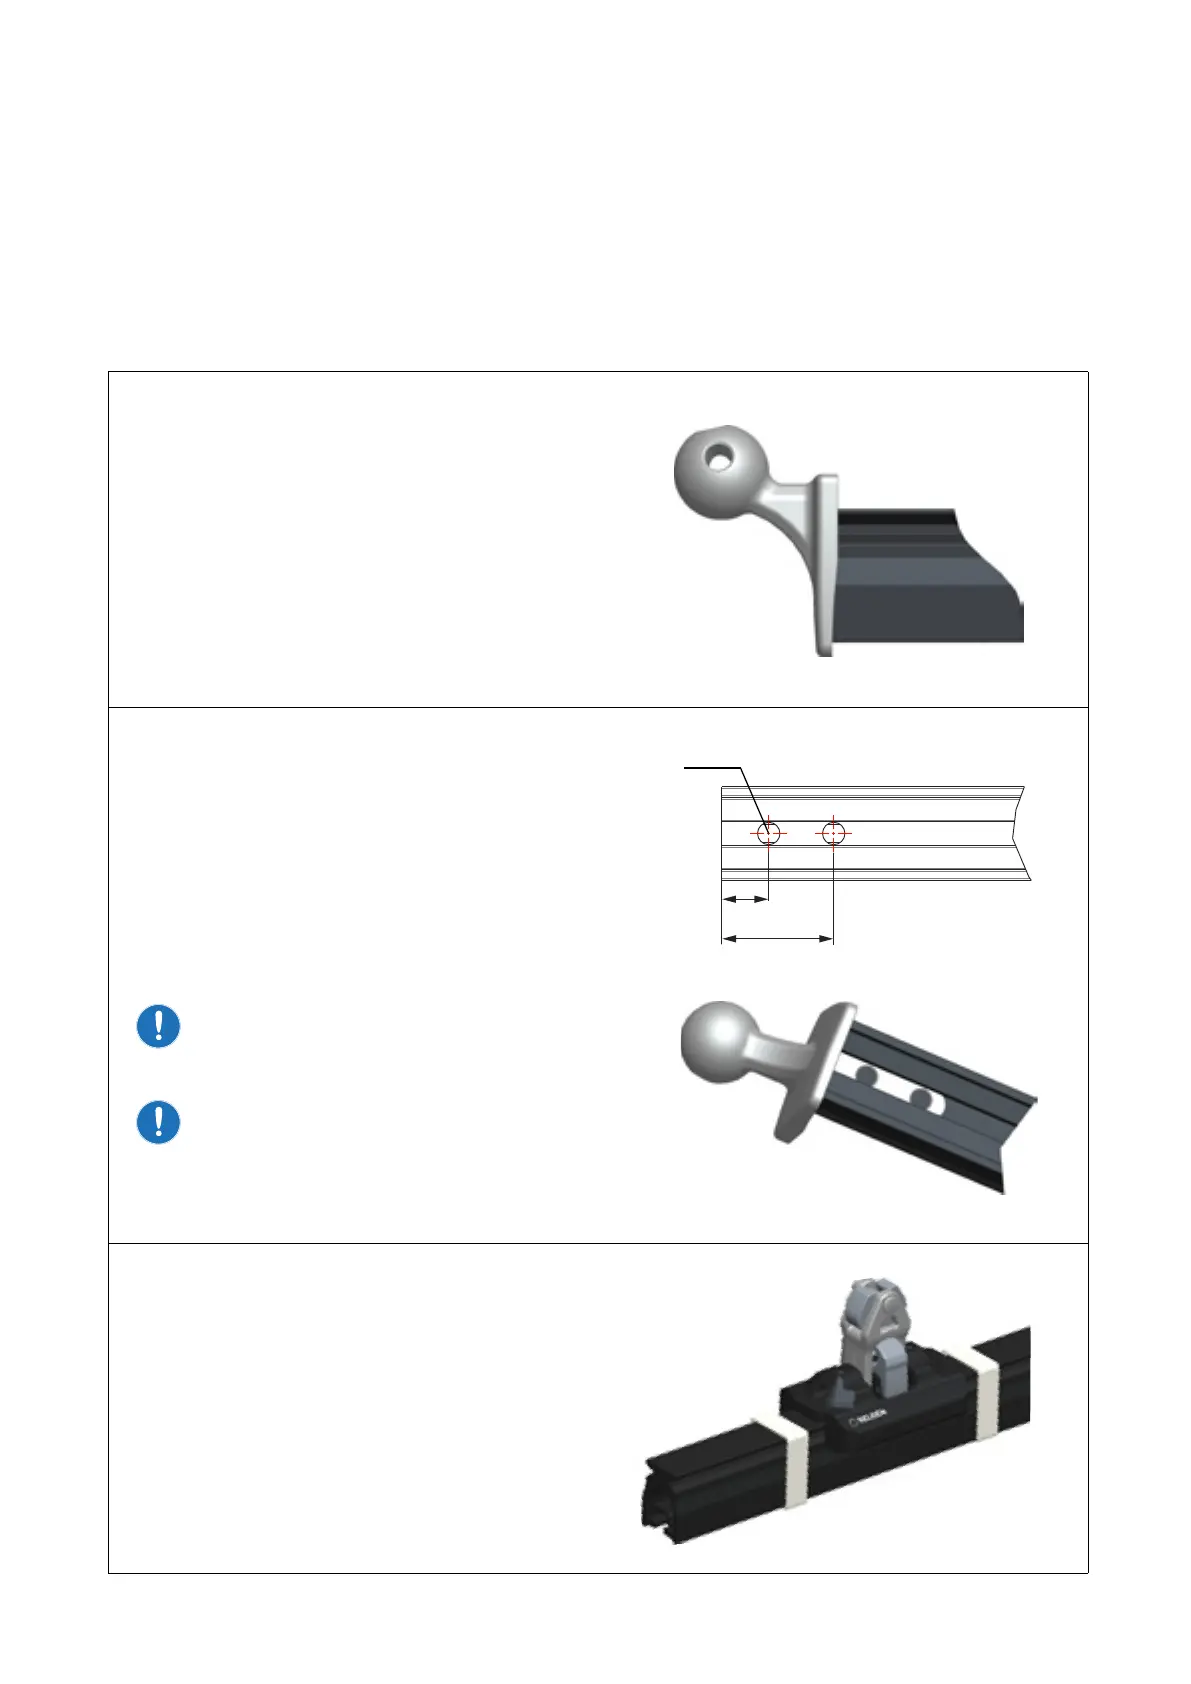
1.
Cut the track at the measured (see 3.5) end
marks. Ensure the cut is perpendicular to the
radius of the track.
Slide the joint bracket 442-201 into the track.
Make sure that there is no gap between the tting
and the track. Some ling of the track may be
required to achieve a perfect t.
2.
Drill two holes for the joint bracket 442-201 tting
in both ends of the track using a Ø6.2mm drill bit,
see pictures.
Joint bracket 442-201 can be used as a drill
gauge to start the holes.
Remove joint bracket 442-201 when holes are
started.
Drill only through one wall!
Do not drill through the upper surface
of the track!
Do not drill through the rst wall in the
track with 442-201 still assembled, doing
so can damage the threads in 442-201!
3.
Mount the car on the track by rolling it from the
transport track onto the self-tacking track.
Be careful not to drop any ball bearings.
Secure the car on the track with tape, as shown.
2 x Ø6.2
13
31