16
5. Installation
To simplify the nal installation, disassemble the centre console and side bracket from the track.
Leave both joint brackets (442-201) assembled on the track.
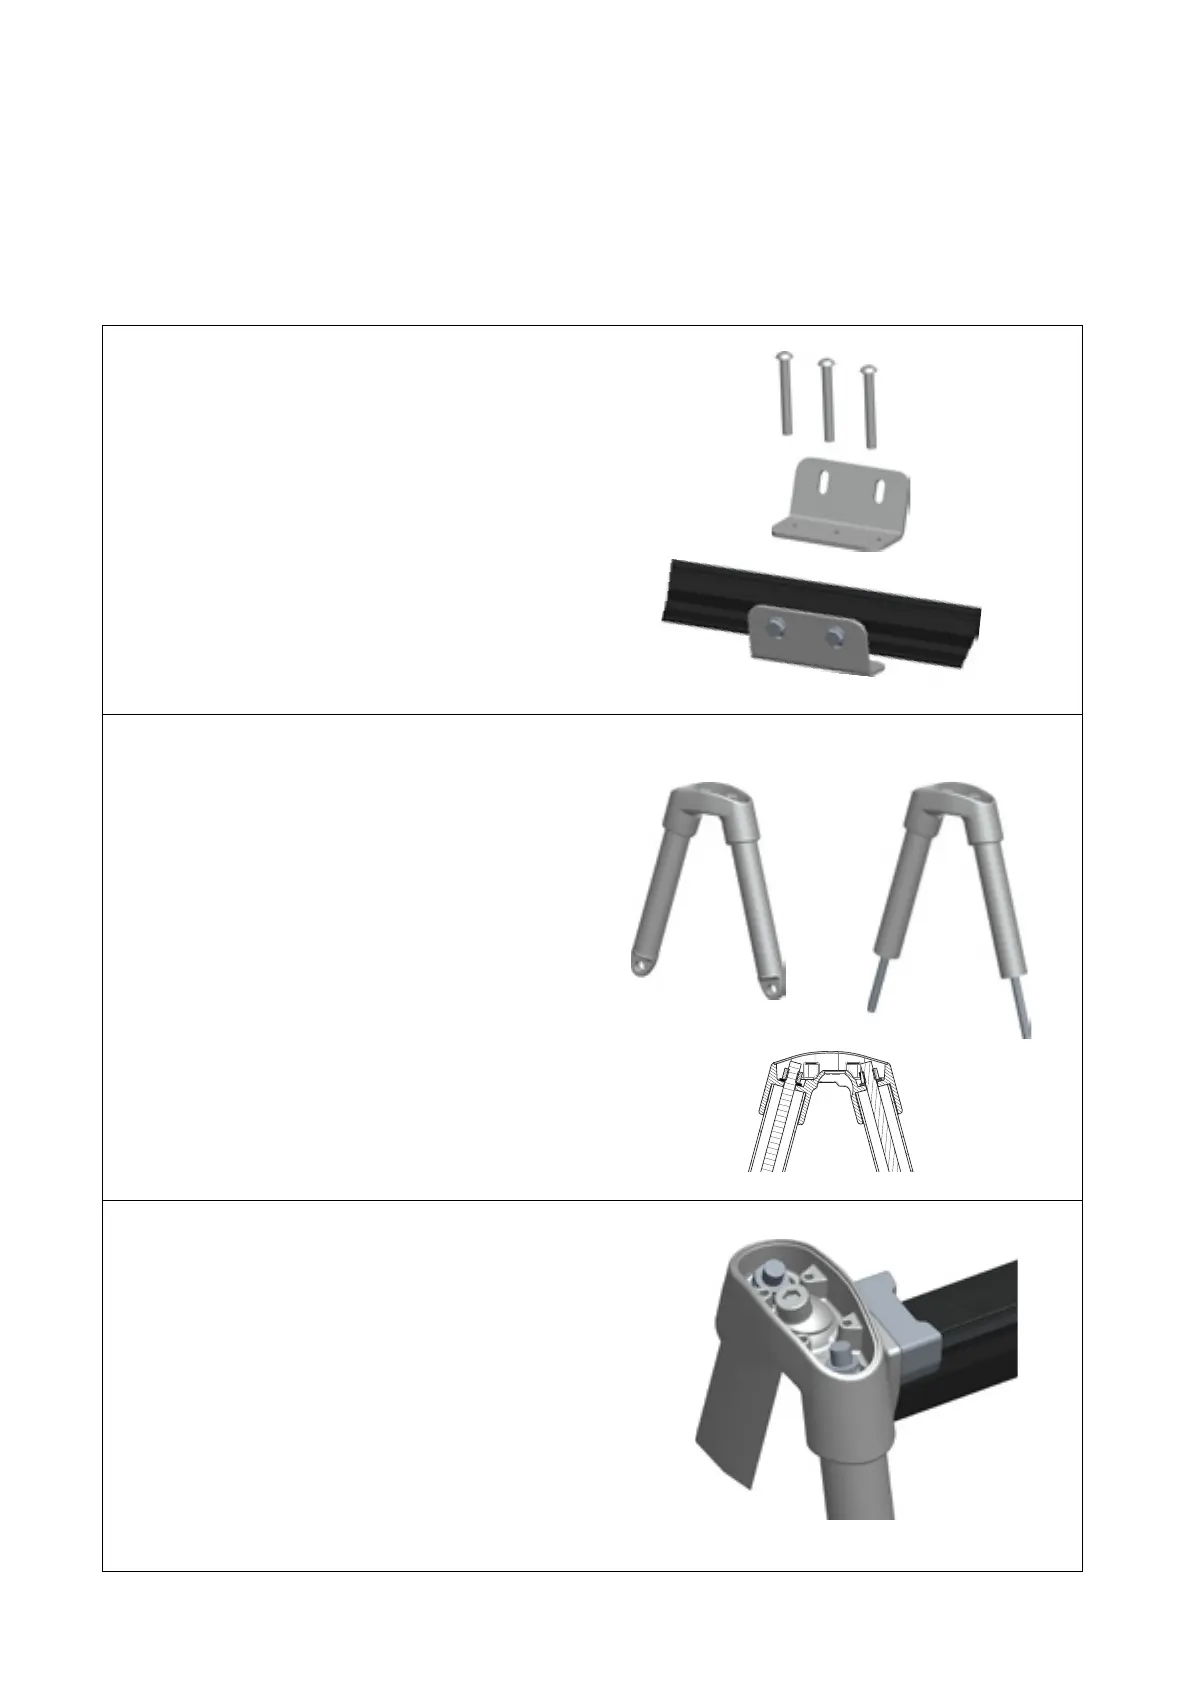
5.1 Step by step installation instructions
1.
Install the centre bracket to the deck at the
marked position. Use 3xM6 screws (not supplied)
and marine sealant.
Assemble the track to the centre console, make
sure the centre mark is on the boats centerline.
Tighten the two screws on the centre bracket.
2.
Deck tting 442-206-10
If deck tting 443-206 is used, add locking
adhesive to the threads in end tting (442-207)
and screw onto the threaded bars.
Fit the legs, nuts (locking) and washers to the
brackets 442-200 and tighten rmly.
Foot kit 442-208-10
If deck tting 442-208 is used, assemble the legs,
nuts (locking) and washers to the bracket 442-200.
System to be tightened from below deck when
placed in position.
3.
Attach the side consoles to the track.
Leave the screw engaged but loose to allow for
adjustment.
Spherical washer can be adjusted for correct
angle of the side console.
Deck tting Foot kit