508.366.1488 | www.semshred.com
4. When lifting the machine, always apply lifting pressure to hopper in order to swing the machine up and back to the
fully open position. For machines equipped with hydraulic jacks, utilizing the jack handle, ensure the jack needle
valve is fully closed by turning it clockwise until fully seated. Insert the jack handle into the pump pivot and pump the
jack piston until the cutting chamber is back to the fully open position (refer to the instruction label on the machine
base).
NOTE: In the fully open position, the machine is designed to remain open without requiring propping; however, a
safety latch has been provided to prevent accidental closing of the machine. The safety latch is located on the right
side of the cutting chamber and should always be checked to verify that it has fallen into position upon opening the
machine.
CAUTION: The rotor knives and bed knives are extremely sharp. Always wear heavy gloves and exercise care when
working in the cutting chamber.
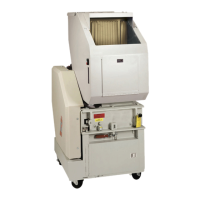
5. Remove the screen from the screen chamber and wipe it clean. The screen should then be placed aside and should
always be positioned standing upright on its side. Wipe the inside of the screen chamber clean.
6. Carefully inspect the interior of the cutting chamber for foreign material or debris. Slowly turn the rotor by hand to
verify that it freely rotates without any obstruction or contact between rotor and bed knives. Wipe the inside of the cutting
chamber clean. Before closing the machine, check that nothing has been left inside the machine.
7. Place the screen back into its original position before closing the machine.
8. Although the machine is designed to remain open without the use of the safety latch, you may find the cutting chamber
resting on the latch. Application of lifting pressure to the hopper should swing the cutting chamber to its extreme open
position. The safety latch pull cord, located on the right side of the machine, should now be pulled to disengage the
safety latch. The cutting chamber can now be easily lowered to close the machine.
9. For machines equipped with hydraulic jacks: The safety latch pull cord, located on the right side of the machine,
should be pulled to disengage the safety latch. Utilizing the jack handle, slowly turn the jack needle valve 1/8-1/4 turn
counter clockwise to slowly lower the cutting chamber. The closing speed of the cutting chamber can be regulated by
turning the needle valve clockwise or counter clockwise as needed (refer to the instruction label on the machine
base).
10. Securely close the machine by rotating the threaded swing bolts up into the clamps and tightening the hex coupling
nut(s) at the front of the machine. Do not over tighten nut(s).
11. Make certain all electrical connections are properly secured between accessories and the control enclosure (refer to the
wiring diagram for wire and terminal connections). If something is not connected, contact a licensed electrician.
12. Open the sheave guard(s) by removing the bolts attaching the cover. Check the belts for proper tension and alignment
(refer to belt tension and alignment section). Upon completion, close the sheave guards by placing the cover back into
position. Insert all of the bolts originally removed and tighten them fully.
13. ELECTRICAL SERVICE CONNECTIONS
Carefully check the diagrams packed with the machine. All internal wiring has been completed at the factory. All safety
interlocks have been verified to be functional before shipment. It is only necessary to connect the electrical power
source to the machine at the control enclosure. All equipment must be in compliance with Article 250 of the National
Electric Code and local codes. Customers disconnecting means and branch circuit protection must be in compliance
with the National Electric Code and all local codes. Electrical installation should only be done by a licensed electrician.