17
508.366.1488 | www.semshred.com
c. After aligning, tighten front two bolts, recheck alignment, and tighten the back two.
9. Close the drawer, making sure the brush has been removed.
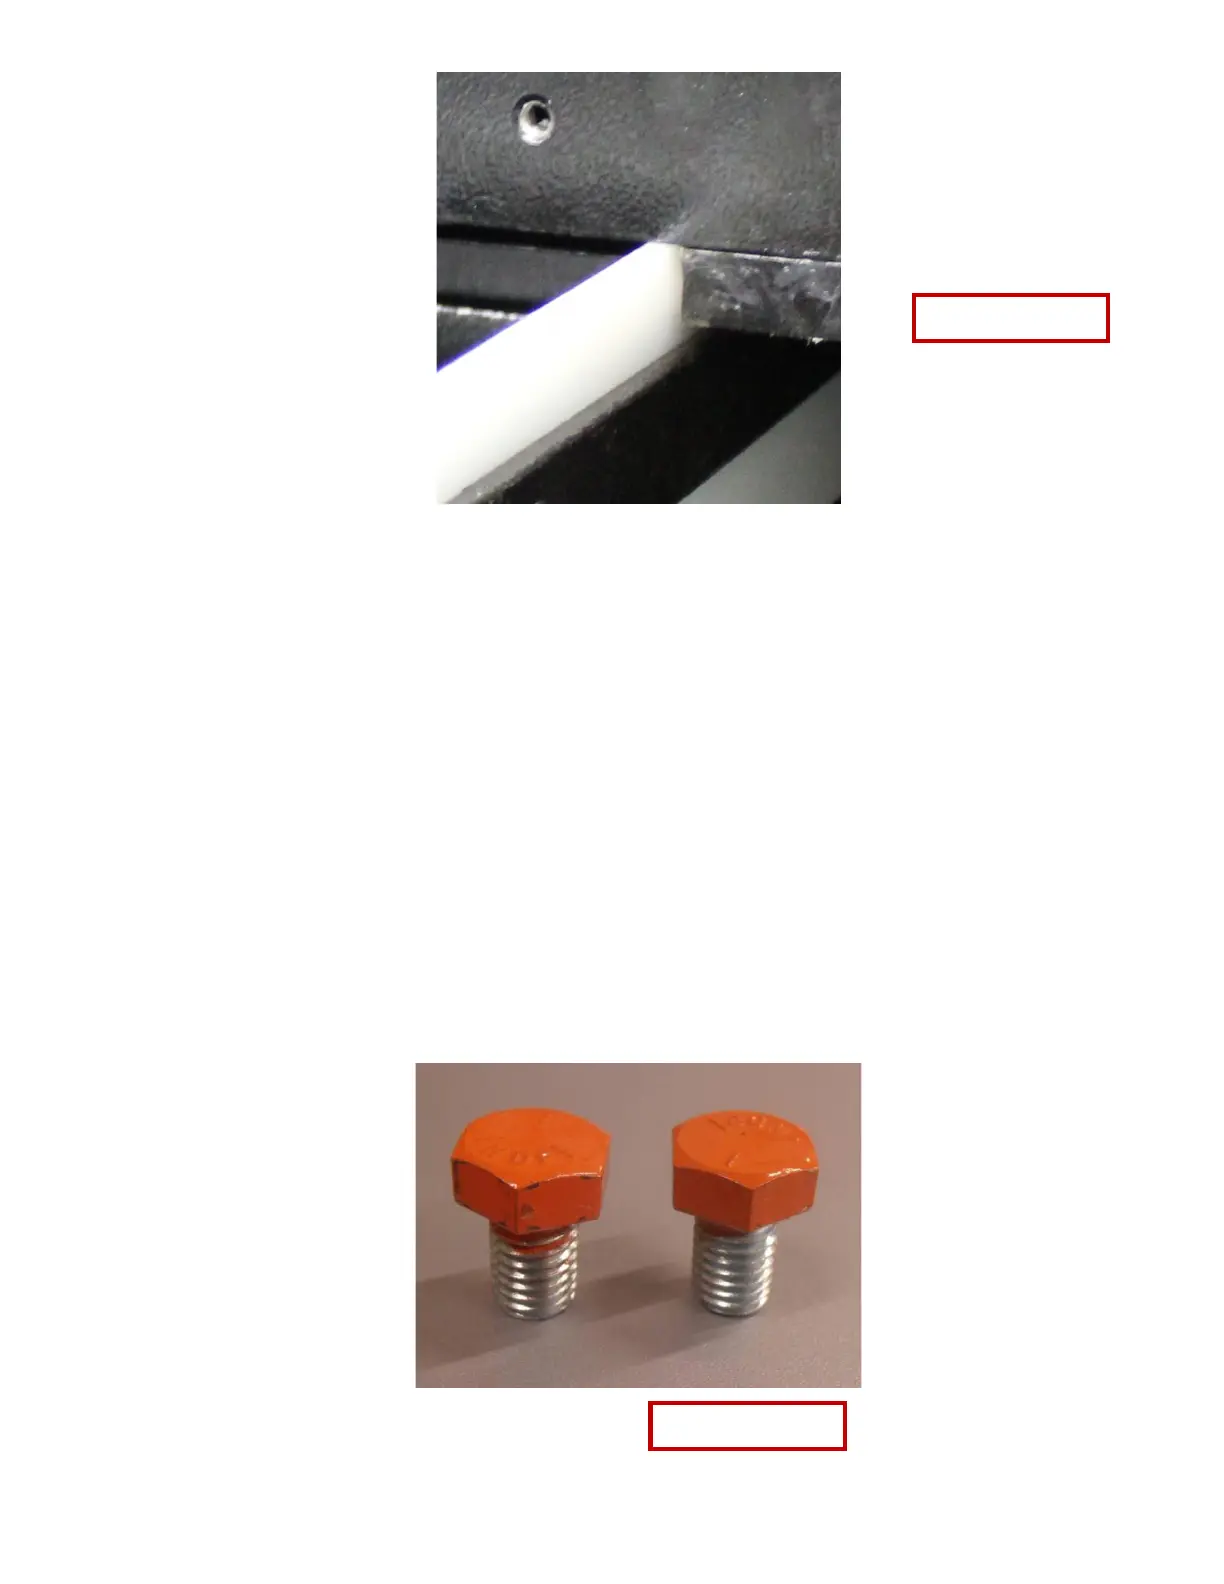
10. Reinstall brush bolts, keeping the bolts loose and align brush with the front edge of the hopper,
approximately ¼” below the bottom of the stage 1 cutting chamber. See figures 14 and 15.
• Make sure the brush is positioned 1/4 inch from surface shown in pictures above. If brush is not far
enough down, particles may exit the hopper.
• Snug the bolts when lined up.
11. Replace the painted bolts in the sides of the cutting chamber drawer (normally red). See Figures 3-5 for
location of bolt.