SENNHEISER ELECTRONIC GMBH & CO. KG
COMPONENT MAINTENANCE MANUAL
HMEC 26-SERIES
Page 7004
May 25/11
23-41-48
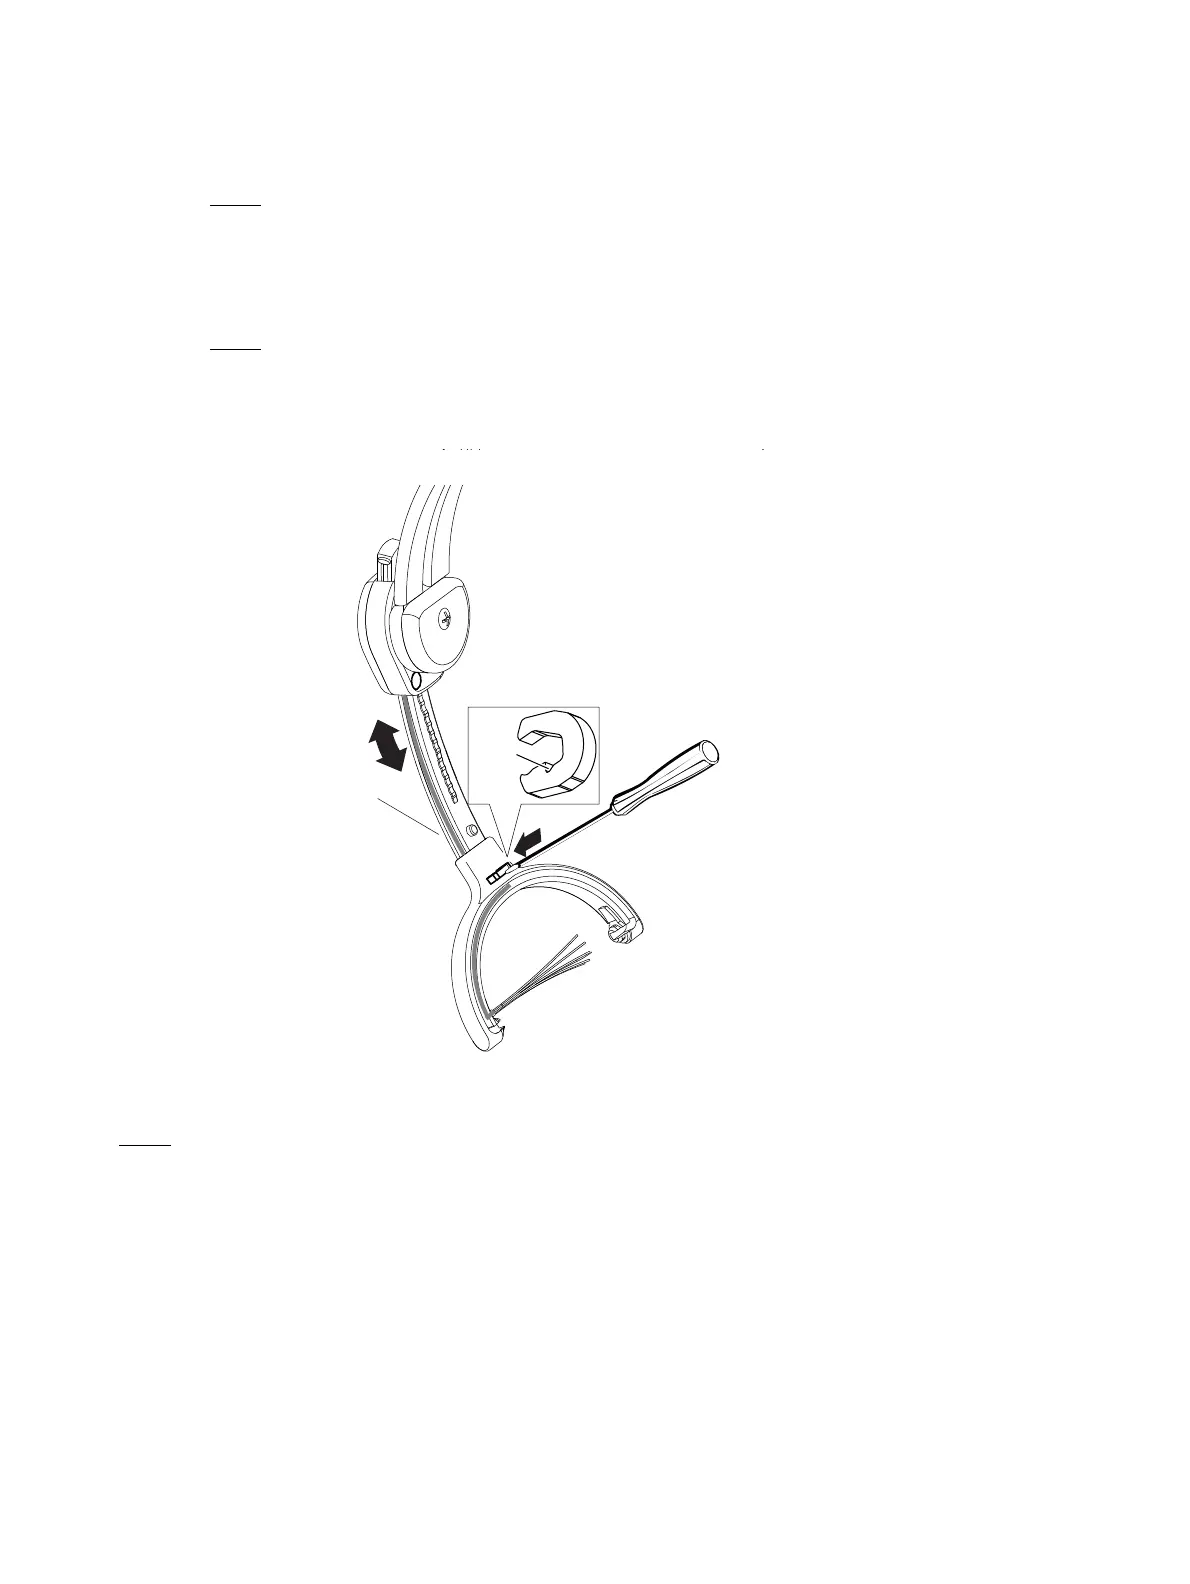
(3) Assembly of the latch for headband (030)
NOTE:
AFTER THE REMOVAL THE LATCH CAN BE DAMAGED OR GET LOST.
RECOMMENDATION: DO NOT INSTALL THIS REMOVED LATCH (030) AGAIN.
USE NEW HEADBAND LATCHES (REF. IPL).
(a) Press the latch for headband (030) completely into the notch of the headband.
NOTE:
ENSURE THE CORRECT DIRECTION/POSTION OF THE NOTCH. THE SIDE WITH THE NOTCH
SHOWS TO THE CABLE CHANNEL SIDE OF THE END PIECE OF THE HEADBAND (010).
(b) Move the end piece of the headband (010) up and down. Ensure that the cable is
completely inserted in the end piece of the headband (010).
B. Assembly of the headband.
NOTE:
REF. FIG. 2001.
FOR HMEC 26, REFER TO IPL FIG. 1 AND FOR HMEC 26-T, REFER TO IPL FIG. 3.
(1) Open the headband holder and install the acoustic units (050, 060).
(2) Insert the headband cable into the strain-relief at the PCB.
(3) Solder all headband leads on left and right side.
Latch
End piece with notch
for cable routing
Oct 30/08
 Loading...