Servicing the Transfer Cap Assemblies
To Service the Transfer Cap Assembly:
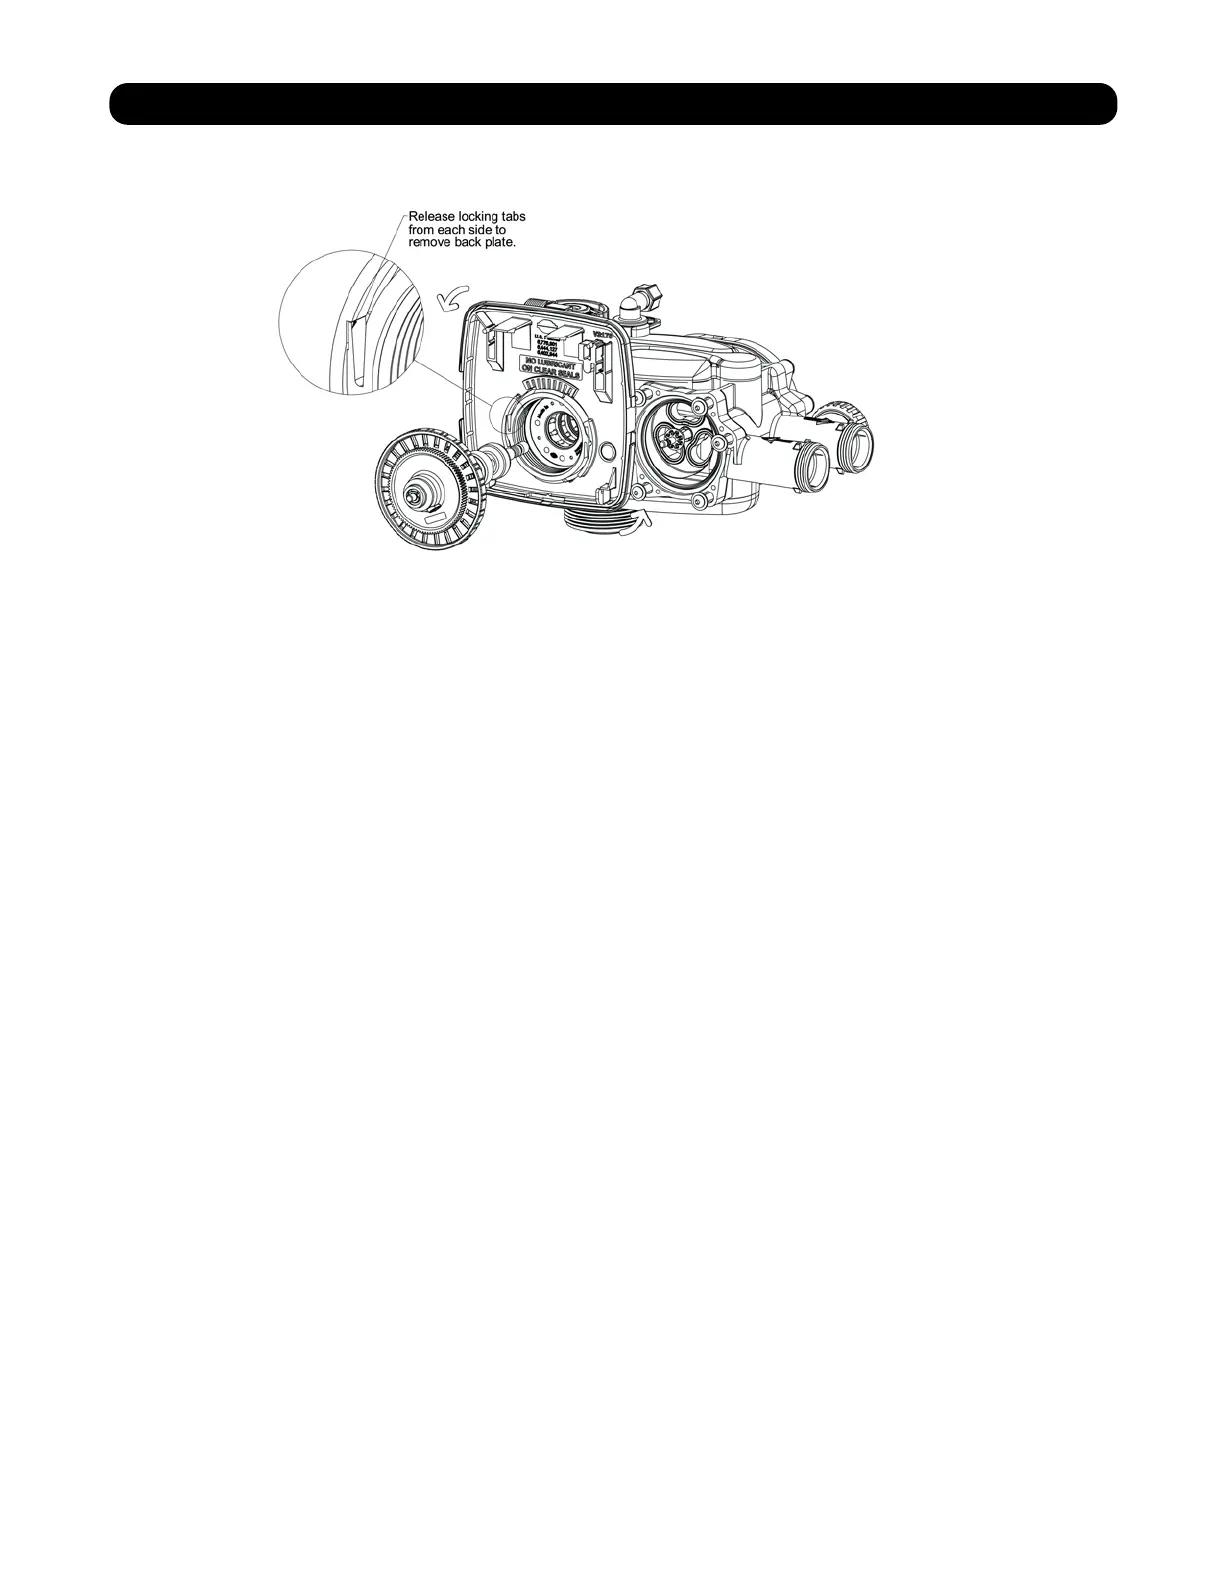
The control valve’s back plate must be removed first to allow access to removing the
transfer cap assembly. Note: Hold slight downward pressure on the top left corner of the
back plate while using a thin flat screwdriver or knife blade to push in on the locking tabs,
this will release the back plate and it will twist to the left off of the valve body. For removal of
the drive motor side you will need to remove the drive cover assembly to access the
motorized drive. The drive motor can be removed by pressing the spring clip loop to the
right then rotate the motor a quarter turn and then pull outward to remove the motor from
the reducing gear cover assembly. Remove the three Philips head stainless steel screws
that retain the reducing gear cover to the drive cap. Once the cover is removed you have
access to the reducing drive gears. Simply slide them off of the gear axles with your fingers
to inspect or check them. There are three small black gears with foil decals and one larger
black reducing gear. Remove the large white drive gear from the stainless steel drive shaft.
To remove the large white transfer drive gear firmly grab the outside edge of the gear with
your fingers and pull it outward away from the control valve assembly. Now you can you use
a 5/32” or a 4mm allen wrench to remove the1/4-20 screws that retain the transfer drive cap
assemblies on both sides of the valves. Note: Once the screws are removed from retaining
the inlet side transfer valve cap and the outlet drive motor transfer cap from the control
valve the cap will spring out away from the valve body. At this point the transfer discs may
be removed by pulling the discs outward off of the shaft away from the valve body with your
hand. With the disc out you can inspect the flat surface area to be sure it is clean and
smooth free of any debris or scratches. Note that the disc is keyed to the drive shaft so that
it will only assemble in one orientation. The transfer discs may be chemically cleaned with a
dilute sodium bilsuflate solution, vinegar or just wiped off with a soft clean cloth.
 Loading...