EasyManuals Logo

Sentry Sample Sequencer 5 User Manual

Sentry Sample Sequencer 5
70 pages
To Next Page IconTo Next Page
To Previous Page IconTo Previous Page
Page #48 background imageLoading...
Page #48 background image
Sentry Equipment Corp | Sample Sequencer
ļƒ’
5
42 SPD 5.5.15
6.2.2 Panel Mount
1. Turn off all power to the Sample Sequencer and disconnect all cables if necessary.
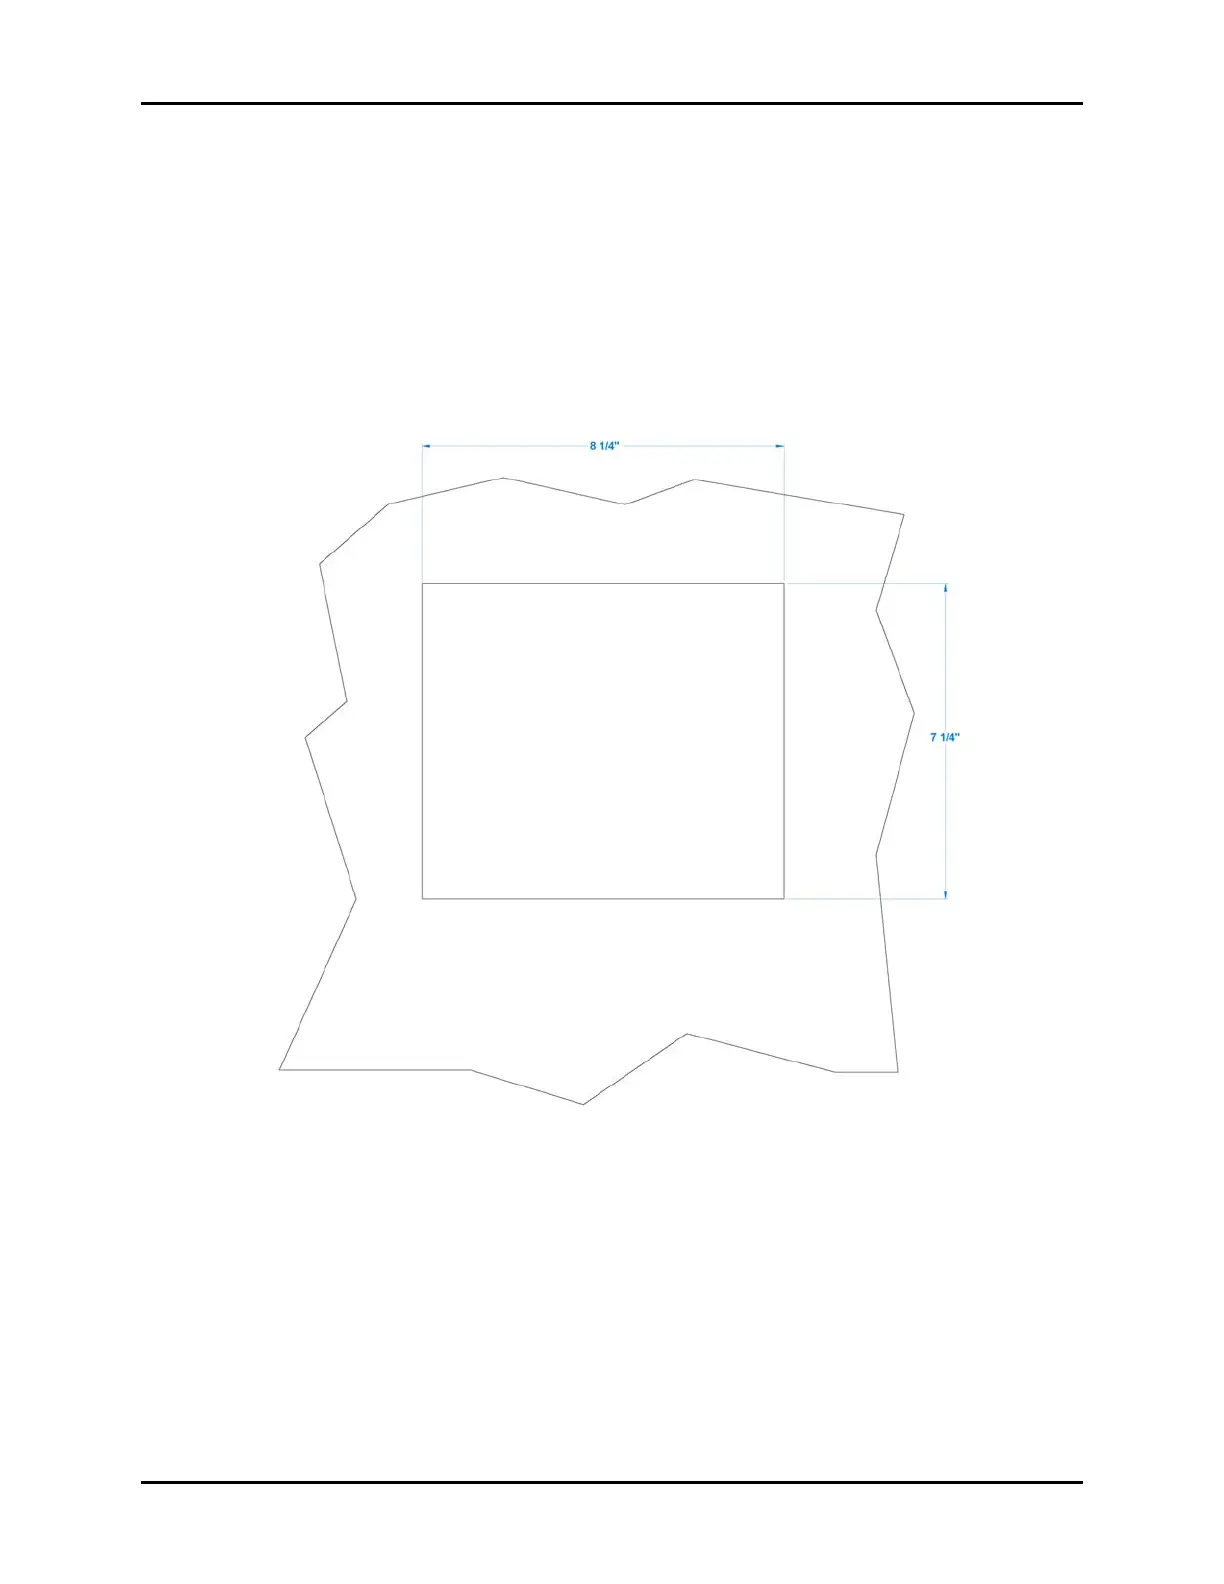
2. Measure the panel hole using the dimension information given in Figure x.
3. Cut out the panel hole.
4. Place supplied panel mount gasket on the rear facing lip of the Sample Sequencer.
5. Fit the Sample Sequencer into the panel hole and secure it with 4 bolts and nuts that were
supplied with the Sample Sequencer 5
6. Make all wiring connections as described in the following sections.
Figure 42: Panel Mount Dimensions

Questions and Answers:

Question and Answer IconNeed help?

Do you have a question about the Sentry Sample Sequencer 5 and is the answer not in the manual?

Sentry Sample Sequencer 5 Specifications

General IconGeneral
BrandSentry
ModelSample Sequencer 5
CategoryRecording Equipment
LanguageEnglish