18
9.0 Calibrating voltage input and current input
(Please read before attempting procedure)
CAL_U and CAL_C commands allows you to calibrate the DATUM 2000™ by
entering two data points. (Calculate the pressure for the 2 calibration points before
beginning this procedure.) The DATUM 2000™ will determine the conversion factor
and display the applied pressure in the desired engineering units. The maximum
read-out is +31999 to -9999.
If this unit has been previously calibrated the calibration must be erased before
calibrating the meter. Following this procedure without erasing the previous
calibration will not reprogram the meter.
Note: If at anytime you wish to abort the calibration procedure, simply disconnect
power to the unit and the old calibration data will still be intact.
CAUTION: CALIBRATING CHANNEL ONE OF THE DATUM 2000™ MANOMETER
WITH A VOLTAGE INPUT WILL RESULT IN DAMAGE TO THE DATUM AND WILL
VOID THE WARRANTY. THE DATUM 2000™ MANOMETER HAS BEEN CALIBRATED
AT THE FACTORY FOR THE SETRA TRANSDUCER INSTALLED INSIDE. IF YOU
WISH TO PERFORM A CALIBRATION OF THE DATUM 2000™ MANOMETER,
YOU MUST APPLY KNOWN PRESSURE TO THE TRANSDUCER. NEVER APPLY A
VOLTAGE SIGNAL TO THE CHANNEL ONE INPUTS (PINS 6 AND 7) ON THE BACK
OF THE DATUM 2000™ MANOMETER.
*Before beginning set up wiring for rst calibration point. If using the internal
reference voltage, +IN, -IN and ground should all be shorted together, pin 6, pin 7
and pin 9 (CH2: pin 12, pin 13, and pin 15).
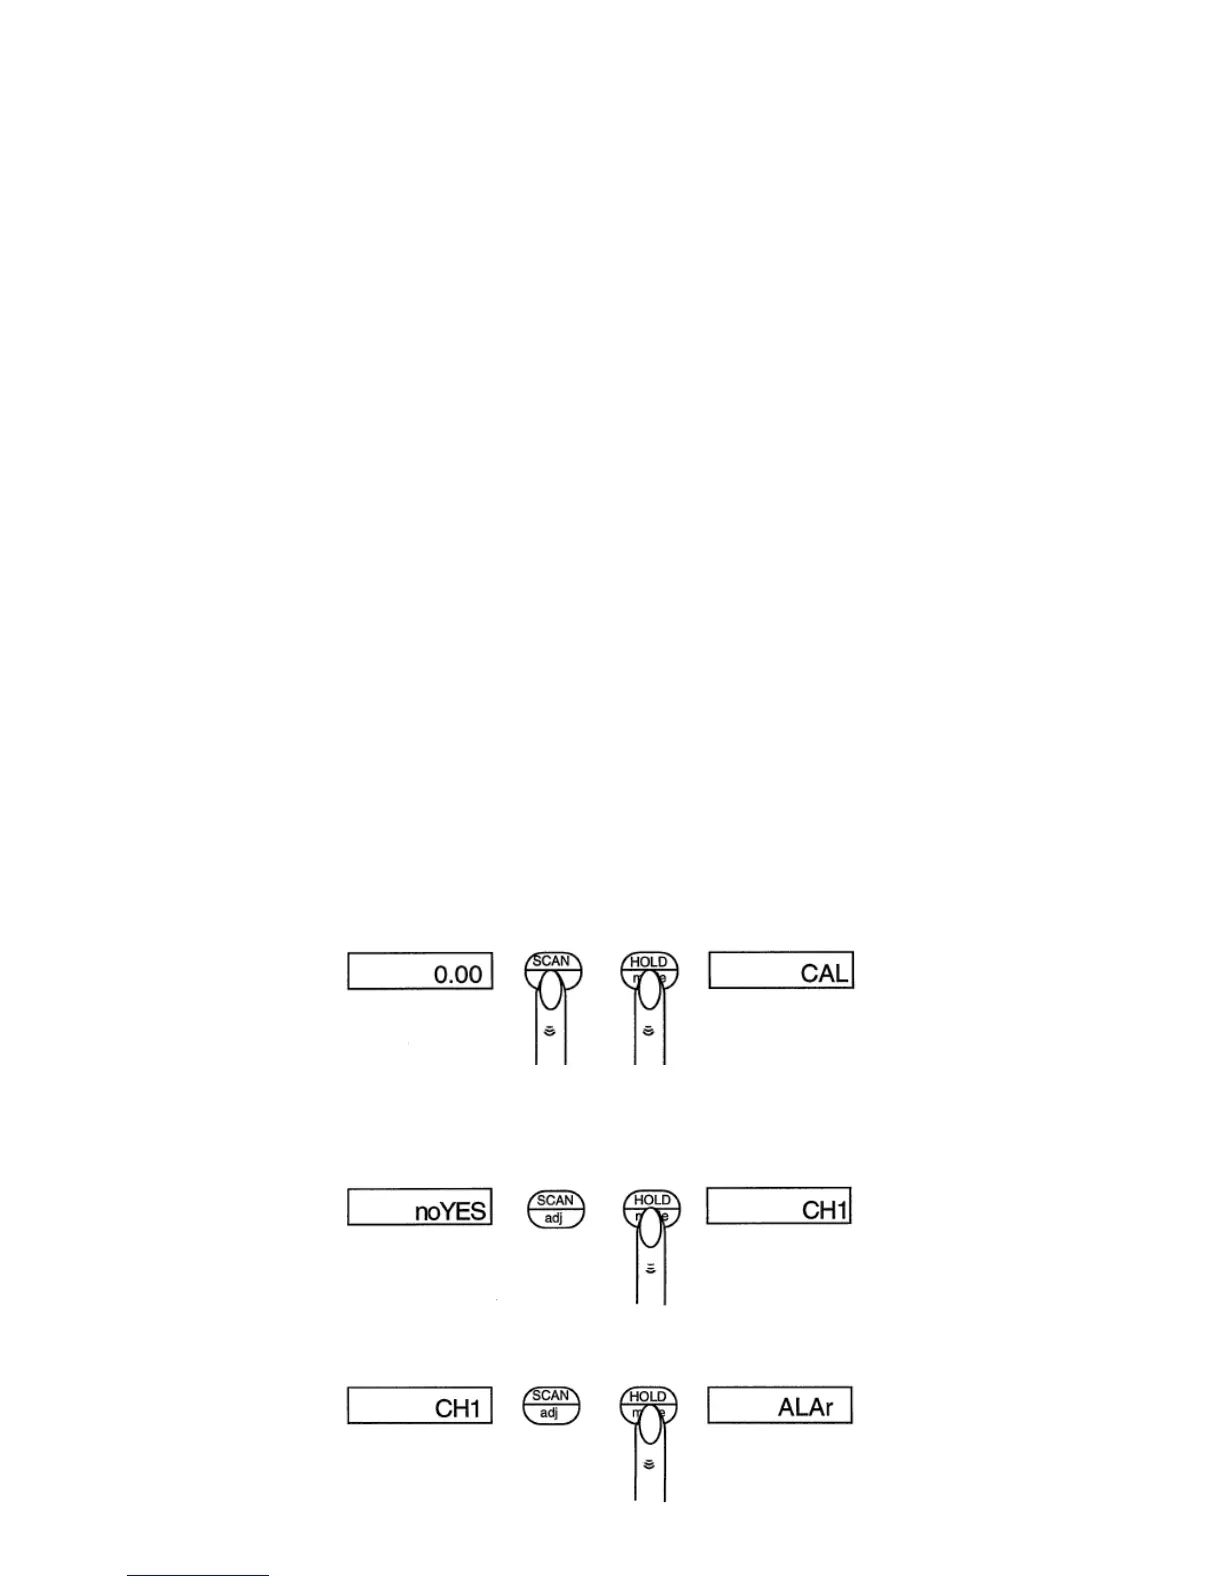
Step 1.
Press and hold the SCAN/adj and HOLD/mode keys for 8 seconds, then release; the
display will alternate between "cal" and "noYes" for ten seconds.
Step 2.
To specify "yes" and select "CH1", press and hold the HOLD/mode key to display
"CH1". (To select "CH2": With "CH1" displayed, press and release the SCAN/adj key
to display "CH2")
Step 3.
Press the HOLD/mode key to display "ALAr".