14www.sharkninjamanuals.com
Using Your Removable Handheld Steamer with Garment Steamer
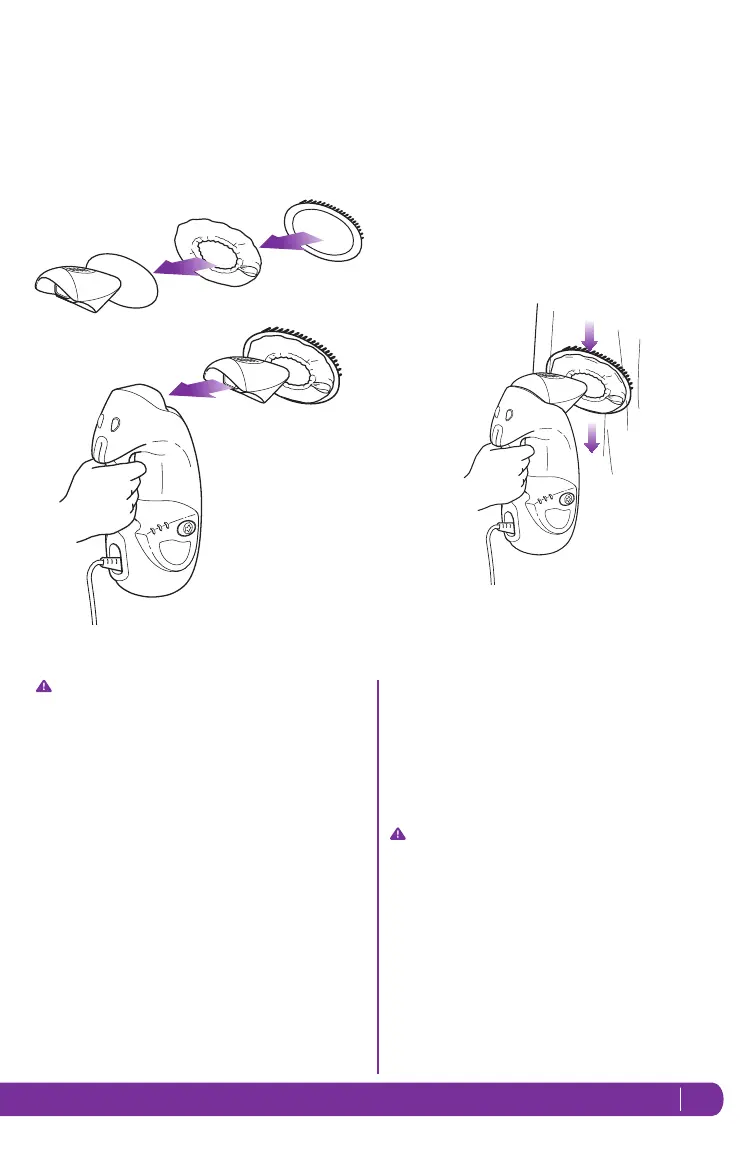
4 Attach the assembled Garment Steamer to the
removable Handheld Steamer by snapping it into the
main nozzle. (fig. 20)
5 Select the steam setting and wait until the selected
setting indicator light turns solid blue. Press and hold
the steam trigger button, and move slowly up and
down over your garments or upholster. (fig. 21)
CAUTION: Do not press the steam trigger while
attaching or removing the Garment Steamer.
6 To remove the Garment Steamer, press and hold down
the Handheld Release Buttons. Then slide out the
Garment Steamer using the grip on top of the Steamer.
Cleaning Tip: The Garment Steamer is ideal for removing wrinkles from clothing and freshening and grooming
upholstery. A terry bonnet and frame with bristles provides controlled steaming for most types of clothing. A
specialized micro-fibre bonnet is ideal for freshening couches and other upholstery, where odours may accumulate.
CAUTION: Always determine colour fastness of any
fabric, especially with reds or blues. Take a clean,
moist, warm towel and gently rub a small area on
the fabric that is as out of sight and out of the way
as possible. If colour bleeds onto the towel, you may
need to have the piece professionally cleaned.
1 Select either the thinner, terry cloth bonnet to steam
your garments, or the thicker, shaggier bonnet to
freshen upholstery.
2 Use the lavender loop on the side of the bonnet to
slide over the nozzle opening of the Garment Steamer.
The elastic around the bonnet should hold it firmly in
place around the Garment Steamer opening.
3 Snap the frame with bristles over the Garment
Steamer. For ease of use, we recommend that the
bristles be placed at the top of the Garment Steamer
bonnet. (fig. 19)
fig. 19
fig. 20
fig. 21
 Loading...