REMOVING
AND
REINSTALLING
THE
MAIN
PARTS
TAPE MECHANISM
SECTION
Perform steps 1, 2, 3, 4, 6 and 8 of the disassembly method to
remove the tape mechanism.
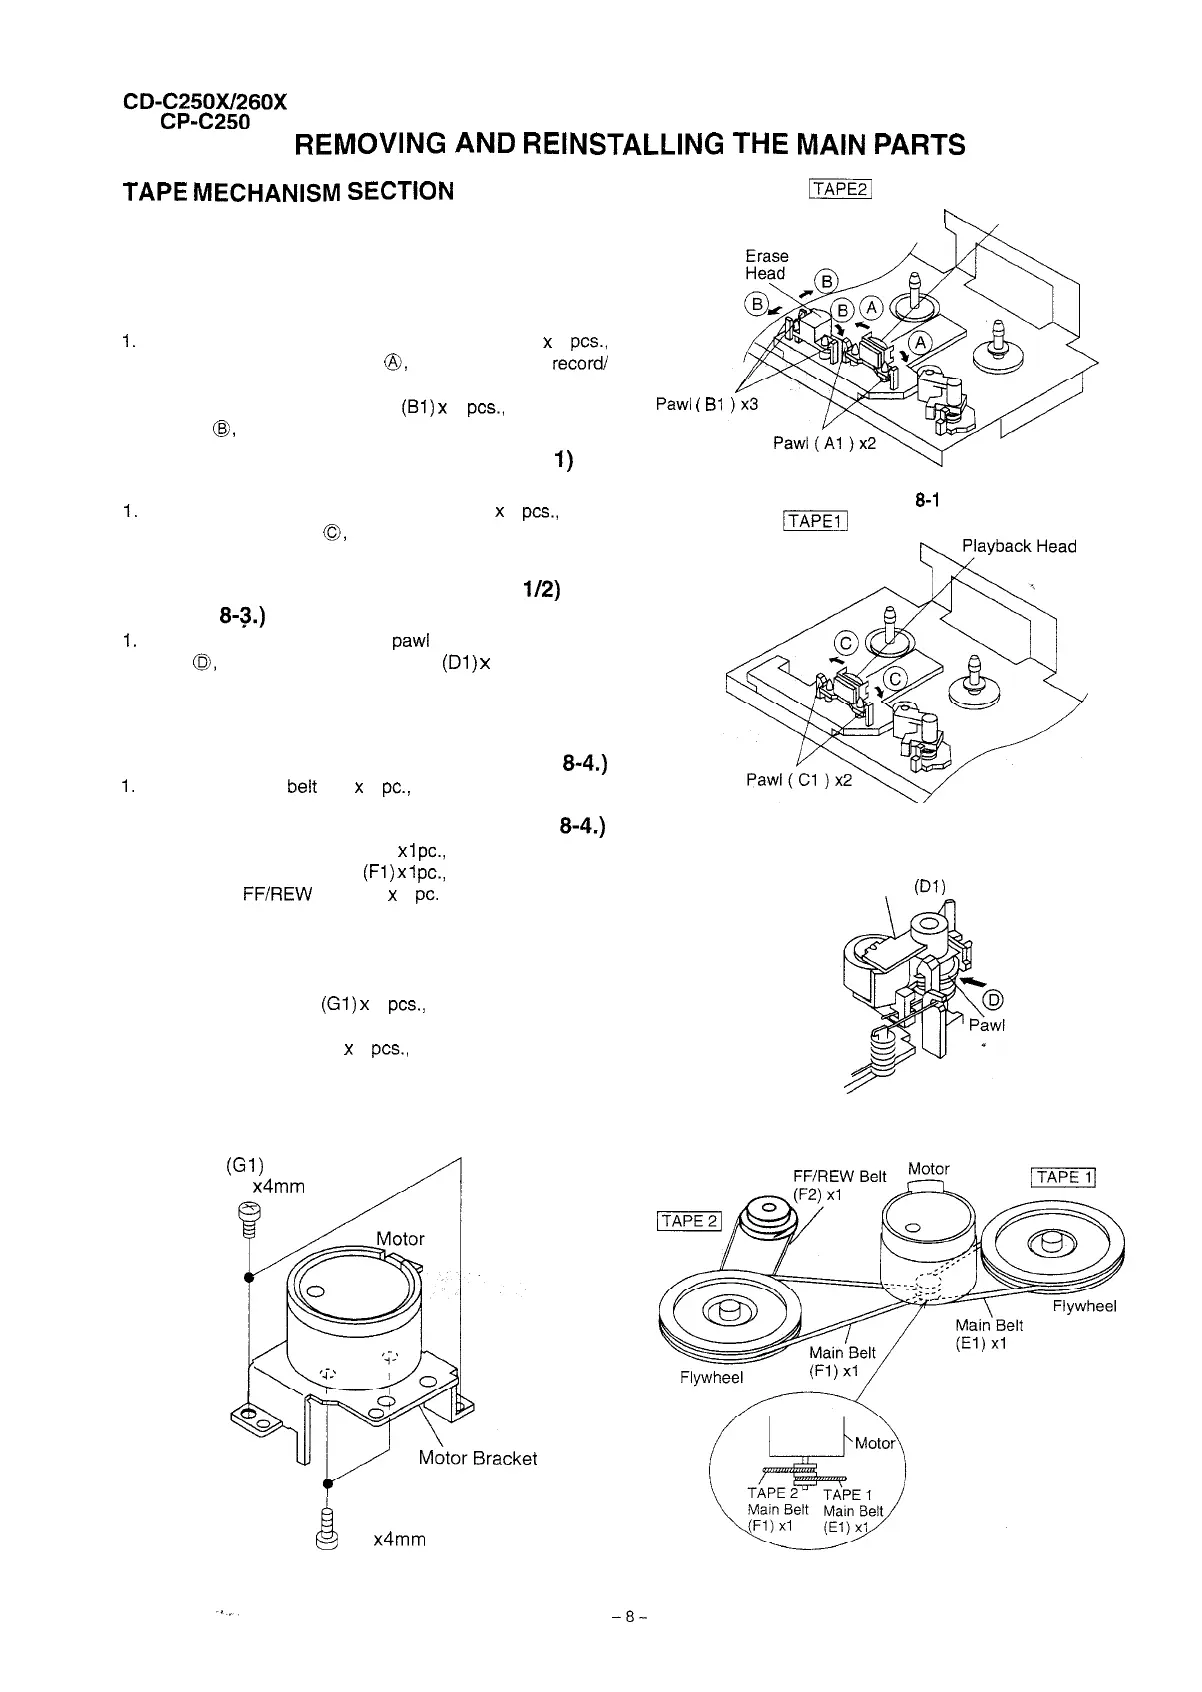
How to remove the record/playback and erase
heads (TAPE 2) (See Fig. 8-l.)
1.
Carefully bend the record/playback head pawls (Al) x 2
PCS.,
in the direction of the arrow
@,
and remove the
record/
playback head upwards.
2. Carefully bend the three pawls
(Bl)
x 3
PCS.,
in the arrow
direction
($9,
and remove the erase head upward.
How to remove the playback head (TAPE
1)
(See Fig. 8-2.)
1.
Carefully bend the playback head pawls (Cl) x 2
PCS.,
in the
direction of the arrow
0,
and remove the playback head
upwards.
How to remove the pinch roller (TAPE
l/2)
(See Fig.
S-3.)
1.
Carefully bend the pinch roller
paw1
in the direction of the
arrow
0,
and remove the pinch roller
(Dl)
x 1 upwards.
Note:
When installing the pinch roller, pay attention to the spring
mounting method.
How to remove the belt (TAPE 1) (See Fig.
8-4.)
1.
Remove the main belt (El)
x
1
PC.,
from the motor side.
How to remove the belt (TAPE 2) (See Fig.
8-4.)
1. Remove the tape 1 main belt (El)
x
Ipc.,
from the motor side.
2. Remove the tape 2 main belt
(Fl)
x
1
PC.,
from the motor side.
3. Remove the
FFiREW
belt (F2) x 1
pc.
How to remove the motor
(See Fig. 8-5.)
1. Remove the belt.
2. Remove the screws
(Gl)
x
2
PCS.,
to remove the motor
bracket.
3. Remove the screws (G2) x 2
PCS.,
to remove the motor.
Note:
When mounting the motor, pay attention to the motor mounting
angle.
(Gl)
x2
02
x4mm
(G2) x2
02
x4mm
Figure 8-5
p%FE
Record/Playback
r--.,
Head
Pawl
(
Bl
Figure
8-1
JTAPEI]
Figure 8-2
Pinch Roller
(Dl)
xl
Figure 8-3
Figure 8-4
-8-