4-79
FACSIMILE►OTHERS FUNCTION
2
Enter the destination fax number.
• Entering a destination number using the numeric keys ►page 4-11
• Retrieving a destination from an address book ►page 4-12
• Using a search number to retrieve a destination ►page 4-15
• Retrieving a destination from a global address book ►page 4-16
• Using a transmission log to resend ►page 4-18
3
Tap the [Others] key, and tap the [Erase] key.
4
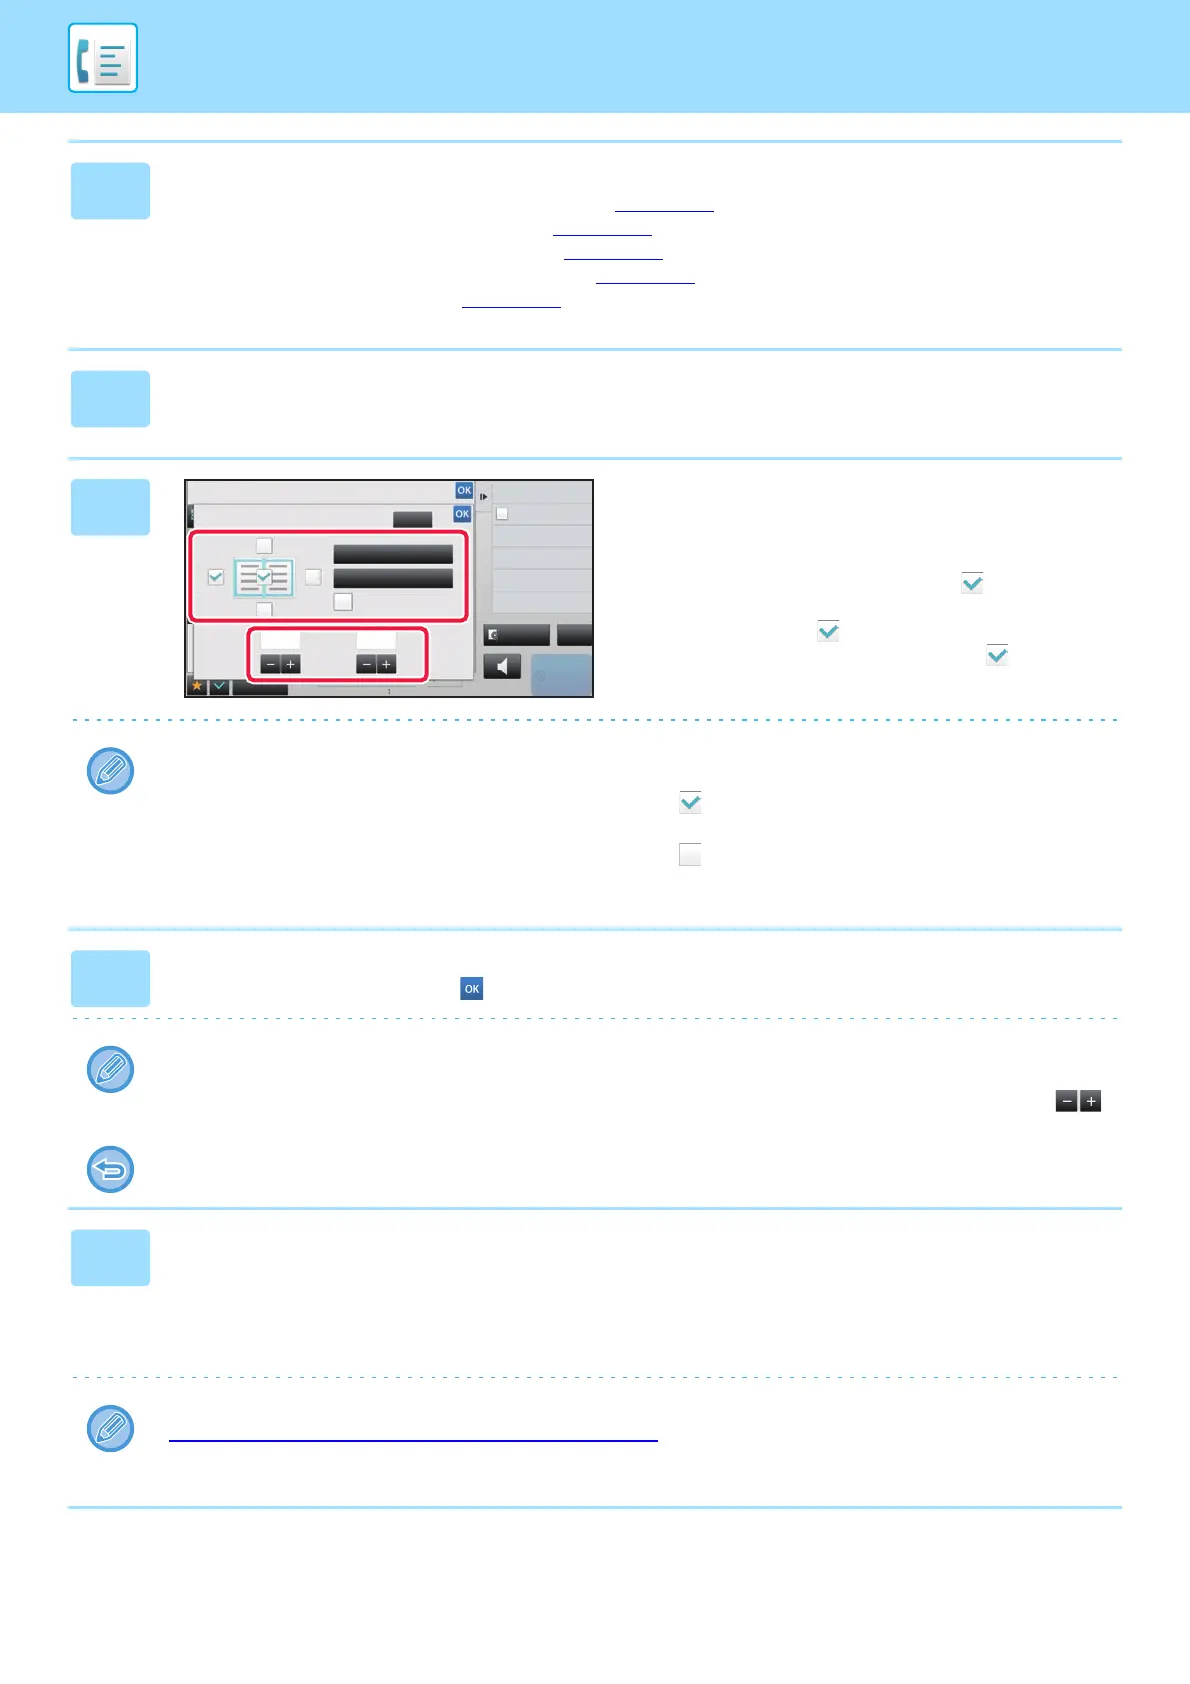
Tap the checkbox of the edge that you
wish to erase, and specify the erase
position.
Check that he tapped checkbox is set to . If the [Specify
Frame] key is tapped, the [Up], [Down], [Left], and [Right]
checkboxes are set to . If the [Specify Frame+Center]
key is tapped, all the checkboxes are set to .
Specify the erase edge on the reverse side when erasing edges of one to three sides of Up, Down, Left, and Right on
the front side to scan a 2-sided original.
• If the [Reverse erase position of back face] checkbox is set to , the edge in the position opposite to the erased
edge on the front side will be erased.
• If the [Reverse erase position of back face] checkbox is set to , the edge in the same position as on the front side
will be erased.
5
Specify the erase width.
After the settings are completed, tap and [Back] keys in sequence.
• Tap the numeric value display indicating the margin shift area on the front side or reverse side, and enter the area
using the numeric keys.
• To quickly set the area, first specify a value close to the desired value by the numeric keys, then adjust it with .
To cancel the erase setting:
Tap the [Clear] key.
6
Tap the [Start] key to start scanning of the original.
• A beep will sound to indicate that scanning and transmission have ended.
• When you place the original on the document glass, scan each page one at a time.
When scanning finishes, place the next original and tap the [Start] key.
• Repeat the procedure until all pages have been scanned and then tap the [Read-End] key.
You can tap the [Preview] key to check a preview of the image before sending a fax. For more information, see
"CHECKING THE IMAGE TO BE TRANSMITTED (page 4-27)
". However, settings for this function cannot be changed
in the preview screen.
Back
Clear
Others
Reverse erase position of
back face
Up
Down
1/2 1/2
Left Right
Center Outer Frame
(0 ~ 1)
inch
(0 ~ 1)
inch
Exposure
Specify Send Exposure
Resolution
Change Original Resolution
N-Up
Put Multiple Pages in A Page
reception memory
100%
Speaker
Start
Erase
Outer Frame
Specify Frame+Center
CA
Preview

 Loading...