Use the To
1 EXT port Connect additional devices (telephone or answering machine) to the printer and the
telephone line. Use this port if you do not have a dedicated fax line for the printer and
if this connection method is supported in your country or region.
Note: Remove the plug to access the port.
2 LINE port Connect the printer to an active telephone line through a standard wall jack (RJ‑11), DSL
filter, or VoIP adapter, or any other adapter that allows you to access the telephone line
to send and receive faxes.
3 Ethernet port Connect the printer to a network.
4 USB port Attach a keyboard or any compatible option.
5 USB printer port Connect the printer to a computer.
6 Power cord socket Connect the printer to a properly grounded electrical outlet.
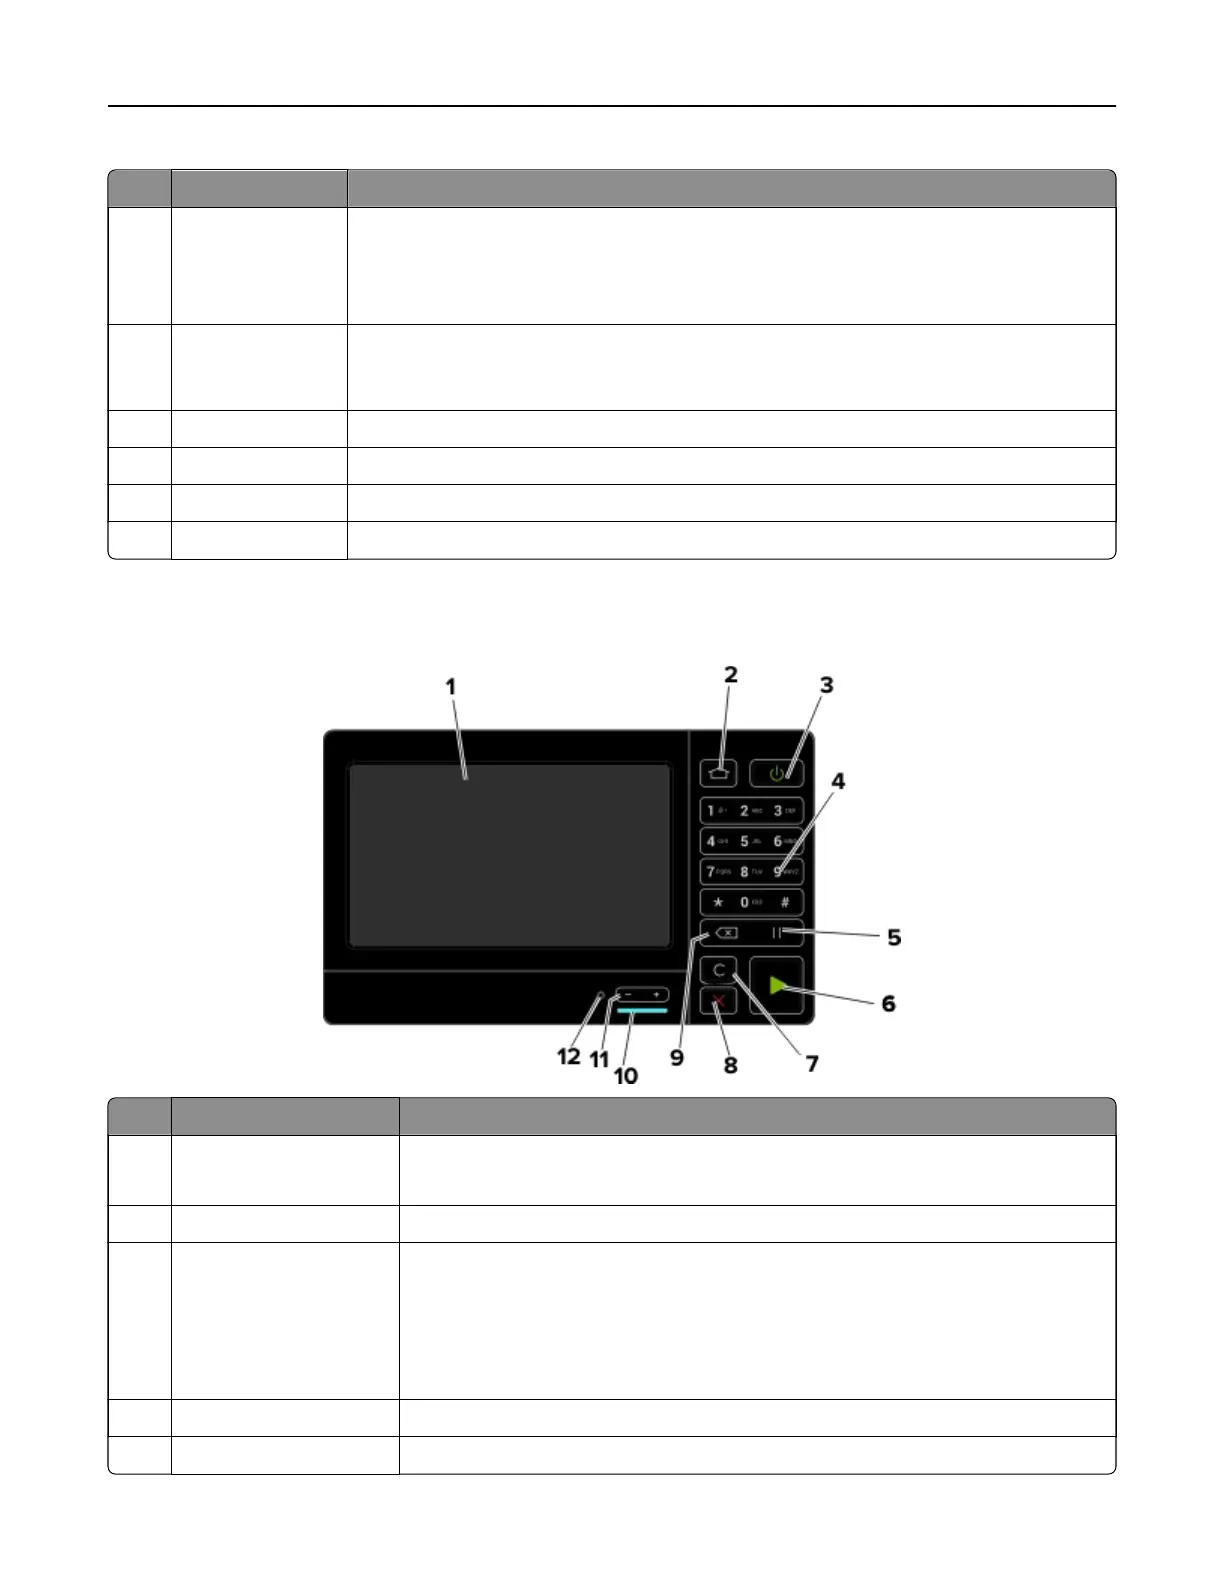
Using the control panel
Use the To
1 Display
• View the printer messages and supply status.
• Set up and operate the printer.
2 Home button Go to the home screen.
3 Power button
• Turn on or turn o the printer.
Note: To t u rn
o
the printer, press and hold the power button for
five
seconds.
• Set the printer to Sleep or Hibernate mode.
• Wake the printer from Sleep or Hibernate mode.
4 Keypad Enter numbers or symbols in an input field.
5 Pause button Place a dial pause in a fax number.
Learning about the printer 12