18
E
Turning Power On/Off
n
Operations after rst power-on
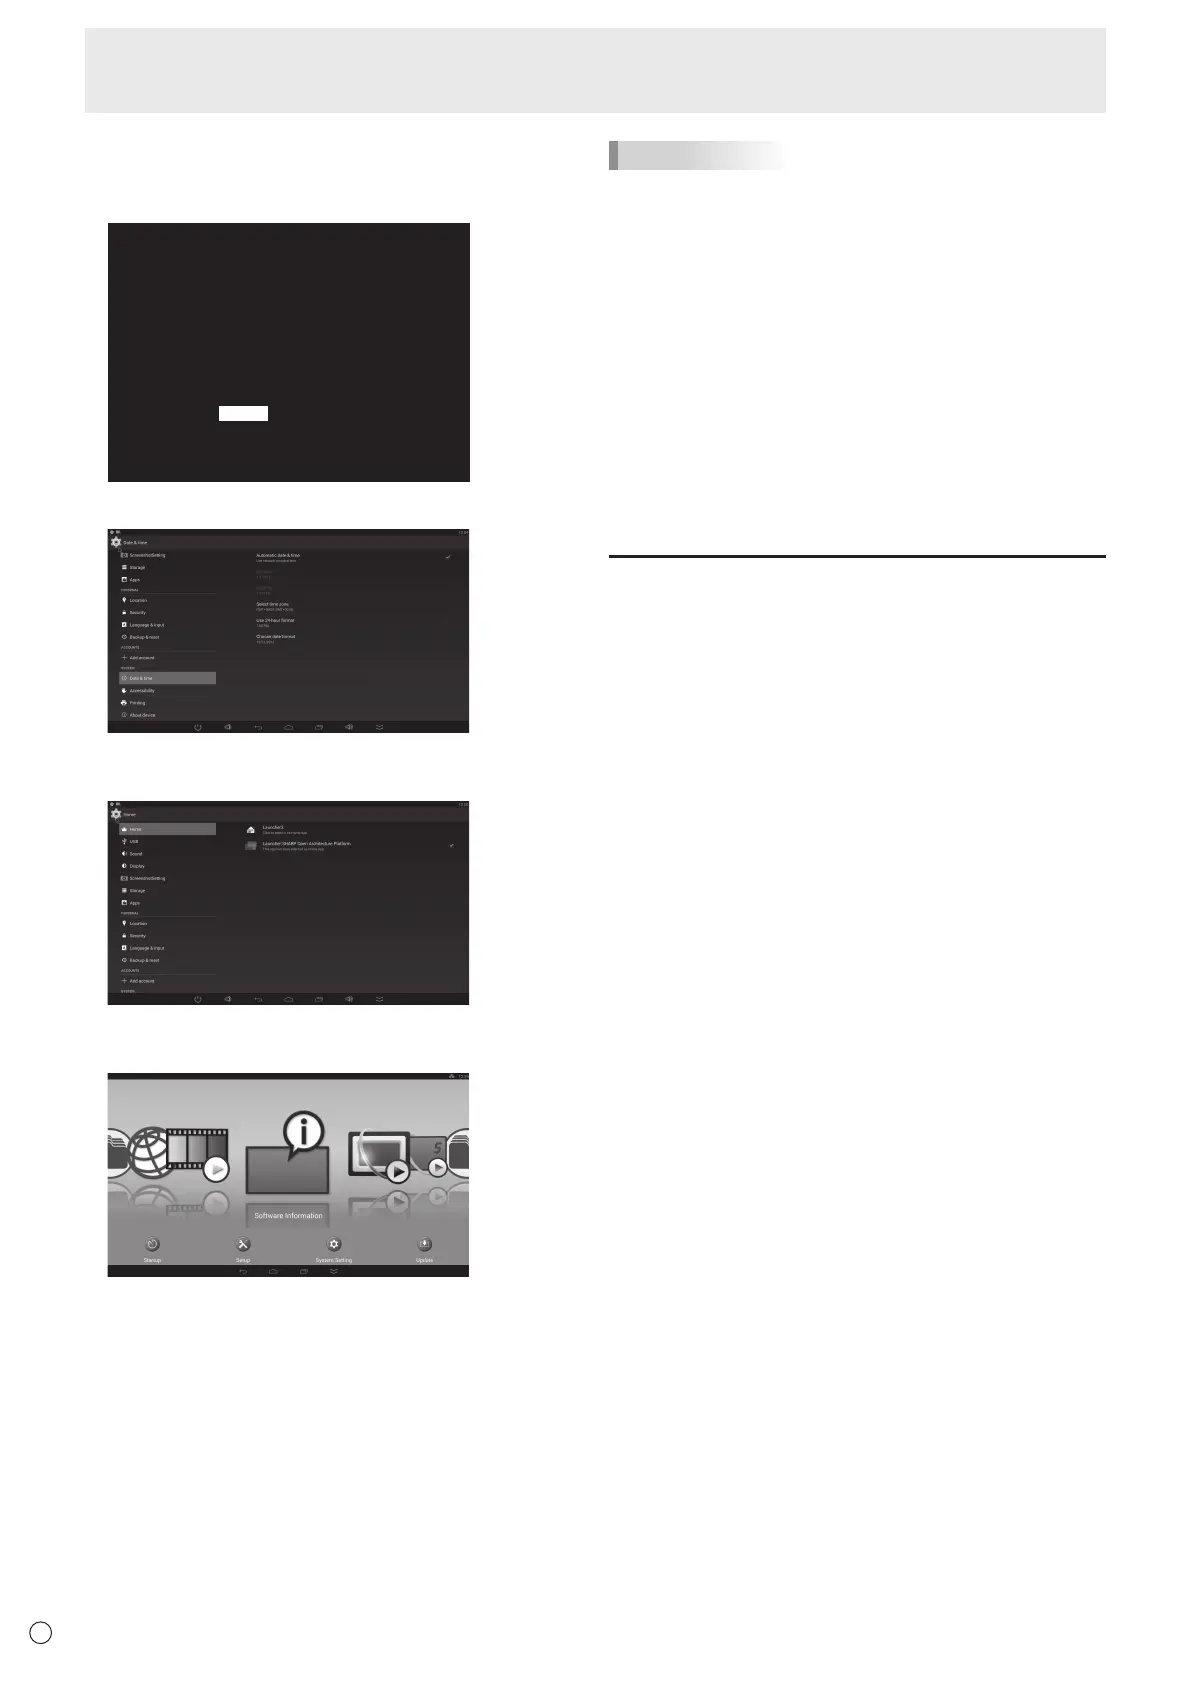
When you turn on the power for the rst time, a screen for
setting the date and time appears.
DATE/TIME
1 920x1080
The date/time setting must be set by Application.
[SET] : Display "Date & time" on Application
<APPLICATION>
01/01/2017 SUN 00:00
SET CANCEL
V: 60 Hz H: 67.5 kHz
1. Select “SET”, and set the time zone and date/time.
2. Select “Launcher:SHARP Open Architecture Platform”
in “Home”.
3. Press the CONTENT MENU button on the remote
control unit.
This is the base screen (CONTENT MENU screen) when
the input mode is APPLICATION.
For information on APPLICATION mode, see the Software
Guide.
• Be sure to set the date and time.
TIPS
• When “Select a home app” screen appears, select
“Launcher:SHARP Open Architecture Platform”, and select
“Always”.
• The clock is maintained by the internal battery.
• If you already set the time but the date/time setting screen
appears when the power is turned on, the internal battery
may be exhausted. After replacing the internal battery, set
the date and time as explained in step 1 on the left.
• Please contact an authorized SHARP servicing dealer
or service center for assistance with internal battery
replacement.
• Estimated service life of the internal battery: About 5 years
(depending on monitor operation)
• The initial battery was inserted at the factory when the
monitor was shipped, so it may run out of power before its
expected operation life.
Disabling power on/off operations
Power on/power off operations can be disabled in order to
protect the monitor from an accidental power off. Set the
ADJUSTMENT LOCK in FUNCTION menu to “ON 2”. (See
page 33.)
 Loading...