43
E
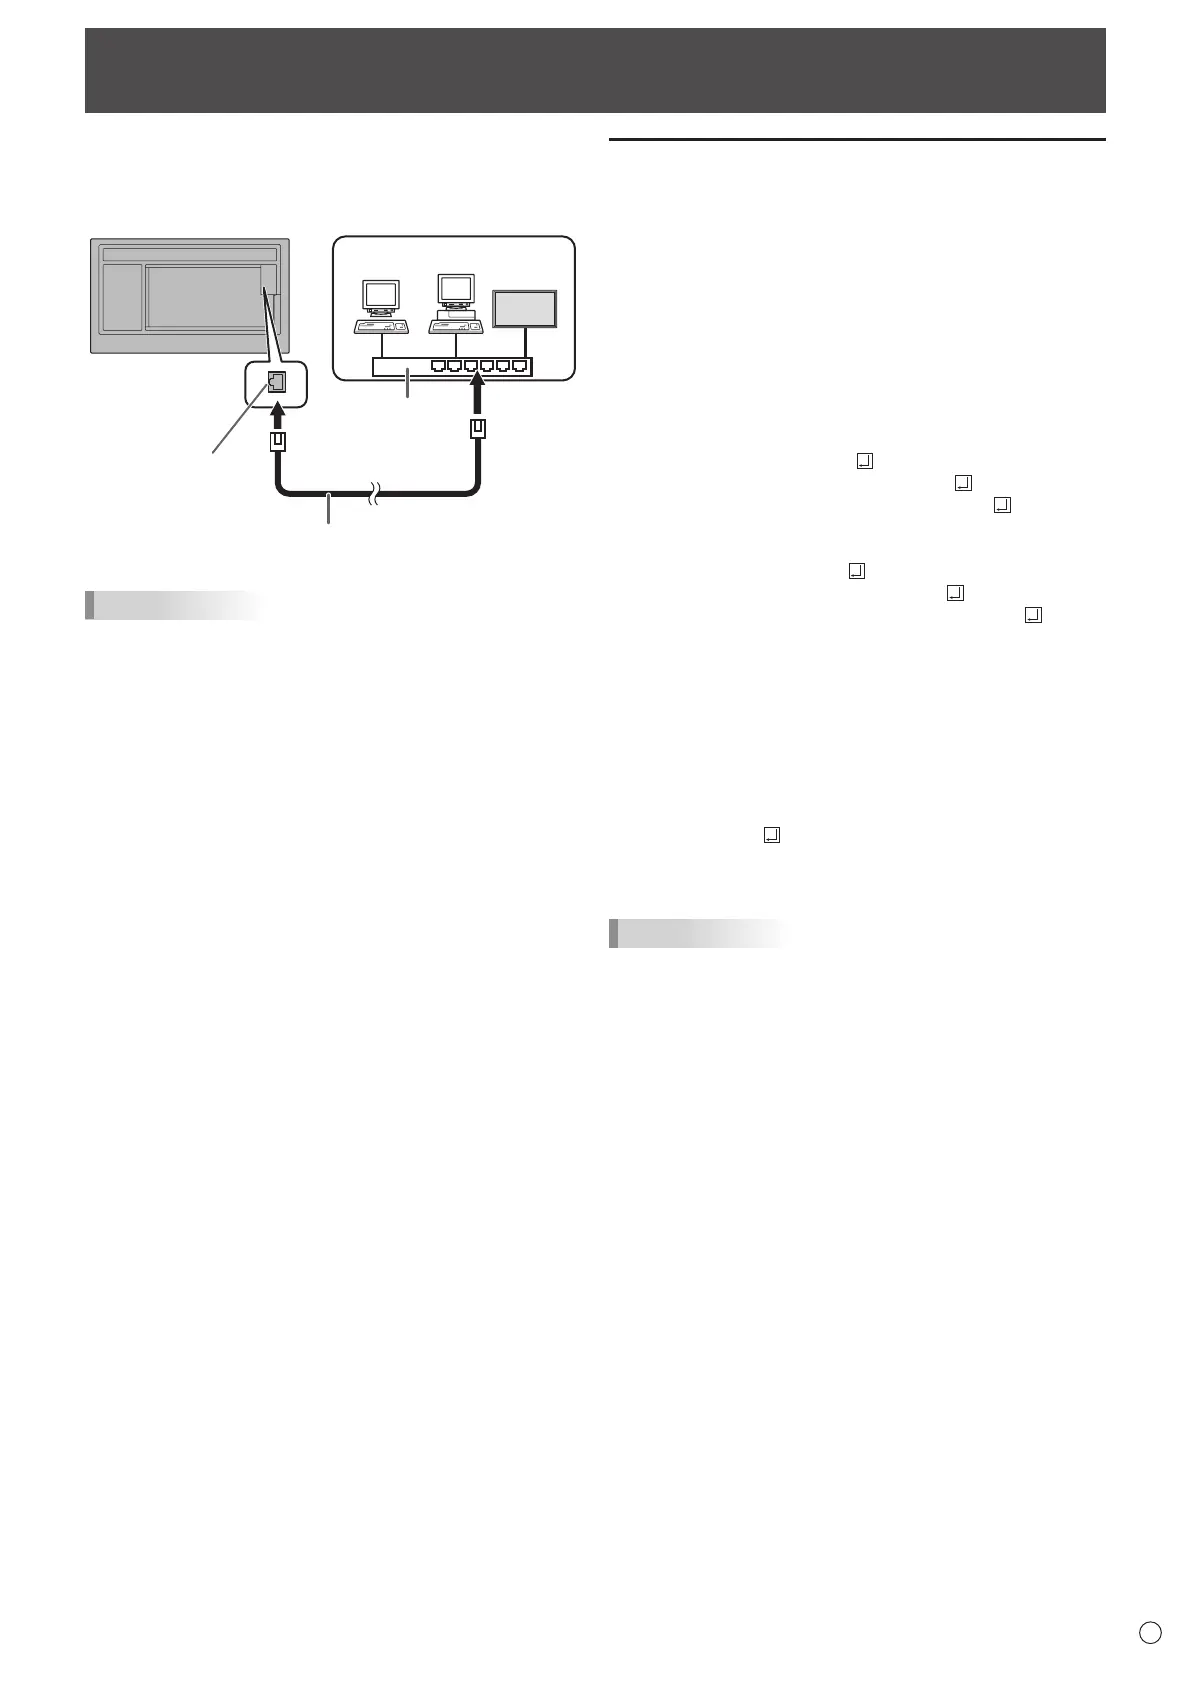
Your monitor can be connected to a LAN allowing you to
control it from a computer on the LAN.
The connection requires a commercially available LAN cable
(UTP cable, Category 5, straight through).
Hub
Network (LAN)
LAN cable (commercially available, straight)
LAN terminal
TIPS
• Thismonitormustbeconnectedtoanetwork.
Conguresettingsrequiredforconnectiontoanetworkin
“System Setting” – “Ethernet” on the CONTENT MENU
screen of APPLICATION mode.
• WhenPOWERSAVEMODEissettoON,thecontrolis
disabled in the standby mode.
• TocontrolthemonitorviaLAN,setRS-232C/LANSELECT
toLAN.(Seepage26.)
Set “Telnet Server” to “ON” on “Setup” in APPLICATION
mode. (See Software Guide.)
• YoucannotuseRS-232CandLANcontrolsimultaneously.
Controlling the Monitor with a computer (LAN)
Command-based control
YoucancontrolthemonitorusingRS-232Ccommands
(see page 39) via terminal software and other appropriate
applications.
Readthemanualfortheterminalsoftwarefordetailed
instructions.
(1) Connect the computer to the monitor.
1. Specify the IP address and data port number (10008)
and connect the computer to the monitor.
Whenconnectionhasbeenestablishedsuccessfully,
[Login:] is returned as response.
2. Sendtheusername.
• Send[username]+[
].
• Iftheusernameisnotset,send[
].
• Whenthetransmissionissuccessful,[
Password:]
is returned as response.
3. Send the password.
• Send[password]+[
].
• Ifthepasswordisnotset,send[
].
• Whenthetransmissionissuccessful,[OK
] is
returned as response.
(2) Send commands to control the monitor.
• ThecommandsusedarethesameasthoseforRS-
232C.Refertothecommunicationprocedure(see
page 35) for operation.
• UsablecommandsareprovidedintheRS-232C
command table (see page 39).
(3) Disconnect the connection with the monitor and
quit the function.
1. Send [QUIT ].
Whenthetransmissionissuccessful,[goodbye]is
returned and the connection is disconnected.
TIPS
• Connectionisautomaticallydisconnectedwhenthe
timespeciedinAUTOLOGOUTTIMEelapsesovera
no-communicationperiod.
 Loading...