Quick Create in Register
The register allows quick creation of products in register without
the need to enter a full product name. This is taken from the
selected department number.
• Scan the new item or (enter a code greater then 6 digits and
press the PLU button). The register will prompt
UNDEFINED CODE.
• Enter the price (without the decimal point) and press TL/NS .
• As the product name is taken from a department for quick
entry. Enter the department number 1 to 99 using the
numeric keypad.
• Press TL/NS to continue.
• The register will prompt with the question DELETE TYPE.
It is possible to set the register to delete unused items after
period of days. i.e. Set the number of days to 31 to delete any
items not sold within one month (See Non-Accessed Deletion).
This answer sets if the item is included in this periodic deletion.
Either
1 for Auto Delete – To include the product in unused delete
or
2 for No Delete – To prevent automatic item deletion.
* the recommended selection.
• The item entered is sold immediately.
• Continue transaction as normal.
Full Create in Program Mode
The following outlines how to program the sales buttons.
Sales can be made using departments (buttons on the keyboard),
Price Look Up codes or EAN barcodes for preset priced items.
• From REG mode, press the Mode key.
• Press 6 then TL/NS to select PGM Mode.
• Press 2 then TL/NS to select Setting.
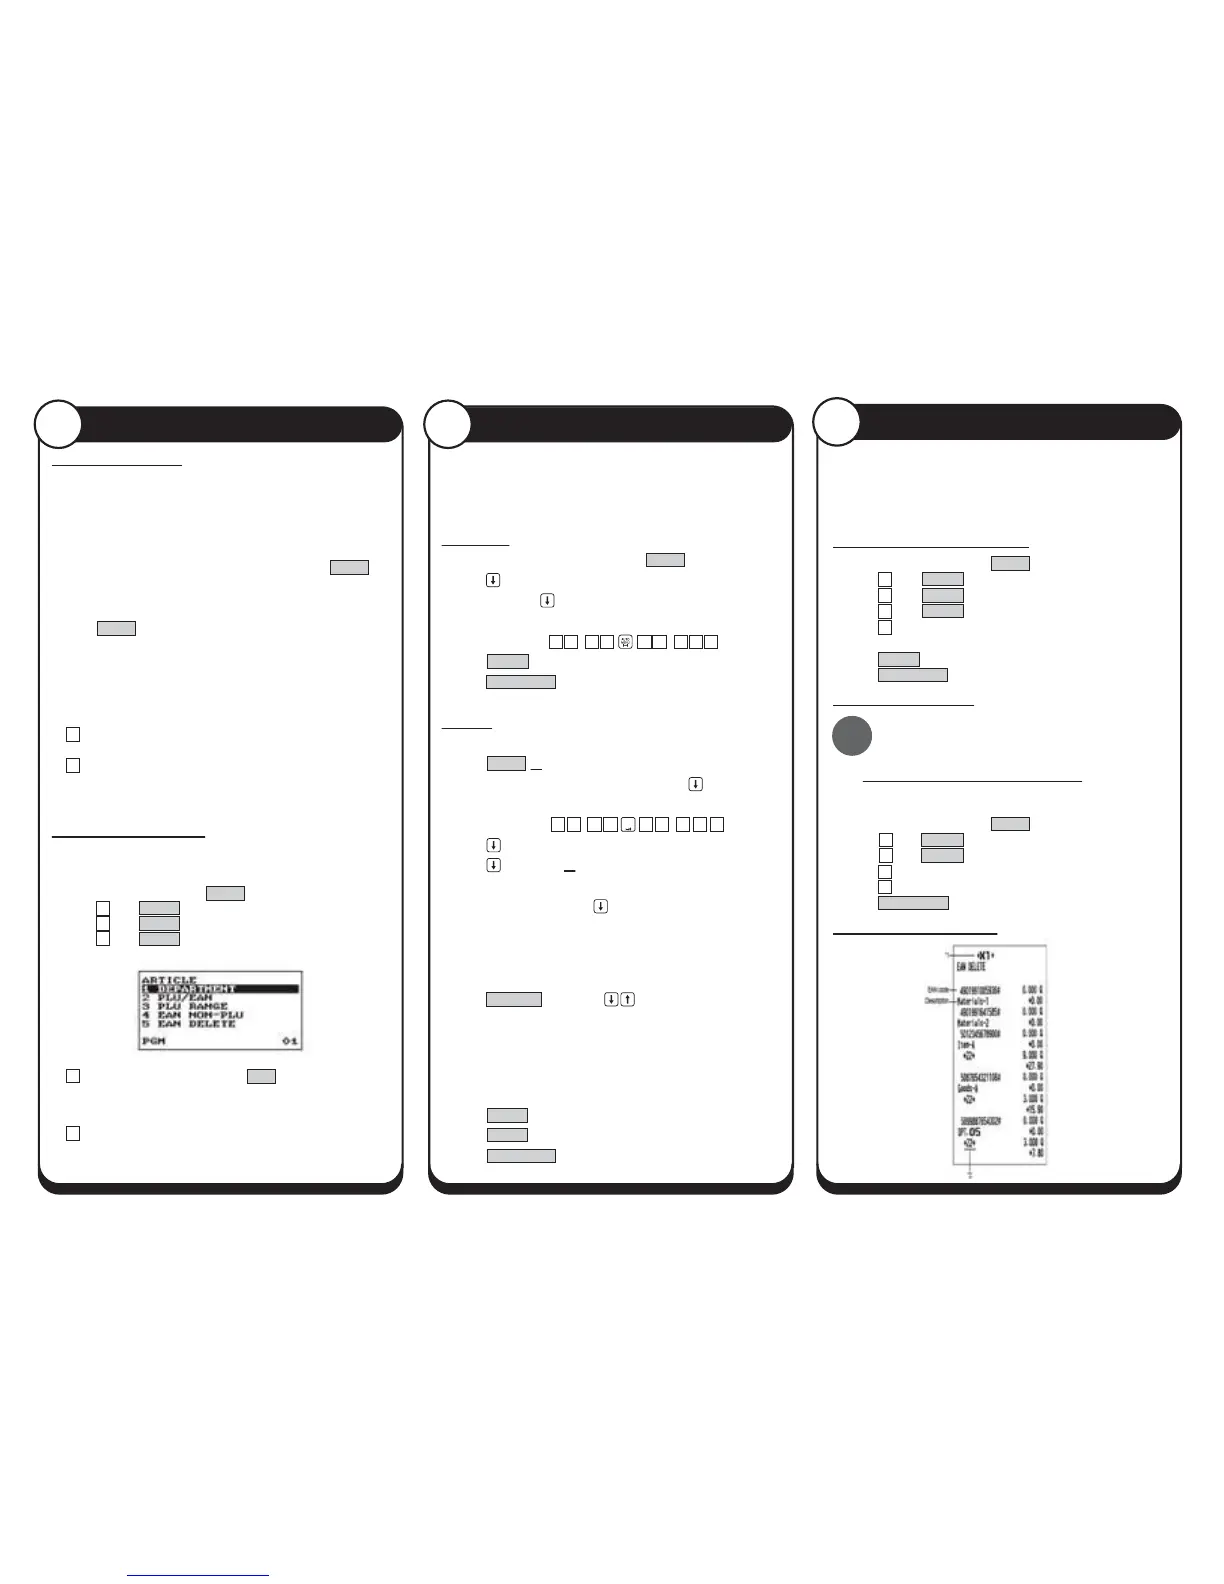
• Press 1 then TL/NS to select Article.
• Select the item type to be amended.
Either
1 Department (Keyboard Item i.e. 1/21 ).
These are the 20 (up to 40 using DEPT Shift) buttons on the keyboard
for manual or preset priced items.
or
2 PLU/EAN (Price Look Up or EAN Barcodes)
These are preset priced Price Look Up codes manually entered using
the PLU key or using scanned barcodes (EAN’s).
Items can be deleted based on a number of days since last sale.
i.e. Set the number of days to 31 to delete any items not sold
within one month.
The following actions this sequence.
Setting the Number of Unused Days
• From REG mode, press the Mode key.
• Press 6 then TL/NS to select PGM Mode.
• Press 2 then TL/NS to select Setting.
• Press 1 then TL/NS to select Article.
• Press 5 to select EAN Delete.
• Enter the number of days for PLU retention.
• Press TL/NS to finish.
• Press Esc/Cancel three times to return to REG.
Deleting the Unsold Items
Important:- The following procedure will delete
any EAN Barcodes set to be included in the auto
delete.
Note:- Delete is the default option for any newly created product it is
necessary to ensure that unused items for that period not intended for delete
are set as No Delete (see opposite).
• From REG mode, press the Mode key.
• Press 4 then TL/NS to select X1/Z1 Mode.
• Press 4 then TL/NS to select EAN Delete.
• Press 2 to select Delete.
• Press 1 to select All Delete.
• Press Esc/Cancel three times to return to REG.
Sample Non Accessed Report
Follow the appropriate section below to amend the items
i.e. Department for keyboard items or Price Look Up/EAN
barcodes.
Department
• Enter department number and press TL/NS .
• Press for no price entry or enter the price (without decimal
point) and press .
• Enter the item name using the letters on the number pad
i.e. for Beer enter 88 99 99 111.
• Press TL/NS to the save the record.
• Press Esc/Cancel three times to return to REG.
PLU/EAN
• Select the code to amend by entering the PLU number and
press TL/NS or for EAN Barcodes scan the barcode.
• Enter the price
(without decimal point) and press .
• Enter the item name using the letters on the number pad
i.e. for Beer enter 88 99 99 1 1 1.
• Press twice to continue.
• Press to continue or for sales reporting enter the
department number to which sales are totalled using the
numeric keypad and press .
• The NON-ACCESS option sets if the item is included in the
automatic periodic deletion.
It is possible to set the register to delete unused items after period of days.
i.e. Set the number of days to 31 to delete any items not sold within one month.
• Press #/TM/ST the use the keys to select.
Either
DEL BY Z – To include the product in unused delete
or
NON DEL – To prevent automatic item deletion.
* the recommended selection.
• Press TL/NS .
• Press TL/NS to the save the record.
• Press Esc/Cancel three times to return to REG.
Creating New Items
6 7
Non-Accessed Deletion
8
!
AUTO
MENU
 Loading...