14
XG-C55X
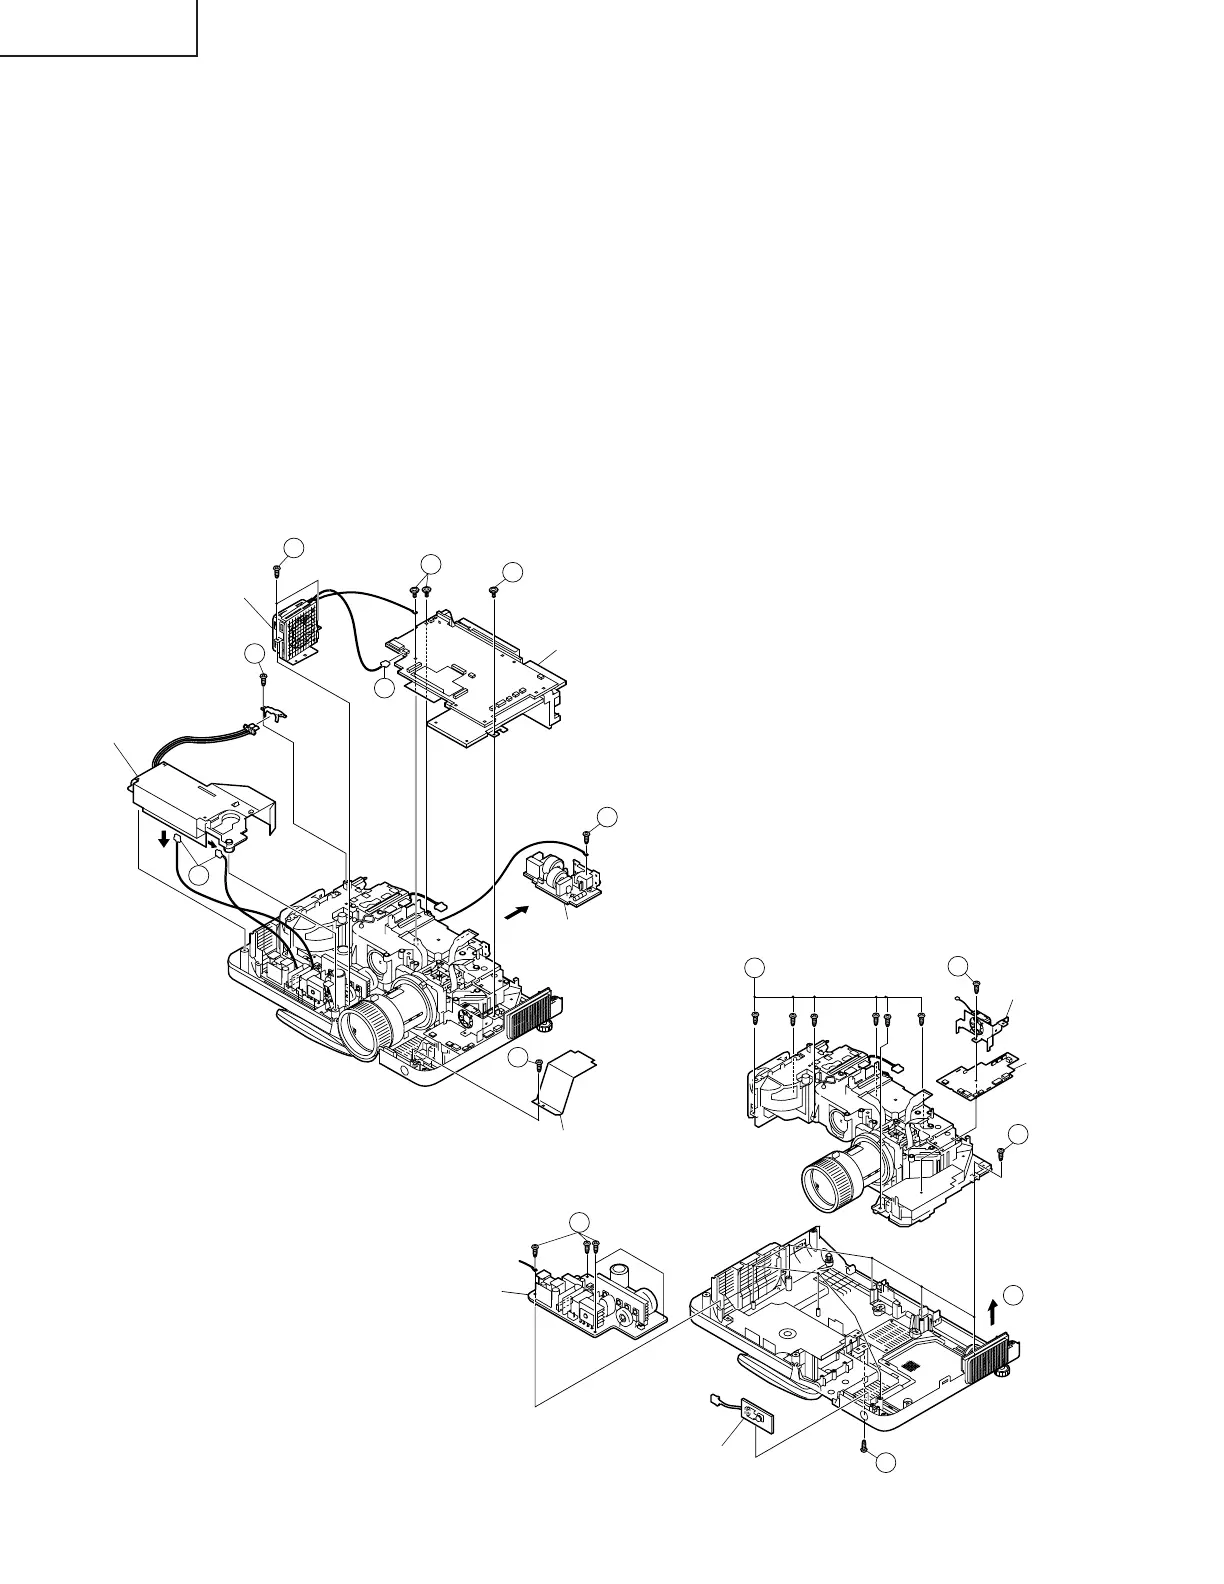
3. Removal of the PWBs
3-1. Remove the lock screw from the lamp socket angle. Detach the lamp socket angle.
3-2. Lift the ballast unit. Disconnect the two connectors and detach the ballast unit.
3-3. Remove the lock screw from the PWB unit cover and detach the cover.
3-4. Remove the three lock screws from the PWB assembly.
3-5. Remove the two lock screws from the cooling fan, disconnect the connector and detach the cooling fan.
3-6. Remove the lock screw from the grounding terminal, disconnect the connector and detach the AC inlet PWB.
4. Removal of the optical mechanism, fan PWB, power PWB and R/C receiver PWB
4-1. Disconnect the connector and detach the speaker unit.
4-2. Remove the eight lock screws from the optical mechanism, and take out the optical mechanism.
4-3. Remove the lock screw from the cooling fan, and detach the cooling fan and fan PWB.
4-4. Remove the four lock screws from the power PWB, and detach the power PWB.
4-5. Take out the R/C receiver PWB.
3-1
3-2
3-5
3-4
3-5
3-6
3-3
3-4
PWB Ass’y
AC Inlet PWB
PWB Unit cover
Ballast Unit
Cooling Fan
4-2
4-3
4-2
Power PWB
R/C Receiver PWB
Fan PWB
Cooling Fan
4-1
4-4
4-2