23
XG-C55X
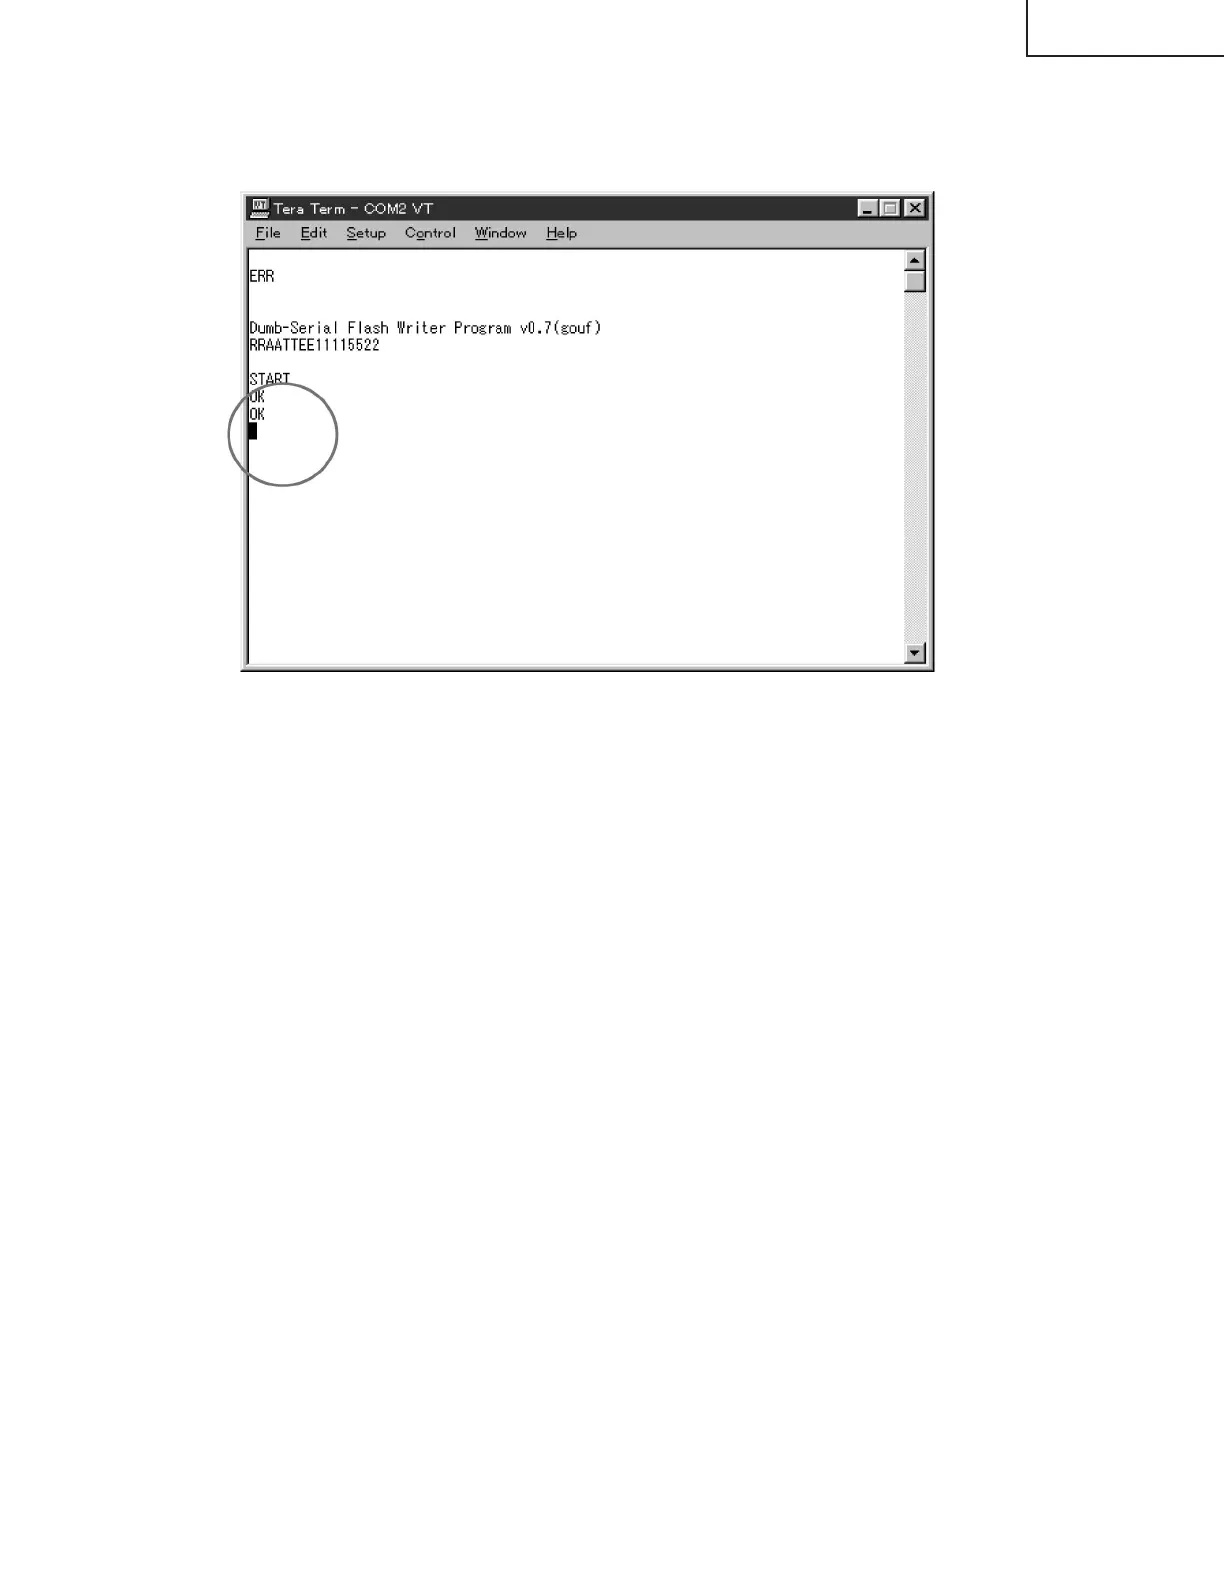
13. The transfer of data starts if the setting is correct. The Bytes transferred will be counted in the dialog box.
14. Wait for several minutes until the OK is displayed two times and then the lamp indicator is illuminated in red.
If the ERR is displayed, take the steps again from the step 1.
Caution: Never turn off the projector or unplug the AC cord while transferring the data. If it is done, the projector
becomes unable to turn the power on.
In case of this, recover the projector by taking the following steps.
(1) Remove the top and the back side cabinet of the projector.
(2) Set the switch on the PC board to the WRITE side.
(3) Plug the AC cord.
(4) Take the steps again from the step 8.
(5) After transferring the data, set the switch on the PC board to the NORMAL side.
15. Unplug the AC cord.
16. Plug in the AC cord and then call the process mode.
17. From the process menu, select the SPECIAL.
Make sure that the PRG VER is changed to new version.
18. Turn off the projector.
The update is complete.