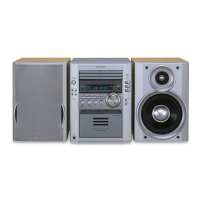
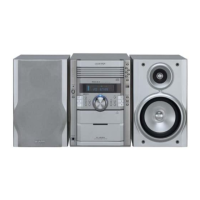
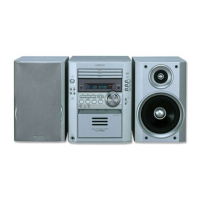
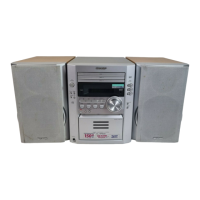
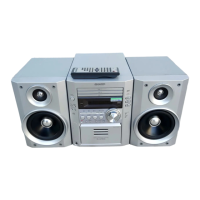
XL-HP700
Setting the clock
/
1'\
'\
l /
1'-1'-.'-11-/
.....
/
C:J
...
:U
U,-
C".'""".".,.,.""",.""L
.•.
".',."""."
•.•.
,.,.""",.'"
..••..
,.".0"""".',
..
"""",':.,.,."."".'",'","
...
"".'",C"".:
•.
,.""."",:.,'",',."'","'
.•
'",'.","'.'.",K.",.",.,,,
II
0 0 0
II
.-r~D
'-I
'III
r-,
I /
'-/'1/1
r-/
/ /
/
1'\
'\
1/
......
/'-/--:/-/ '-I
-:'
Uj:.1
U
'-I
/11/
r-,
, /
'\
1/
'---_/-_-=1_/'_11
__
I......;;.C--"'{--;-:~----'I,L"'7-~=-
¢
5 Press
the
TUNINGITIME
(V
or
A)
button
to
adjust
the
min-
utes and
then
press
the
MEMORY/SET button.
4 Press
the
TUNINGITIME
(V
or
A)
button
to
adjust
the
hour
and
then
press
the
MEMORY/SET button.
• Press the TUNINGITIME
(V
or
A)
button once
to
advance
the time
by
1 minute. Hold it down to change the time
in
5-
minute intervals.
• The hour will not advance even if minutes advance from "59"
to
"00".
• Press the TUNING/TIME
(V
or
A)
button once
to
advance
the time by 1 hour. Hold
it
down to advance continuously.
• When the 12-hour display
is
selected, "AM" will change au-
tomatically to "PM".
To
confirm
the
time
display:
Press the CLOCK button
on
the main
unit or remote control.
The time display will appear for about 5
seconds.
Note:
The "CLOCK" or time will flash at the push of the CLOCK button
when the AC power supply
is
restored after a power failure or
unplugging the unit.
Readjust the clock as follows.
To readjust
the
clock:
Perform
"S
etting the clock" from step
1.
If
the "CLOCK"
is
not flash-
ing
in
step
2,
step 3 (for selecting the 12-hour or 24-hour display)
will be skipped.
To change
the
12-hour
or
24-hour display:
1 Clear all the programmed contents. [Refer to "Clearing all the
memory (resetr'
on
page 29 for details.]
2 Perform
"S
e
tting the clock" from step
1.
)
1'\
'\
1/
'/
-/--:,-/
'-I
-:1
C.J"_' U
'-I
/11/
r-,
, 1
CLOCK
(I)(Q)
TUNING/TIME
'v'
/'..
(Q)(I)
I ! I I
\ I I I I
'-,-,
'-I
,-
,
1./
-
'-
'- '-'
,_
r,
-
I ! I I \
"AM 12:00"
~
The 12-hour display will appear.
(AM 12:00 -
PM
11
:59)
"AM 0:00"
~
The 12-hour display will appear.
(AM 0:00 -
PM
11
:59)
"0:00"
~
The 24-hour display will appear.
(0:00 - 23:59)
Note that this can only
be
set when the unit
is
first installed or
it
has been reset. [Refer to "Clearing all the memory (reset)"
on
page 29 for details.]
\ I I I
I -
/FI
/'11
2 Press
the
CLOCK
button
on
the
main
unit
and,
within
5 sec-
onds, press
the
MEMORY/SET button.
3 Press
the
TUNINGITIME
(V
or
A)
button
to
select 12-hour
or
24-hour
display
and
then
press the MEMORY/SET but-
ton.
The clock should be set
on
the main unit.
In
this example, the clock
is
set for the 12-hour
(AM
12:00) display.
1 Press
the
ON/STAND-BY
button
to
turn
the
power
on.
14