EasyManua.ls Logo

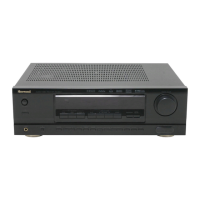
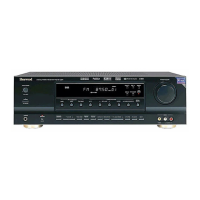
Sherwood RD-8108 User Manual

Sherwood RD-8108
41 pages
To Next Page IconTo Next Page
Page #1 background imageLoading...
Page #1 background image
2
Introduction
Congratulations on Your Purchase!
Your new high fidelity receiver is designed to deliver
maximum enjoyment and years of trouble free service.
Please take a few moments to read this manual
thoroughly. It will explain the features and operation of
your unit and help ensure a trouble free installation.
Please unpack your unit carefully. We recommend that
you save the carton and packing material. They will be
helpful if you ever need to move your unit and may be
required if you ever need to return it for service. Your unit
is designed to be placed in a horizontal position and it is
important to allow at least two inches of space behind
your unit for adequate ventilation and cabling
convenience.
To avoid damage, never place the unit near radiators, in
front of heating vents, in direct sunlight, or in excessively
humid or dusty locations. Connect your complementary
components as illustrated in the following section.
CAUTION : TO REDUCE THE RISK OF
ELECTRIC SHOCK, DO NOT
REMOVE COVER (OR BACK).
NO USER-SERVICEABLE PARTS
INSIDE. REFER SERVICING TO
QUALIFIED SERVICE PERSONNEL.
CAUTION
RISK OF ELECTRIC SHOCK
DO NOT OPEN
This symbol is intended to alert the user to the
presence of uninsulated "dangerous voltage"
within the product's enclosure that may be of
sufficient magnitude to constitute a risk of
electric shock to persons.
This symbol is intended to alert the user to the
presence of important operating and
maintenance (servicing) instructions in the
literature accompanying the appliance.
To reduce the risk of fire or electric shock, do not expose
this appliance to rain or moisture.
Caution : Do not block ventilation openings or stack
other equipment on the top.
FOR U.S.A
Note to CATV System Installer: This reminder is
provided to call the CATV system installer's attention
to Article 820-40 of the NEC that provides guidelines
for proper grounding and, in particular, specifies that
the cable ground shall be connected to the
grounding system of the building, as close to the
point of cable entry as practical.
FCC INFORMATION
This equipment has been tested and found to
comply with the limits for a Class B digital device,
pursuant to Part 15 of the FCC Rules. These limits
are designed to provide reasonable protection
against harmful interference in a residential
installation. This equipment generates, uses and can
radiate radio frequency energy and, if not installed
and used in accordance with the instructions, may
cause harmful interference to radio communications.
However, there is no guarantee that interference will
not occur in a particular installation. If this equipment
does cause harmful interference to radio or
television reception, which can be determined by
turning the equipment off and on, the user is
encouraged to try to correct the interference by one
or more of the following measures:
Reorient or relocate the receiving antenna.
Increase the separation between the equipment
and receiver.
Connect the equipment into an outlet on a circuit
different from that to which the receiver is
connected.
Consult the dealer or an experienced radio/TV
technician for help.
CAUTION: Any changes or modifications in
construction of this device which are not expressly
approved by the party responsible for compliance
could void the user's authority to operate the
equipment.
WARNING
ENGLISH
UNPACKING AND
Caution regarding placement
(Except for U.S.A and Canada)
To maintain proper ventilation, be sure
to leave a space around the unit (from
the largest outer dimensions including projections)
equal to, or greater than, shown below.
Left and right panels: 5 cm
Rear panel: 5 cm
Top panel: 20 cm
Questions and Answers:

Sherwood RD-8108 Specifications

General IconGeneral
Weight10.5kg
Tuning rangeFM, MW
Input sensitivity (MM)2.5mV
Weight (kg)10.5
Weight (lbs)23.1
Input Sensitivity2.5mV (MM)
Speaker load impedance8 ohms
Video Connectionscomposite
Dimensions (mm)440 x 140 x 380
Frequency Response (extended)10Hz-100kHz (+0.5dB, -3dB)
Tuner SectionFM, MW
Dimensions (inches)17.3 x 5.5 x 15
Power Output100 watts per channel into 8Ω (stereo)

Summary

Introduction

Congratulations on Your Purchase

Welcomes the user and emphasizes reading the manual for optimal use and service.

Safety Precautions and Warnings

Highlights critical safety warnings regarding electric shock, fire, and ventilation.

FCC Information and Compliance

Details FCC compliance, digital device limits, and potential interference mitigation.

Important Placement Guidelines

Provides crucial advice on unit placement for proper ventilation and operation.

Before Operating

Safety Precautions for U.S.A/Canada

Outlines safety guidelines, including use of polarized plugs for US and Canadian regions.

Safety Precautions for Europe/Australia

Details safety requirements, particularly the three-pin plug and earthing for European and Australian users.

Voltage Selection for International Use

Explains how to select the correct AC voltage for operation in different countries.

System Connections

Important Connection Guidelines

Provides essential tips for connecting audio/video cords, AC input, and handling power loss.

Connecting Antennas

Details how to connect FM and AM antennas for optimal reception.

Connecting 7-Channel Direct Inputs

Explains how to connect components with 6 or 7 channel analog outputs.

System Connections (Continued)

Connecting Audio/Video Components

Guides on connecting various audio/video devices like CD players, tape decks, and video components.

Subwoofer Pre Out Connection

Instructions for connecting a powered subwoofer to enhance bass sounds.

System Control Connection

Explains how to connect Sherwood components for system control via DIGI LINK.

System Connections (Continued)

Connecting Digital Inputs and Outputs

Details connections for coaxial and optical digital audio signals for high-quality sound.

Connecting Speakers

Provides essential guidelines for correctly connecting speakers, including polarity and impedance.

AC Outlet and Input Cord

Describes the switched AC outlet and the main AC input cord.

Front Panel Controls

Receiver Controls Overview

Identifies and describes all buttons and knobs on the front panel of the receiver.

Display Indicators

Explains the various indicators and information shown on the fluorescent display.

Video 3 Input Jacks

Details the specific function of the VIDEO 3 input jacks for video and audio signals.

Universal Remote Controls

Remote Control Capabilities

Introduces the remote's ability to control multiple brands and components.

Digi Link System Operation

Explains how to use the remote with Sherwood components via the Digi Link system.

Universal Remote Controls (Continued)

Numbered Button Functions

Provides a detailed table showing the functions of numbered buttons for various devices.

Universal Remote Controls (Continued)

Loading Remote Control Batteries

Instructions for inserting and replacing batteries in the remote control.

Remote Control Functions

Entering Setup Codes

Detailed steps on how to program the remote to control other audio/video components.

Remote Control Functions (Continued)

Punch-Through Functionality

Explains how to program the remote for volume or channel control across devices.

Remote Control Functions (Continued)

Macro Function Programming

Guides on programming a sequence of operations into a single button.

Operations

Listening to a Program

Step-by-step guide on how to select inputs and listen to audio sources.

Operations (Continued)

Selecting Input Sources

Explains how to select digital or analog inputs for CD, VIDEO 1-3 sources.

Adjusting Volume and Tone

Details how to adjust overall volume, use mute, and apply cinema EQ.

Operations (Continued)

Adjusting Tone Controls

Guides on adjusting bass and treble levels, including tone ON/OFF modes.

Surround Sound Modes

DTS Surround Modes

Explains DTS Digital Surround, DTS-ES Extended Surround, and DTS Neo:6 modes.

Dolby Digital Modes

Details Dolby Digital, Dolby Digital EX, and Dolby Pro Logic surround sound technologies.

Surround Sound Modes (Continued)

Dolby Pro Logic and Pro Logic II

Describes Dolby Pro Logic, Pro Logic II Cinema, and Pro Logic II Music modes for enhanced surround.

Dolby Virtual and Other Modes

Explains Dolby Virtual for phantom speakers and Theater, Hall, Matrix modes.

Speaker Placement

Front and Center Speaker Placement

Guidelines for positioning front left/right and center speakers for optimal sound.

Surround and Back Speaker Placement

Instructions for placing surround left/right and surround back speakers.

Subwoofer Placement and Notes

Advice on subwoofer placement and general speaker notes for optimal setup.

Speaker Settings Adjustment

Speaker Size Configuration

How to set speaker sizes (Large, Small, None) based on connected speakers.

Speaker Distance Configuration

How to adjust speaker distances for accurate surround sound timing.

Speaker Settings Adjustment (Continued)

Selecting Speaker Setting Modes

Details how to navigate and select various speaker setting modes (front, surround, subwoofer).

Adjusting Speaker Settings

Explains how to adjust specific settings like distance difference and Dolby Virtual delay time.

Enjoying Surround Sound

Selecting Decoding and Surround Modes

Guides on selecting appropriate decoding and surround modes for various digital and analog signals.

Surround Sound Operations

Stereo Mode Operations

How to select or cancel stereo mode for surround sound operation.

Dolby Pro Logic II Music Parameters

Adjusting parameters like Panorama, Center Width, and Dimension for music surround.

Channel Level Adjustment

Selecting and Adjusting Channels

Guides on selecting individual channels (Front, Center, Surround, etc.) and adjusting their levels.

Channel Level Adjustment (Continued)

Using Test Tone for Level Adjustment

Explains how to use the test tone function for precise channel level calibration.

2-Channel Downmixing

How to reproduce multi-channel signals through two speakers or headphones.

Listening to Radio

Radio Tuning Methods

Covers auto tuning, manual tuning, and presetting radio stations for easy access.

Listening to Radio (Continued)

Preset Station Operations

How to tune to preset stations, manage FM stereo/mono, and scan presets.

Recording and Dubbing

Recording to Tape

Instructions for recording audio from various sources onto a tape deck.

Dubbing Video Components

Guides on dubbing video and audio signals from one component to another (e.g., VIDEO 2 to VIDEO 1).

Digital Audio Recording

Digital Recording Setup

Explains how to connect for digital recording and select digital inputs for high-quality sound.

Other Functions

Dynamic Range Compression

Discusses compressing dynamic range for Dolby Digital sources for clearer night-time viewing.

Sleep Timer and Display Brightness

Covers operating the sleep timer and adjusting the brightness of fluorescent displays.

On-Screen Display (OSD)

Current Status Display

Describes how the OSD displays current operation status, like input source or test tone.

Menu Screen Navigation

Explains how to access and navigate the main menu for system setup and adjustments.

On-Screen Display (OSD) Menu Navigation

Speaker and Function Setup

Details menu options for Speaker Setup and Function Select within the OSD.

Surround Mode and Level Adjustments

Covers menu options for selecting surround modes and adjusting channel levels (CH LEVEL TRIM).

AUTO OSD Setting

Explains how to enable or disable the AUTO OSD feature for status displays.

Troubleshooting

Common Problems and Solutions

A comprehensive guide to diagnose and resolve common issues with the receiver.

Specifications

Amplifier Section Specifications

Technical details for the amplifier, including power output and distortion levels.

Digital Audio, Video, and Tuner Specs

Technical specifications for digital audio, video inputs, and FM/AM tuner sections.

General Specifications

General technical details such as power supply, consumption, dimensions, and weight.

Setup Code Table

TV Remote Codes

A list of setup codes for controlling various TV brands with the universal remote.

VCR Remote Codes

A list of setup codes for controlling various VCR brands with the universal remote.

Setup Code Table (Continued)

Cable Box (CBL) Remote Codes

Setup codes for controlling cable boxes from different manufacturers.

DVD Player Remote Codes

Setup codes for controlling DVD players from various brands.

Setup Code Table (Continued)

AUX Home Automation Codes

Setup codes for home automation devices controlled via AUX input.

AUX DBS and Accessory Codes

Setup codes for DBS satellite receivers and various accessory devices via AUX input.

CD Player Remote Codes

Setup codes for controlling CD players from different brands.

Setup Code Table (Continued)

AUX-LD Player Codes

Setup codes for controlling LD players from various manufacturers.

AUX Amplifier Codes

Setup codes for controlling amplifiers via AUX input.

Related product manuals