-24-
Model D4902 (For Machines Mfd. Since 11/18)
OPERATIONS
4. Install table saw fence and clamp a stop block
to it behind blade so that workpiece can be
placed against stop block to properly align cut
(see Figure 30).
5. Attach a backing board to miter gauge, aligned
even with the end of the workpiece, as shown in
Figure 30.
Note: This backing board will prevent blade tear out
on workpiece when making cut.
6. Turn saw ON, then carefully and slowly push miter
gauge forward to make shoulder cut.
7. Turn saw OFF, wait for blade to come to a complete
stop, then remove workpiece.
8. Repeat Steps 3–7 for remaining three shoulder cuts.
Workpiece must not contact stop block
during cut. Clamp stop block far enough
behind blade so that workpiece will not
contact stop block during cut. Failure
to do so may result in kickback, which
can cause severe personal injury.
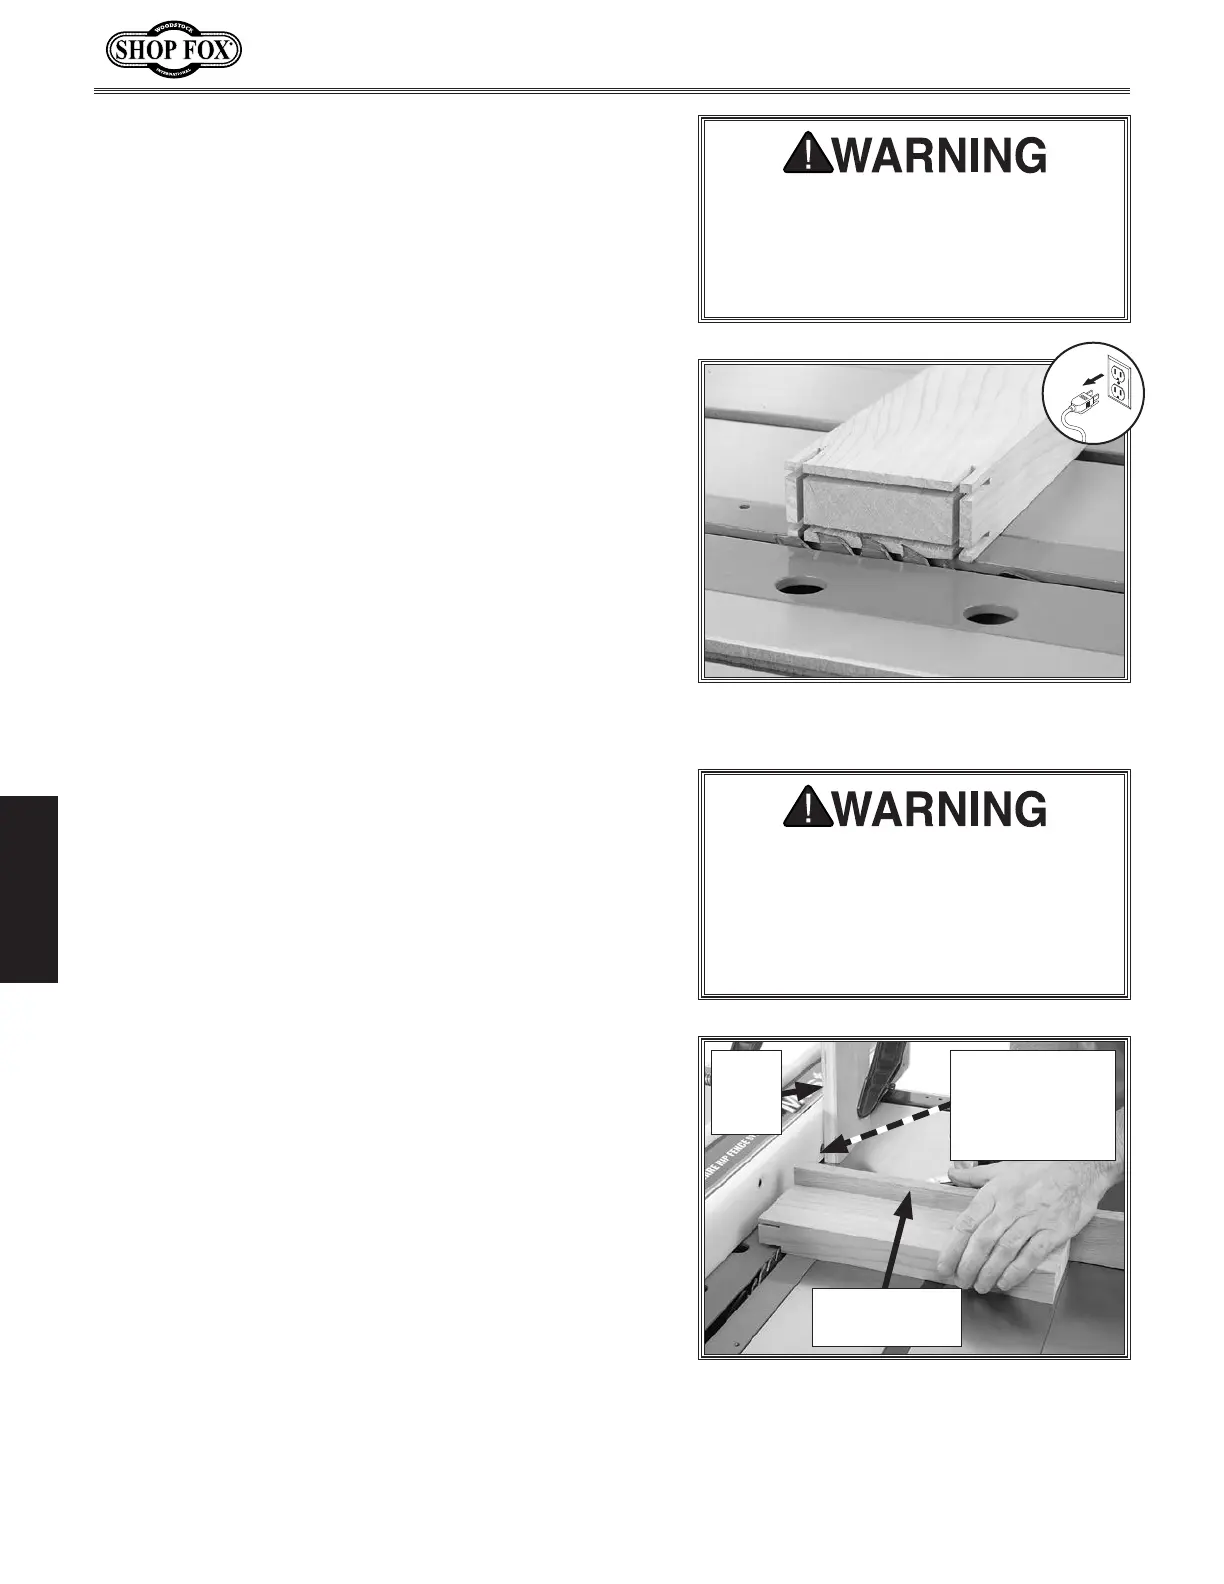
Figure 30. Making a tenon shoulder cut.
Fence
Stop
Block
Workpiece Not
Contacting
Stop Block As It
Reaches Blade
Miter Gauge
Backing Board
Figure 29. Blade height adjusted for
shoulder cut.
Cutting Tenon Shoulders
The final set of cuts will remove the waste pieces from
the previous cuts to produce the shoulders and complete
the tenon.
When all of the steps of these procedures are successfully
performed, your basic tenon is complete.
To cut tenon shoulders, do these steps:
1. DISCONNECT TABLE SAW FROM POWER!
2. Install a cross-cut saw blade.
3. Adjust blade height to remove waste pieces of
shoulders, as shown in Figure 29.
ALWAYS use a cross-cut saw blade
when making the tenon shoulder cuts.
Otherwise, the blade can aggressively
grab the workpiece causing kickback
and possible serious personal injury.
 Loading...