10
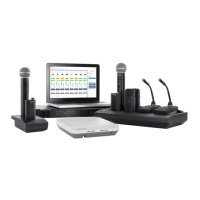
3. Remove Mics and Test the Audio
Test the audio for each microphone and adjust mic gain if necessary
from the Monitor tab of the control software. The gain should be set at a
level where the audio is registering (green/yellow) on the signal indicator
but not clipping (red).
Monitor Tab
Signal indicator
Gain adjustment
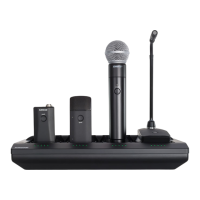
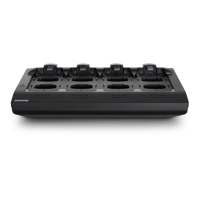
2. Link the microphones to channels.
Use the control software or the charging station to Link the microphones
to APT channels. If desired, this feature can be disabled on the charging
station so that Linking can only be performed from the control software:
- Control Software: From the Configuration page, press the Link button for
each charger in the Group.
-
Charging Station: Press and hold the Link button for 6 seconds. The LEDs
flash during the process and turn solid green once the Link is successful.
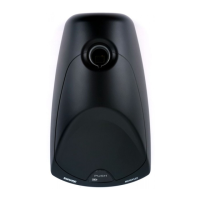
Mount the Access Point Transceiver (APT)
The APT radiates RF in a cardioid pattern that is strongest from the face of
the device. Aim the APT face towards the intended coverage areas. Do not
block the line-of-sight and keep away from large metal objects.
Important: Always perform a "walk around" test to verify coverage before
using a wireless system during a speech or performance. Experiment with
antenna placement to find the optimum location. If necessary, mark "trouble
spots" and ask presenters or performers to avoid those areas.
Aim toward microphone area
APT Face
 Loading...