Shure Incorporated
7/50
1.
2.
3.
1.
2.
3.
4.
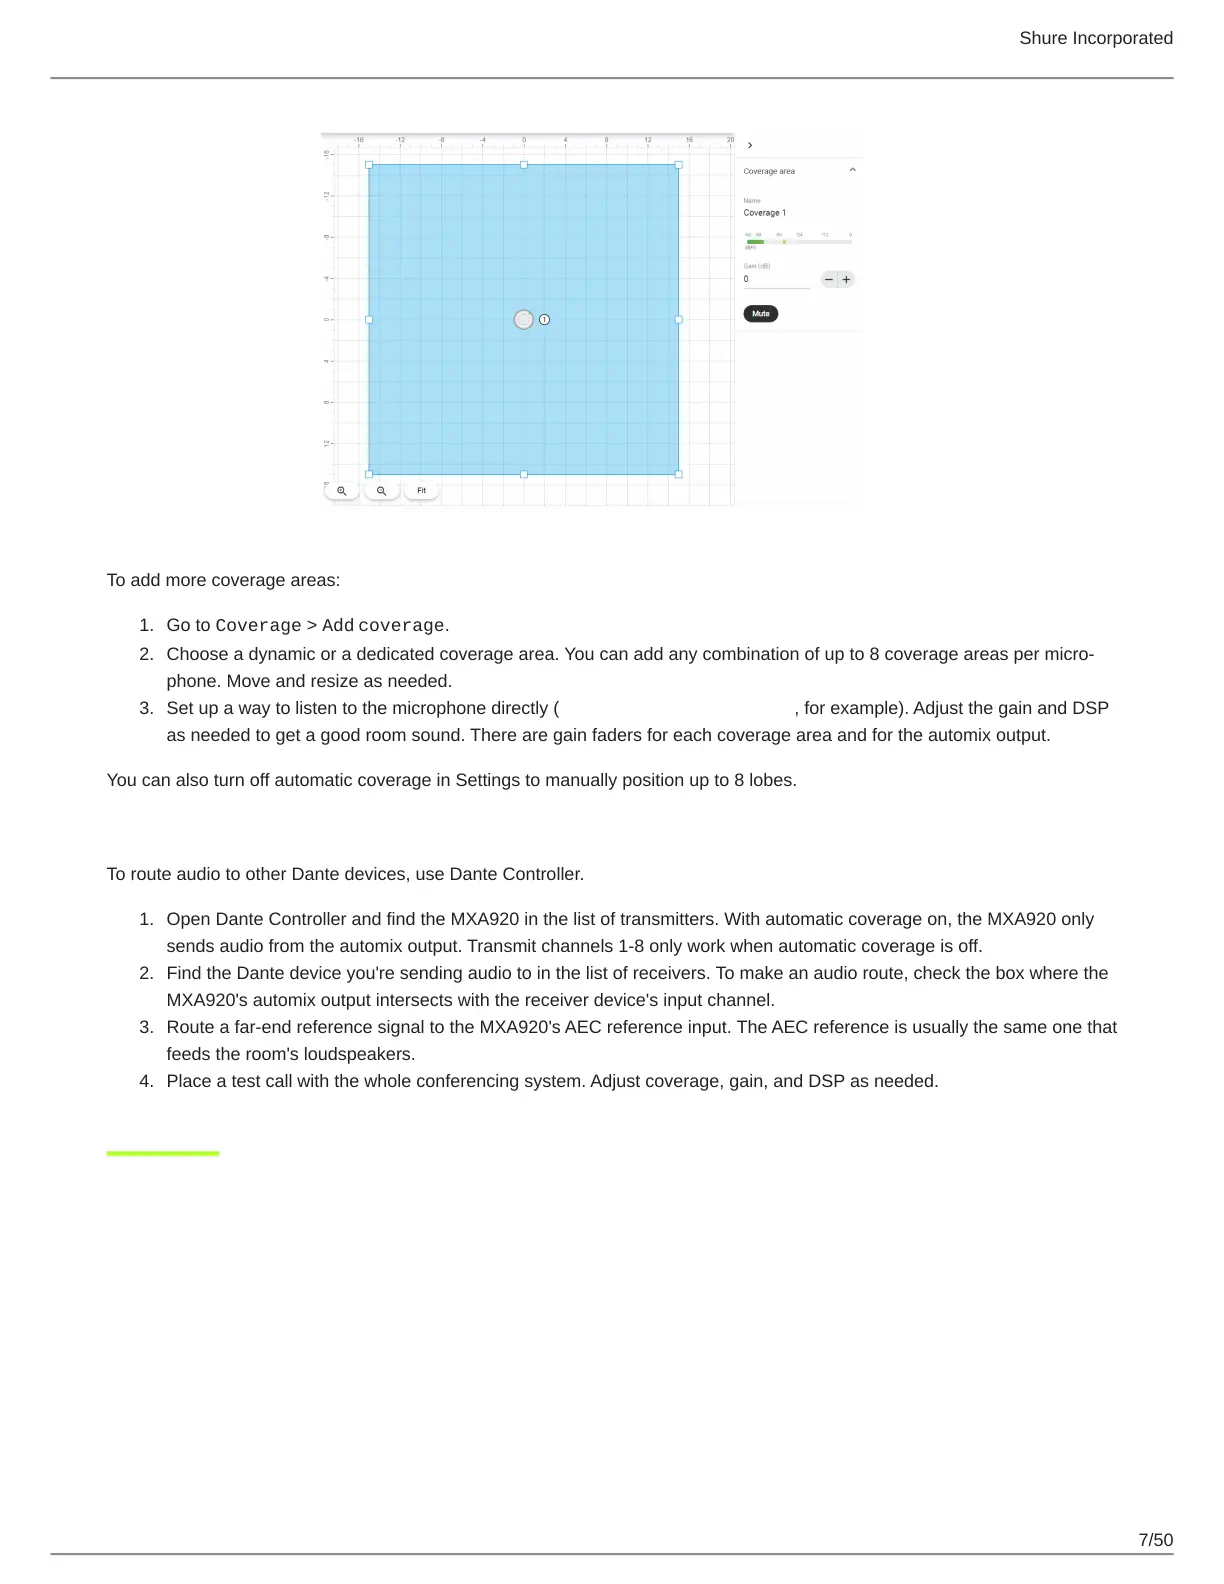
To add more coverage areas:
Go to Coverage > Add coverage.
Choose a dynamic or a dedicated coverage area. You can add any combination of up to 8 coverage areas per micro
phone. Move and resize as needed.
Set up a way to listen to the microphone directly (with a Dante headphone amp, for example). Adjust the gain and DSP
as needed to get a good room sound. There are gain faders for each coverage area and for the automix output.
You can also turn off automatic coverage in Settings to manually position up to 8 lobes.
Step 3: Route Audio
To route audio to other Dante devices, use Dante Controller.
Open Dante Controller and find the MXA920 in the list of transmitters. With automatic coverage on, the MXA920 only
sends audio from the automix output. Transmit channels 1-8 only work when automatic coverage is off.
Find the Dante device you're sending audio to in the list of receivers. To make an audio route, check the box where the
MXA920's automix output intersects with the receiver device's input channel.
Route a far-end reference signal to the MXA920's AEC reference input. The AEC reference is usually the same one that
feeds the room's loudspeakers.
Place a test call with the whole conferencing system. Adjust coverage, gain, and DSP as needed.
 Loading...