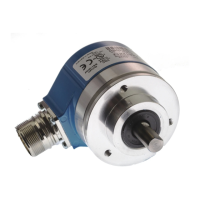
Absolute Encoder
ATM60 SSI
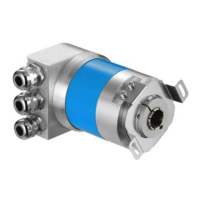
Encoders with face mount flange
This flange design offers two installation opti-
ons:
• via the threaded holes on the flange side
• by clamping the mounting spigot
Installation via the threaded holes on the
flange side (Figure 3)
Lock the drive shaft on the application side.
Mount the coupling (1); ensure that it does
not touch the Encoder flange.
Push the Encoder, with mounted coupling (1),
onto the drive shaft and centring/clamping
arrangement (3).
Fix the Encoder with 3 M4 screws (2), fix the
coupling (1) to the drive shaft.
The coupling must not be subjected to any
axial stresses.
Make the electrical connections with the vol-
tage switched off. Switch on the voltage and
check the operation of the Encoder.
Installation via the mounting spigot
(Figure 4)
Since the mounting spigot is also the means
of centring, the clamping device must be con-
structed such that clamping firmly does not
lead to an invalid angle or shaft offset.
Lock the drive shaft on the application side .
Mount the coupling (1); ensure that, when the
shaft is rotated, it does not touch the Enco-
der flange. Push the Encoder, with mounted
coupling (1), onto the drive shaft, and the
mounting spigot into the clamping device (2).
Clamp the Encoder with the screw (3). Fix the
coupling (1) on the drive shaft.
The coupling must not be subjected to any
axial stresses.
Make the electrical connections with the vol-
tage switched off. Switch on the voltage and
check the operation of the Encoder.
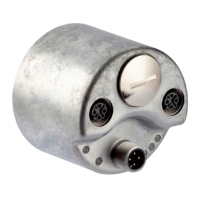
Encoders with stator coupling for blind
hollow shaft (Figure 5)
Lock the drive shaft on the application side.
Loosen the Hexagonal screw (2) on the clam-
ping ring (1).
Push the Encoder and collet onto the drive
shaft.
Take note of installation Figure (6).
Fix the torque support (3) with 4 M3 screws
(4) and washers.
Firmly tighten the hexagonal screw (2) on the
clamping ring (1).
Tightening torque 1.3 Nm
Make the electrical connections with the vol-
tage switched off. Switch on the voltage and
check the operation of the Encoder.
Issue 03 / 10 • The right to make technical changes is reserved 8013417
GB
0900_sick_MA_8013417.indd 70900_sick_MA_8013417.indd 7 13.05.11 09:5513.05.11 09:55
 Loading...