CE1G2201xx 2015-02-27 7/49
1.1.1 Sensor calibration: DIP switch 1
Set the DIP switch to ON and press the DIP switch reset button:
The display shows CAL. The room temperature currently acquired
blinks.
Press
or to make a recalibration of max. ± 5 °C. To save
the entry, set the DIP switch to OFF and press the DIP switch reset
button (also refer to Fig. ).
1.1.2 Setpoint limitation: DIP switch 2
DIP switch ON: Setpoint limitation 16…35 °C
DIP switch OFF: Setpoint limitation 3…35 °C
(factory setting)
Save the entry by pressing the DIP switch reset button.
1.1.3 Temperature display in °C or °F:
DIP switch 3
DIP switch ON: Temperature display in °F
DIP switch OFF: Temperature display in °C
(factory setting)
Save the entry by pressing the DIP switch reset button
(also refer to Fig.
).
1.1.4 Control action: DIP switches 4 and 5
DIP switch 4 ON and 5 ON: PID self-learning
Adaptive control for all types of application.
DIP switch 4 ON and 5 OFF: PID 6
For fast controlled systems, applications at locations with
great temperature variations.
DIP switch 4 OFF and 5 ON: PID 12
For normal controlled systems, applications at locations
with normal temperature variations.
DIP switch 4 OFF and 5 OFF: 2-Point
For difficult controlled systems, 2-position controller with a
switching differential of 0.5 °C (factory setting).
Save the entry by pressing the DIP switch reset button
(also refer to Fig.
).
1.1.5 Radio clock: DIP switch 6
Can only be used with REV..DC (with integrated DCF77 receiver
for time signal from Frankfurt)!
DIP switch ON: Clock runs on built-in quartz
DIP switch OFF:
Time signal DCF77 from
Frankfurt
Save the entry by pressing the DIP switch reset button
(also refer to Fig.
).
1.1.6 DIP switch reset
When changing one or several DIP switch positions, press the DIP
switch reset button to make a DIP switch reset.
Otherwise, the previous settings will be maintained!
(Also refer to Fig.
).
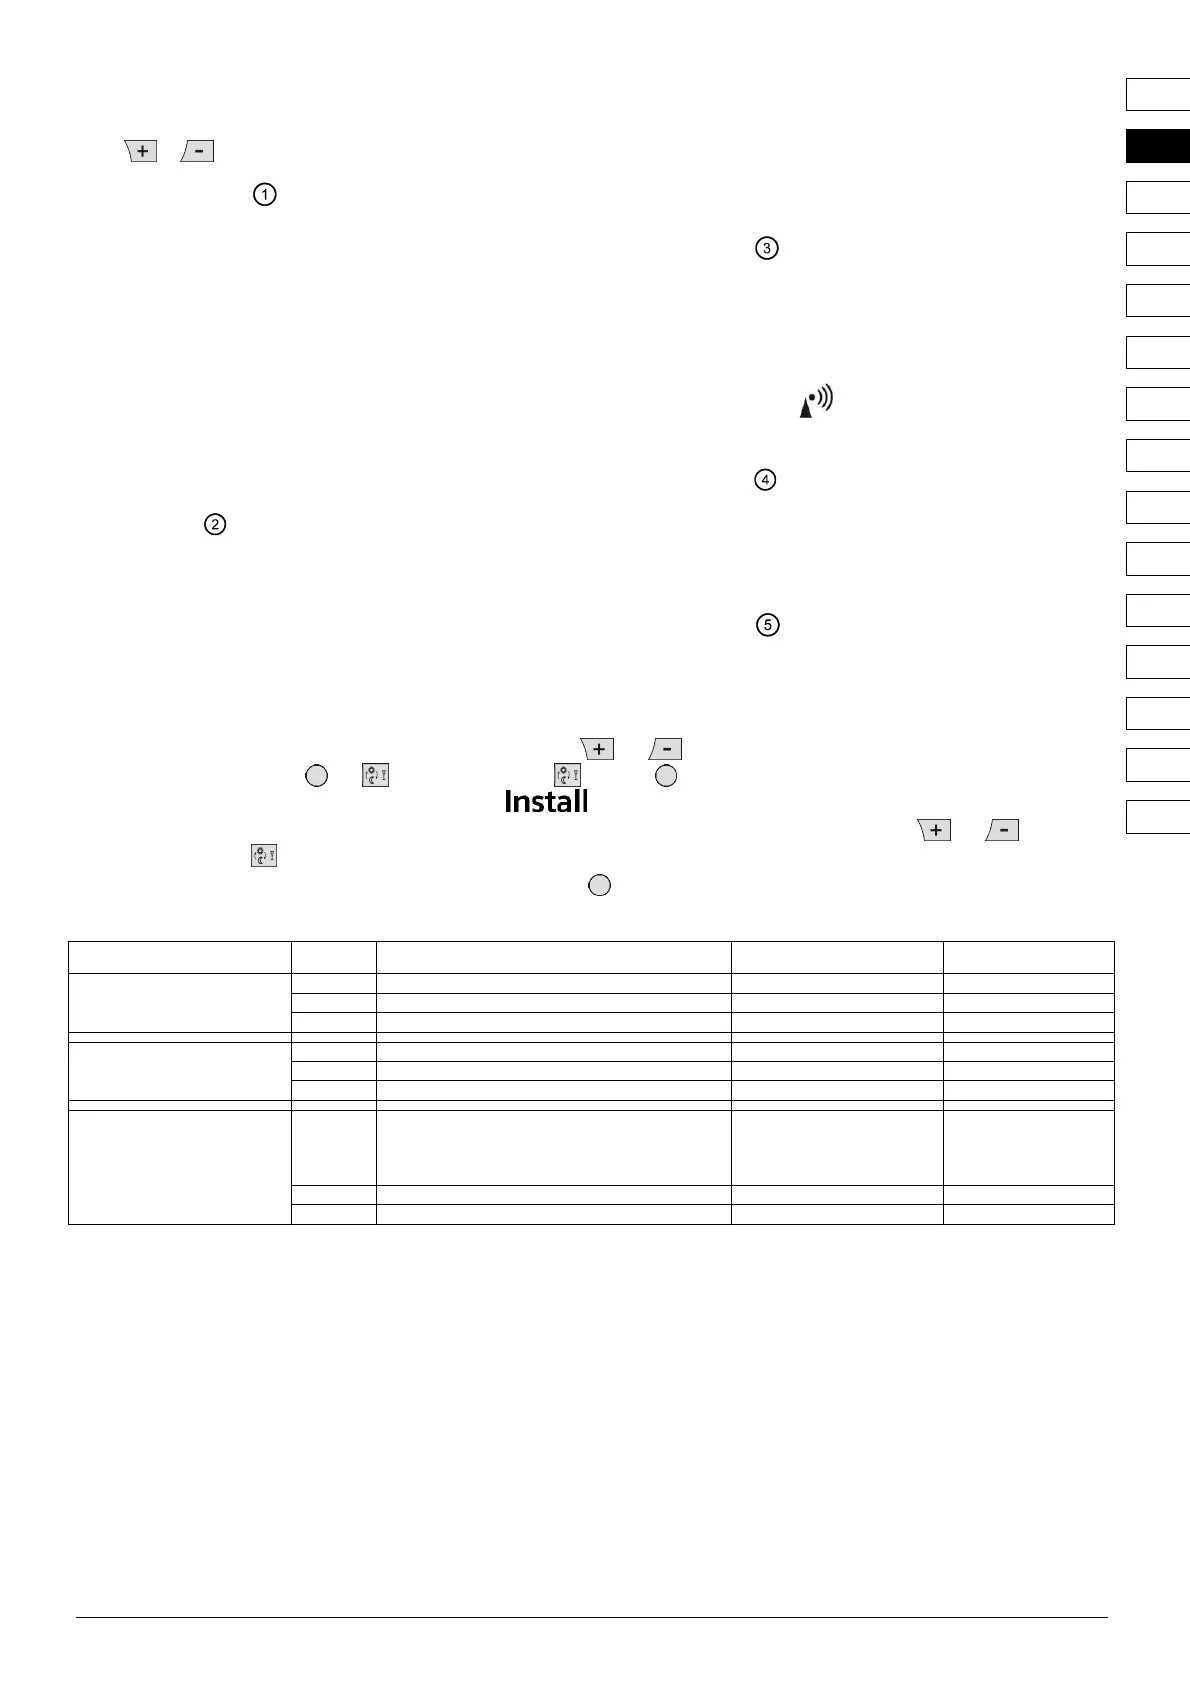
2 Accessing the expert level
Move the selector slider to the RUN position and press simultaneously and for 3 seconds, then release the buttons and, within 3
seconds, press simultaneously
and for 3 seconds, release and keep depressed for another 3 seconds. This enables you to
access the expert level for making the settings on that level.
on display (also refer to Fig. G).
Starting with code 00, the display shows the choice of languages. Navigation on the expert level is made possible with and . Confirm
the settings by pressing
.
The expert level is quit by pressing the operating mode selection button
.
Code list
Function block Code Name Factory setting Your setting
Basic settings
00 Language English
01 Sensor calibration off
02 Switching differential 2-point 0.5 °C
LCD settings
10 Illumination time 10 seconds
11 Background brightness 0
12 Contrast 0
Clock settings
30
Time zone
Deviation from time signal received from
Frankfurt (Central European Time CET)
(refer to Note 1)
0 hours
31 Start of summer time (refer to Note 2) March 31 (31-03)
32 End of summer time (refer to Note 3) October 31 (31-10)
Note 1:
If the radio clock is not active or not present, this setting has no impact.
With the radio clock active, the time signal received from Frankfurt is shifted by the value set under code 30 (time zone).
Note 2:
If the radio clock is not active or not present, the time change always takes place at 02:00 on the Sunday before the set date.
With the radio clock active, the time change is shifted by the value set under code 30 (time zone).
Note 3:
If the radio clock is not active or not present, the time change always takes place at 03:00 on the Sunday before the set date.
With the radio clock active, the time change is shifted by the value set under code 30 (time zone).
DE
EN
FR
IT
NL
ES
PT
CS
HU
PL
SV
FI
DA
TR
EL
 Loading...