RWD62U Controller Installation and Commissioning Guide Document Number 129-410
October 1, 2004
Siemens Building Technologies, Inc. Page 9 of 10
Installation
Mounting Notes
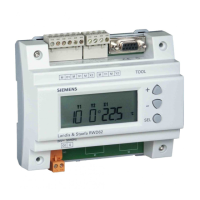
TH0741R1
AB C D
Figure 4. Mounting Options.
The RWD62U can be mounted as follows:
Observe all local installation and mounting regulations.
A On a DIN rail (EN 50 022-35 x 7.5) at least 4.75 inches (120 mm) long for
RWD62U.
B Wall-mounted with two screws. (Minimum length of the screws should be
2.75 inches (70 mm) (φ 3.2 mm).
C Front-mounted using standard elements:
• One DIN rail 5.90 inches (150 mm) long for RWD62U
• Two hexagonal placeholders 1.96 inches (50 mm)
• Washers
• Screws
NOTE: (Ensure all terminations are tightened before final mounting to front
panel.)
D Inside the ARG62.21.
WARNING:
There must be a minimum of 0.31 inches (8 mm) distance from
terminations to panel/enclosures to avoid electric shock.
Electrical Installation
Notes
• Standard cables can be used for the controller. However, when mounting in an
environment greatly exposed to EMI, use only shielded cables.
• The RWD62U is designed for 24 Vac operating voltage.
• Use safety insulating transformers with double insulation as per EN 60742; they
must be designed for 100% Duty.
• When using several transformers in one system, the connection terminals G0
must be galvanically connected.
• Supplying voltages above 24 Vac to low voltage connections may damage or
destroy the controller or any other connected devices. Additionally, connections
to voltages exceeding 24 Vac endanger personal safety.
 Loading...