Document Number 129-410 RWD62U Controller Installation and Commissioning Guide
October 1, 2004
Page 8 of 10 Siemens Building Technologies, Inc
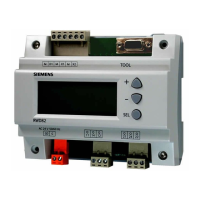
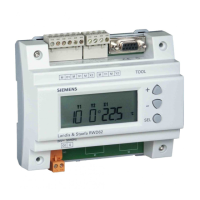
Wiring Terminals
G0
Y2
D1 M X1 M X2
M
G
M
Y1 M
Tool
TH0800R1
NOTE: Screwed terminals for cables with min
2 × 16 or 1 × 14 AWG.
Figure 2. Wiring Terminals.
G, G0 24 Vac supply
(SELV 24 Vac power supply)
M Ground (G0) for signal inputs
and universal inputs
X1 Signal input (main input:
Siemens Ni 1000, Pt 1,000
and 0 to 10 Vdc)
X2 Signal input (Aux. Input:
Siemens Ni 1000, Pt 1000, 0
to 10 Vdc and remote setting
unit)
Y1, Y2 Analog outputs (0 to 10 Vdc)
D1 Digital input
Tool Communication port with PC
(9-pin plug)
Wiring Diagram
Y1
G
Y1
S1
D1
G0
Y..
BM
X1 X2MM
RWD0061R1
X1
M
M
G0
G
SN
24 Vac
N1
TOOL
PC
Y2
G
BM
X2
G
M Y2
Figure 3. Wiring Diagram.
G, G0 Power
N1 RWD62U controller
X1 Room temperature
sensor
(Termination G appears when
X2 is
an active sensor)
X2 Auxiliary sensor or digital input
S1 Time clock or switch
Y1 Heating control valve with
0 to 10 Vdc input
Y2 Cooling control valve with
0 to 10 Vdc input
PC Personal computer
(optional set-up only)
CAUTION:
The TOOL signal ground is galvanically connected to G0 inside the controller. If the signal line of the
computer is grounded to Earth, the G0 line after TOOL connection will be grounded as well. This will
change the SELV to a PELV.
 Loading...