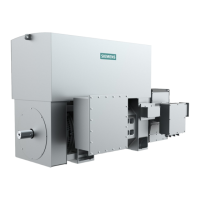
9.3.4 Bearings
9.3.4.1 Removing roller bearings
Preparation
The following preparations are required before removing the rolling bearings.
● Bring the motor into a horizontal position.
● Remove the coupling on the drive end or make the shaft extension freely accessible.
● Remove any mounted components and instruments at the DE and NDE:
– Unscrew the grease removal valve, if present.
– Unscrew the relubrication tubing.
– Unscrew the bearing PT100 and the installation tube.
– Unscrew the shock pulse measurement locations with pipe.
● Depending on the particular version, there could also be a sound absorber, air inlet shroud
and fan; also remove these.
For a schematic diagram of the respective component layout, see the chapter "Spare parts
(Page 91)".
Procedure
1. Remove the bearing mounting components.
– Remove the outer bearing cover if one is being used.
Remove the sealing ring (Page 87).
If there is a labyrinth sealing ring, then also remove this.
– Ensure that the inner bearing cover is no longer attached to the bearing housing or end
shield.
– Support the rotor for the removal of bearing housing or end shield.
– If necessary, remove the bearing housing from the end shield.
– Remove the end shield. Depending on the shaft height, rolling bearing type and design,
it is either a bearing head version or a bearing housing version.
– Remove the locking elements from the shaft; depending on the version, either a locking
ring or shaft nut.
2. Remove the rolling bearing: Depending on the particular version, together with the grease
slinger or without.
Maintenance
9.3 Corrective Maintenance
SIMOTICS HV C 1NA14544WA600AG0-Z
86 Operating Instructions 06/2018
 Loading...