Required tools
● Standard set of tools with screwdrivers, screw wrenches, socket wrenches, etc.
● Torque wrenches from 1.5 Nm up to 100 Nm
● 600 mm extension for socket wrenches
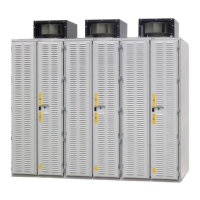
Interconnecting the power cells
All power cells in the module have an identical design. On the inside of the door, there is a layout
diagram showing how to interconnect the double submodules.
All power cells have one equipment code. The installation location can be determined by the
equipment codes entered in the layout diagram.
Removing a power cell
Proceed as follows to remove a defective power cell:
1. Check that the power cells are in a no-voltage condition at the "A" terminals of the power cell
as well as the "B" connections of the capacitor bank.
2. Remove the fiber-optic cable ⑤ at the front of the power cell.
3. Remove the locking rings ② at the water couplings. Remove the two water hoses ①,
including the couplings, at the front of the power cell.
4. Remove all screws (M8 x 20) of the busbars ⑥ of the power cells that you want to remove.
Remove the two busbars.
5. Remove all screws ③ (M5 x 16) of the upper retaining strip.
6. Remove the screws ④ (M5 x 16) of the upper retaining strip.
7. Remove the upper retaining strip.
Figure 9-7 Removing a power cell, steps 1 - 7
Maintenance
9.7 Repair
SINAMICS SH150 6SL3805
106 Operating Instructions 05/2020
 Loading...