41
GB
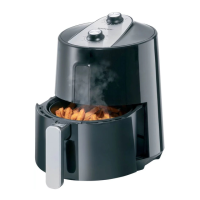
10.3 Rotary spit for chicken
or roast meat
Required parts
Rotary spit10
2 chicken skewers8
Handle11
Tray / grease drip tray17
The right size for the chicken/
roast joint
The rotary spit10 has small markings9 on
both ends (see arrow). Note: these mark-
ings9 are located only on one side of the
square.
The markings9 indicate the outermost posi-
tions where the locking screws7 may be
fastened. The maximum length of the chick-
en or roast joint is slightly smaller.
Make sure that the roast will not come into
contact with the heating element3 during
cooking with the rotation function:
- The skewered roast should be evenly
distributed around the rotary spit10
and not be too thick.
- Tie loose or protruding parts of the roast
with kitchen thread to the roast itself.
During cooking parts of the roast must
not come loose.
Procedure
1. Slide the grease drip tray17 at the bot-
tom on to the floor of the interior.
2. Position the chicken or roast joint in the
middle of the rotary spit10.
3. Insert the two chicken skewers8 with
both square holes each on to the ends
of the rotary spit10.
4. Push the chicken skewers8 so far to-
gether that the piece of meat is held
firmly. Tighten the locking screws7 in
this position.
5. Use the handle11 to insert the rotary
spit10 into the device1 (see “Inserting
the rotating basket/rotary spit” on
page 40).
__332724_1907_Heissluftfritteuse 9 in1_B8.book Seite 41 Mittwoch, 11. Dezember 2019 11:19 11
 Loading...