WK 8 A2
■ 18
│
GB
│
IE
│
NI
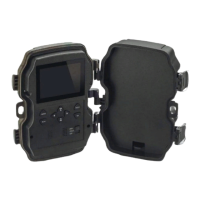
Handling and operation
In this chapter you will receive important information about proper
handling and operation of the device.
Switching on and off, changing settings
After connecting a power supply, move the mode selector switch
13
to the "TEST" position to adjust the settings described on the follow-
ing pages using the control panel buttons
15
:
♦ Press the button to switch from video to photo mode. The symbol
shown in the upper right corner of the display shows you the
current mode.
♦ Press the
button to switch from photo to video mode.
♦ Press the SHOT button to take a photo/record a video manually.
Pressing the SHOT button again ends the recording.
♦ Press the MENU button to open the settings menu.
Back
Select
Time lapse video res
Mode
Photo resolution
Photo series
Video resolution
Settings