WK 8 A2
GB
│
IE
│
NI
│
29 ■
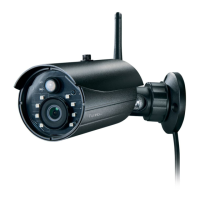
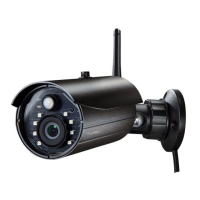
Using the wall bracket
You can mount the camera permanently on a wall or ceiling using
the supplied wall bracket. Before mounting the wall bracket you
should ensure that all screws are tight.
CAUTION
►
Ensure that there are no electric lines, water or heating pipes
installed at the proposed drilling location!
► The supplied anchors are only suitable for mounting on
concrete or stone. Before starting the installation, please check
your installation location carefully for its suitability for the an-
chors. The assembly material must be suitable for the respective
location. If in doubt, consult a professional.
NOTICE
► During assembly, make sure that you do not mount the camera
upside down. Photos and videos cannot be rotated later.
♦ Mark the drill holes
25
by holding the foot of the wall bracket at
the desired mounting location and marking the hole positions.
♦ Use a drill with a 6 mm drill bit to drill the required holes and
insert the plugs and insert the anchors
26
flush with the wall.
♦ Screw the wall bracket to the wall using the supplied screws
27
.
♦ Mount the camera with the tripod thread
9
or
20
on the tripod
screw
21
and screw the camera a little way on (about three turns).
♦ Turn the camera in the desired direction and lock it with the lock-
ing washer
23
.
♦ To move the camera into its final position, undo the two joint
wing screws
24
a little, position the camera and fix the position
by tightening the two joint wing screws.