7
ASSEMBLING YOUR KIT
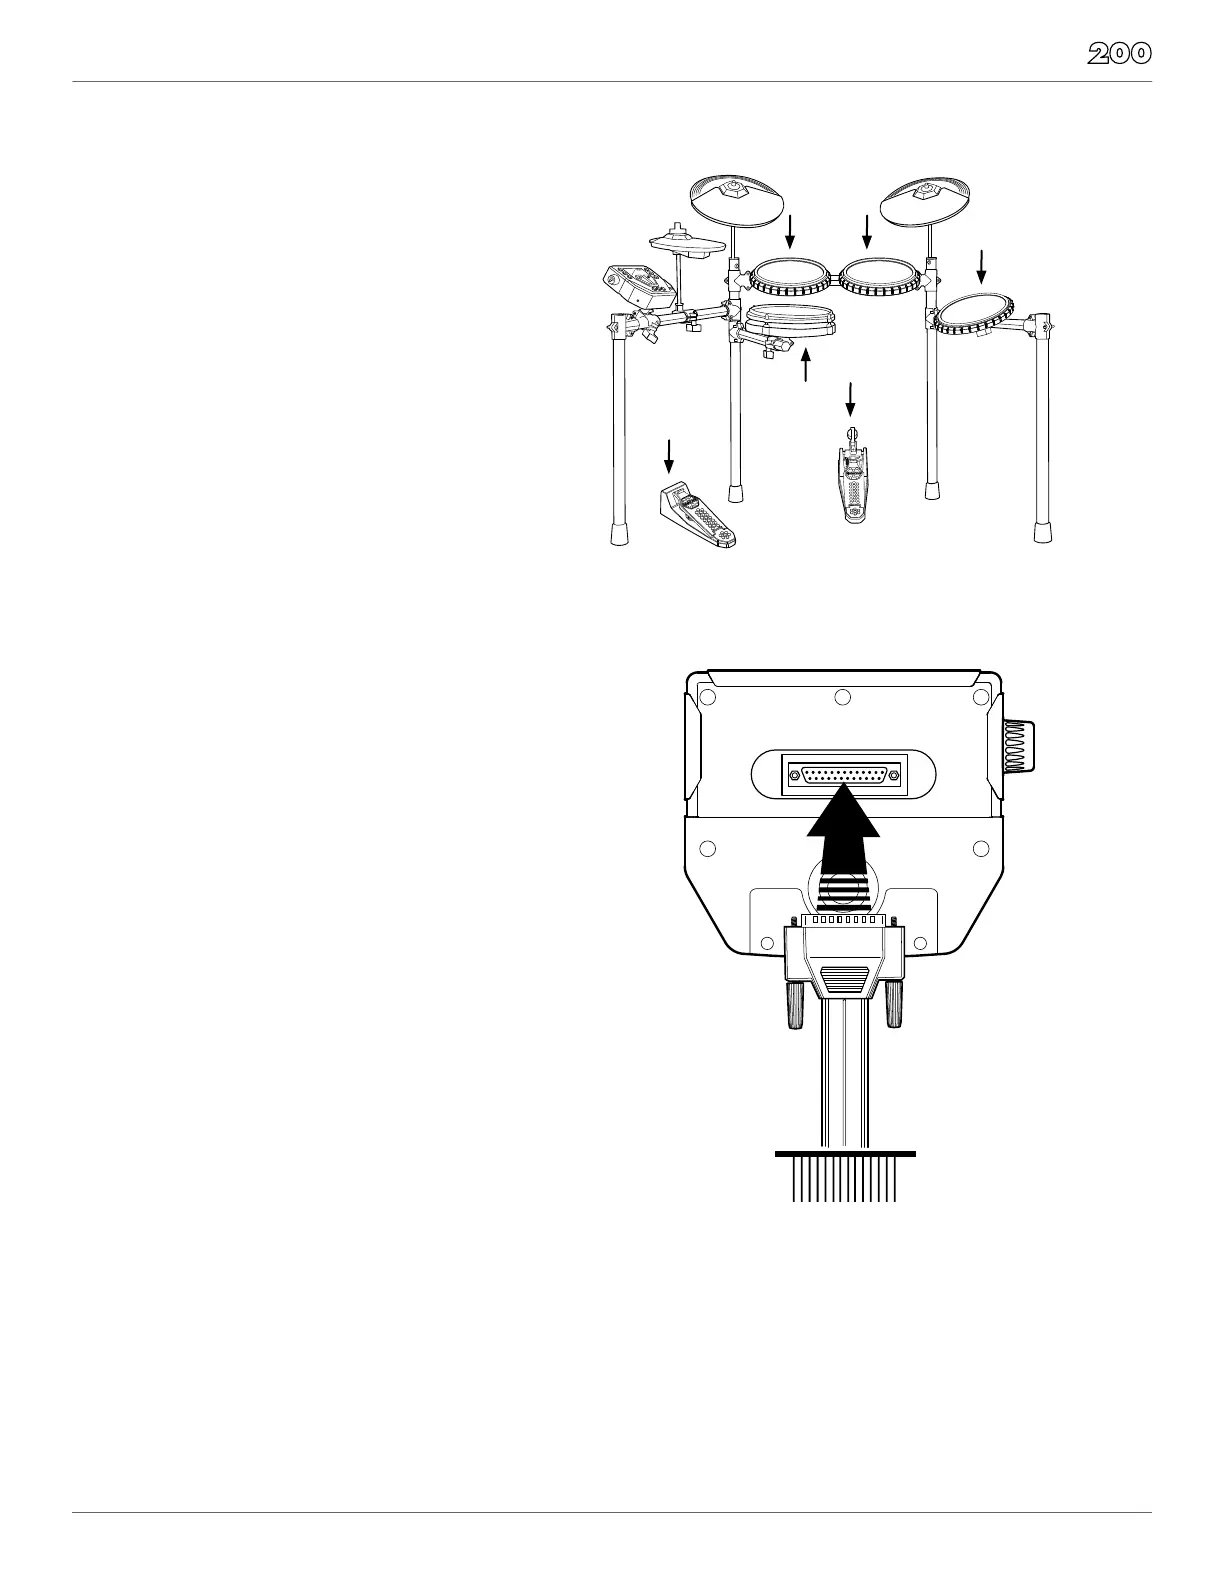
STEP 5 - POSITION PEDALS & ATTACH DRUM PADS
as illustrated below. Place the bass pedal on the
Loosen the wing screws on the drum mount
clamps then place the tom pads into the mounts
and tighten the wing screws.
Place the snare drum in the mount on the lower
into the clamp and tighten the wing screw.
STEP 6 - CONNECT MODULE TO THE PADS
Using the provided cables, connect the ¼” jacks
to the corresponding drum pads, cymbal pads
The pin connection will attach to the multi-pin
connector of the sound module. Use cable strips
to retain cables to the rack.
NOTE: The voice of the hi-hat pad is controlled
by the hi-hat pedal. Similar to a real drum kit,
the hi-hat pad functions as an ‘open hi-hat’
when the pedal is released. When the pedal is
pressed down, it functions as a ‘closed hi-hat’.