9 | P a g e
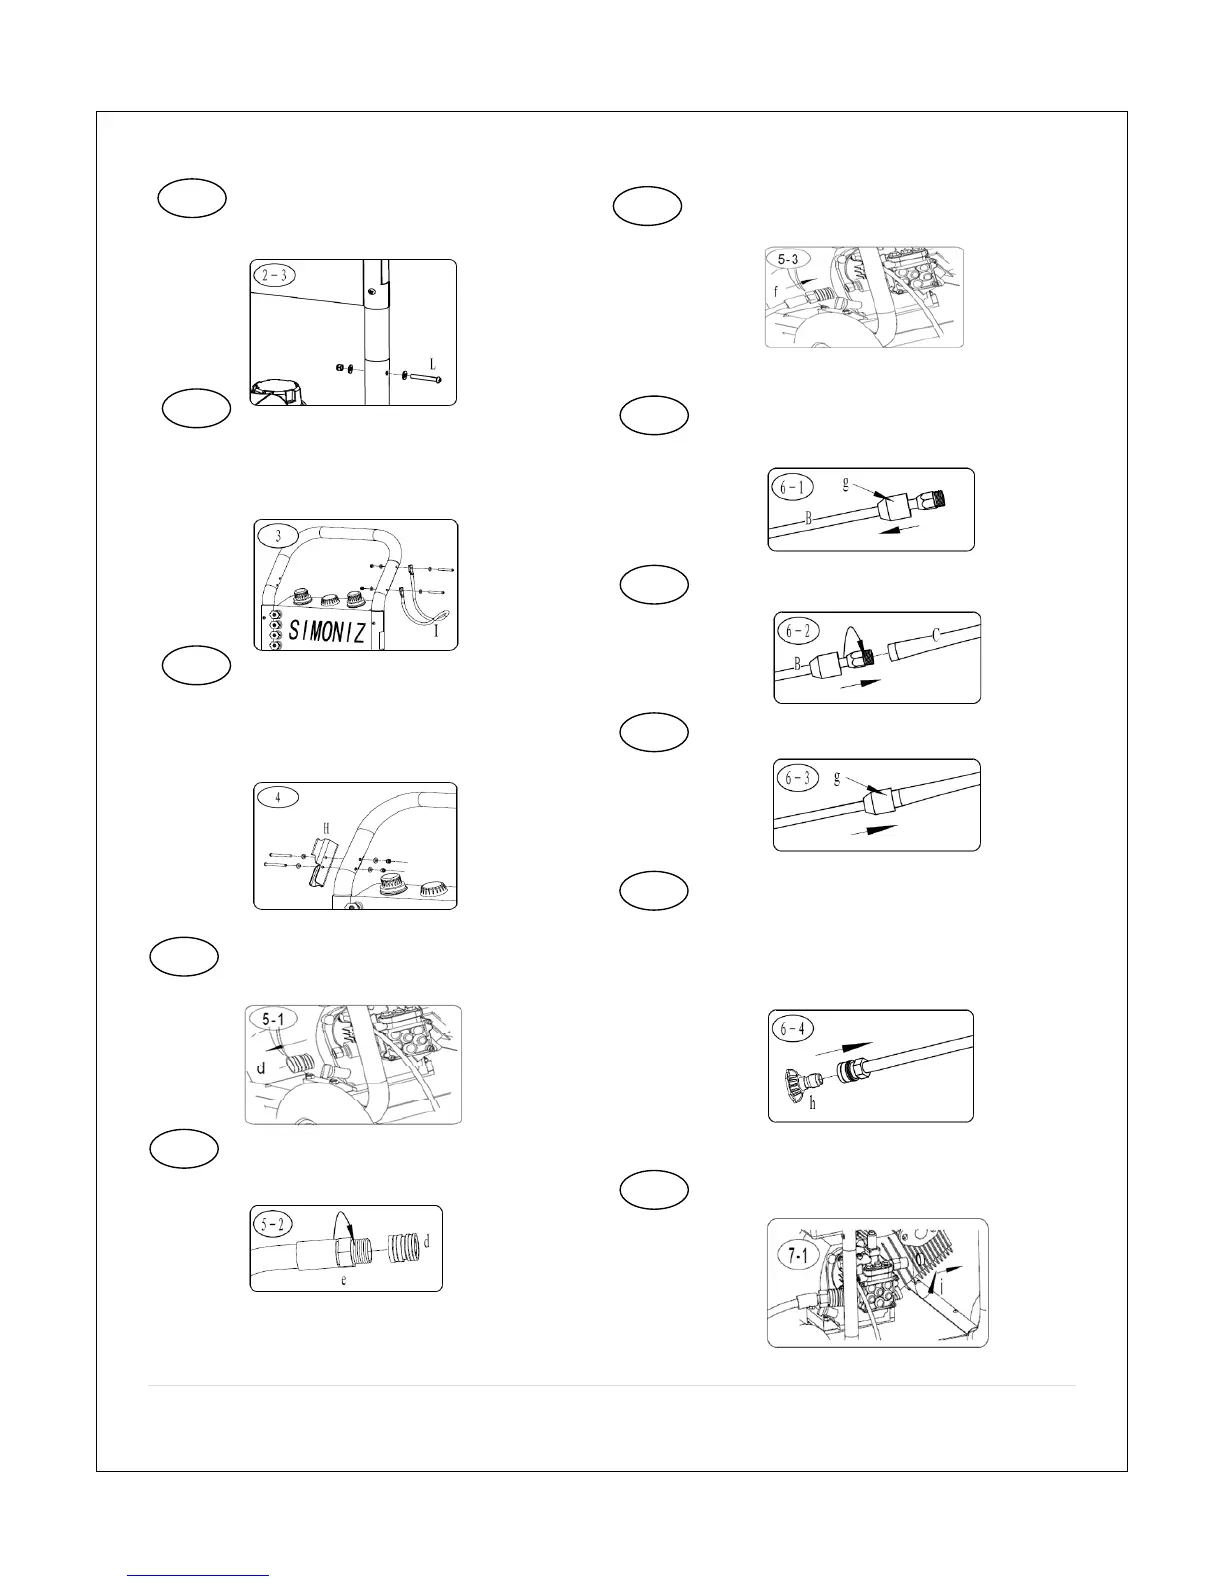
Insert bolt x1(L) through handle and
secure with nutx1 and washerx1(L).Tighten with
wrench (included) and screw driver(included)
HOSE SUPPORT ASSEMBLY
Attach the hose support (I) to right side of the
frame and secure with boltsx2, nutx2, washersx4
already attached. Tighten with wrench (included)
and screw driver(included)
GUN SUPPORT ASSEMBLY
Attach the gun support (H) to the left side of the
frame and secure with boltsx2, nutx2, washersx4
already attached. Tighten with wrench (included)
and screw driver(included)
GARDEN HOSE CONNECTION
Remove quick-connect coupler (d)
from the pump inlet.
Screw fe
male quick-connect coupler
(d) to garden hose (e).
Re-attach quick-connect coupler to
pump inlet (f).
WAND ASSEMBLY
Pull back the rubber shroud (g) to expose
the threaded fitting on the wand (B).
Attach the wand (B) to the gun(C)
Slide rubber shroud over connection point.
Pull back on quick-connect collar, insert
your required nozzle (h)and
release collar. Tug on nozzle to make sure
it is securely in place
PRESSURE HOSE CONNECTION
Unscrew air shield (i) on the pump outlet.
5-1
5-2
2-3
3
4
6-2
6-1
6-3
6-4
7-1
5-3
 Loading...