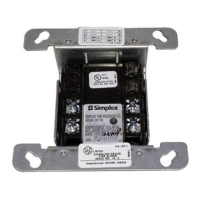
4 Wiring the FACU
This section describes how to wire the 2004-9101 control unit.
4.1 Wiring the 2004-9101 FACU
To connect power-limited (PL) systems, ensure you adhere to the following guidelines:
1. Install and route PL field wiring, for example, IDC, NAC and Aux, in the shaded areas shown in Figure 7.
2. Separate the PL circuit wiring from the NPL circuit wiring in the cabinet.
3. Maintain a minimum of 0.25 in. (6.35 mm) space between NPL and PL wiring.
4. Conductors test free of all grounds.
5. Provide a system ground for earth detection and lightning protection devices.
Note: According to NFPA780, check that this connection complies with approved earth detection. Earth detection threshold: 10 k
ohm minimum from either positive or negative terminals.
6. For all wiring, use only copper conductors unless noted otherwise.
7. Keep excess slack to a minimum inside the back box enclosure.
8. Use wire ties to neatly dress and bundle the circuit wiring together.
9. Use unshielded wire. If you are using shielded wire, leave the shield unterminated or open.
10. Do not run wires through elevator shafts.
4.1.1 Wiring the AC supply and earth ground connection
The primary power required for the 2004-9101 FACU is:
• 120 VAC, 60 Hz, 4 Amp
or
• 240 VAC, 50 Hz, 3 Amp
You do not require a jumper or switch to select the AC power as the FACU automatically detects the voltage.
To wire the AC power supply, ensure you adhere to the following guidelines:
1. Before handling the AC feed, use a voltmeter to verify that the AC feed is not live.
2. De-energize and tag the circuit to prevent injury.
3. Wire the AC power from a dedicated circuit breaker or fuse that is rated at 20 A max. in accordance with NFPA 72, NEC and local
codes.
Note:
- Each AC supply wire must be between 14 AWG minimum and 12 AWG maximum.
- AC power wiring is supervised and non-power limited.
4. Remove the insulating cover of the FACU. The cover has a high voltage warning on the front.
5. Remove the nut from the grounding stud in the cabinet.
6. Connect a 12 AWG copper ground wire from a safety ground in the electrical distribution unit to the control unit's safety ground
stud and secure with a nut.
7. Open the flap cover to connect the line and neutral wires from the AC mains to the TB1 terminal of the FACU.
8. Apply the AC power to the FACU after the system is completely installed and visually checked.
Note: The AC power must be applied before connecting the red wire to the positive terminal of battery two.
page 15 579-1402 Rev B
2004 Foundation Series Fire Alarm Control Unit Installation Guide