Page 10 579-1102 Rev H
4007ES and 4007ES Hybrid Fire Alarm Systems Installation Manual
3.3.3 Battery guidelines
A fused harness is required to connect the backup batteries. Use harness 734-304 for a NAC power supply, and harness 734-303 for an IDNAC power
supply. The harness is shipped with the panel. The mating spade lug on the battery should be 0.250 in. X 0.032 in. (6.35 mm X 0.81 mm). If another size
is needed, you need to replace the battery terminal connectors on the supplied battery harness.
• The 4007ES battery charger supports up to 33 Ah batteries (maximum) within UL864 and ULCS527 guidelines.
- 18 Ah batteries can fit inside the box.
- 25 Ah and 33 Ah batteries use 2081-9282(red 25 Ah or 33 Ah) or 4009-9801 (beige 25 Ah).
• To minimize the power losses due to wiring from the external battery box to the 4007ES, use at least a 12 AWG wire. Mount the battery box within 20
feet (609.6 cm) of the panel in accordance with the mounting instruction label in the box. All interconnecting wiring must be enclosed in conduit.
• Seismic battery brackets can be used internally in the 4007ES box (the 2081-9401: 12.7 Ah bracket, and the 2081-9402: 18 Ah bracket). For more
information on how to install the seismic brackets, see the Battery Bracket installation instructions (579-944).
3.4 Power
Final installation To finalize the installation:
1. Reinstall the power supply and the electronics.
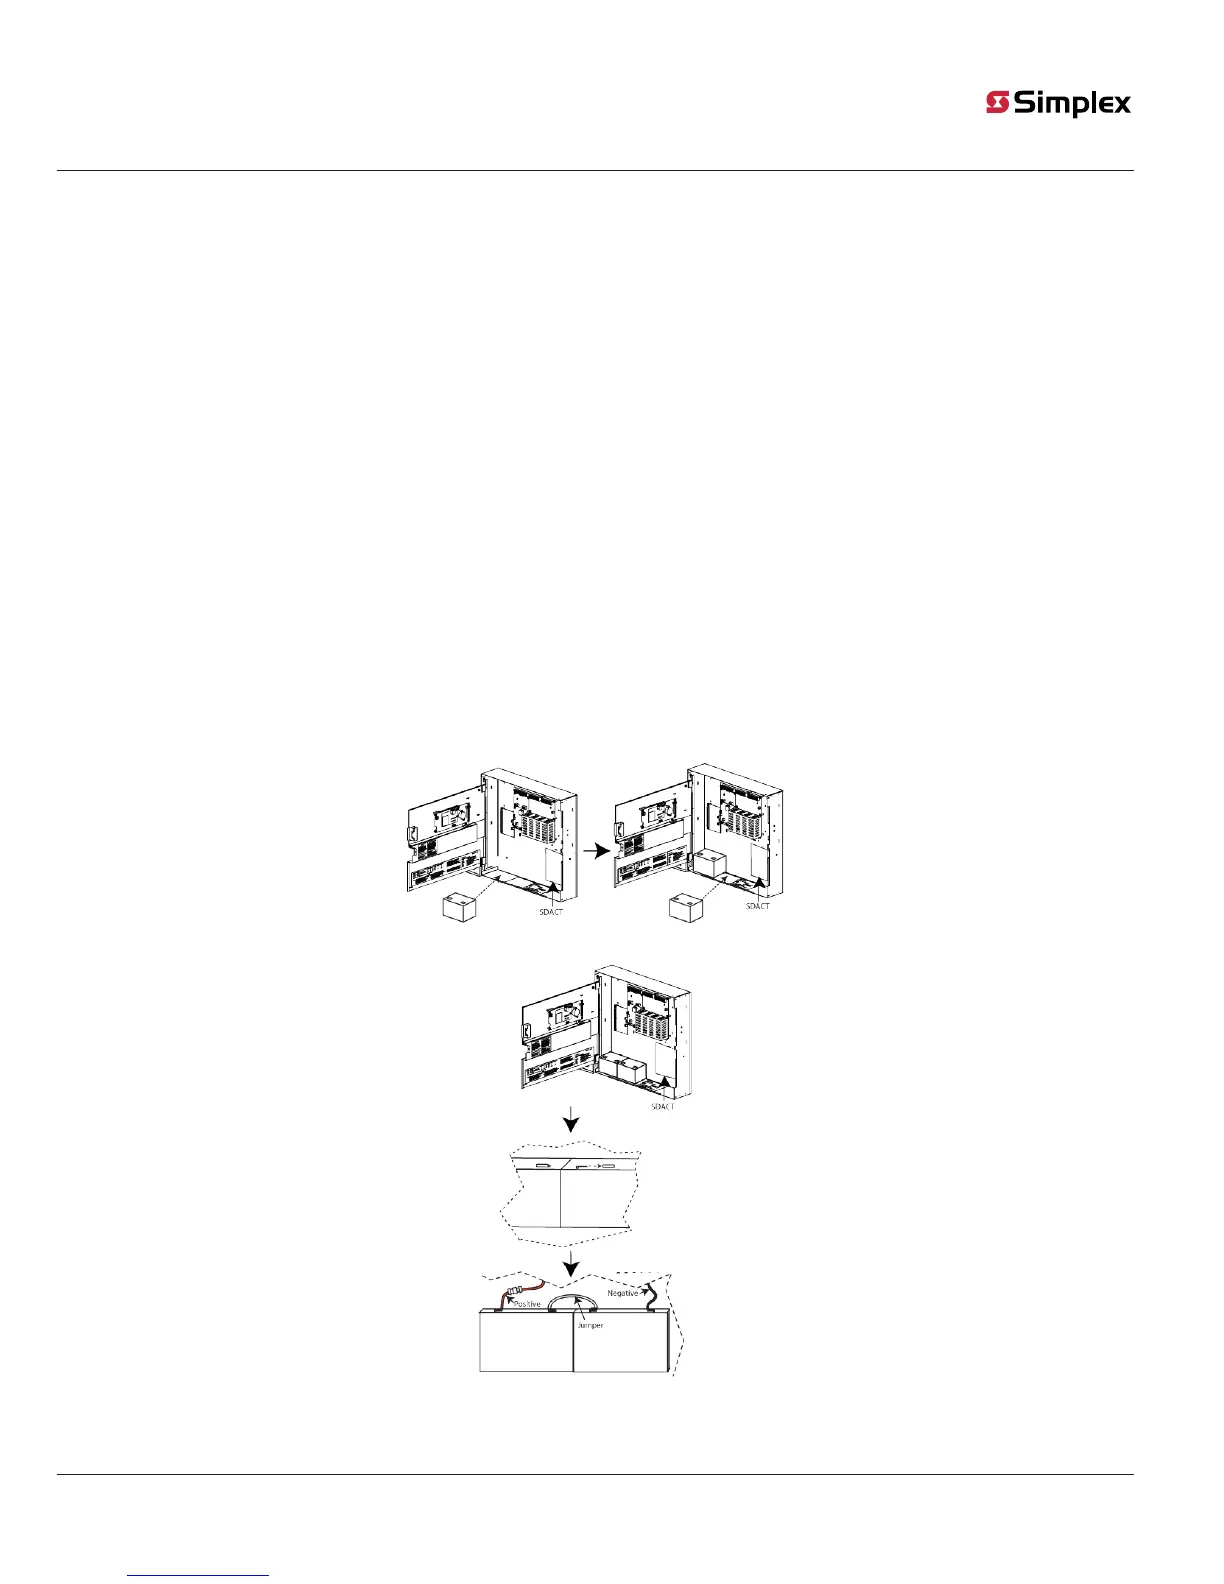
2. To install the batteries:
a. Place the first battery on the left side of the panel to avoid interference with the DACT, if installed.
NOTE: The battery terminals should face the front of the box.
b. Insert the second battery and make sure it is snugly positioned beside the first battery.
c. Wire the batteries in series such that you have 24 V. Use the white wire provided to bridge the batteries together, see Figure 9: Power supply on
page 10.
IMPORTANT: Verify all field wiring before applying any power to the panel.
Power up the system:
1. Connect the negative lead to the battery.
2. Apply AC.
3. Connect the positive to the battery.
Fig 9: Power supply

 Loading...