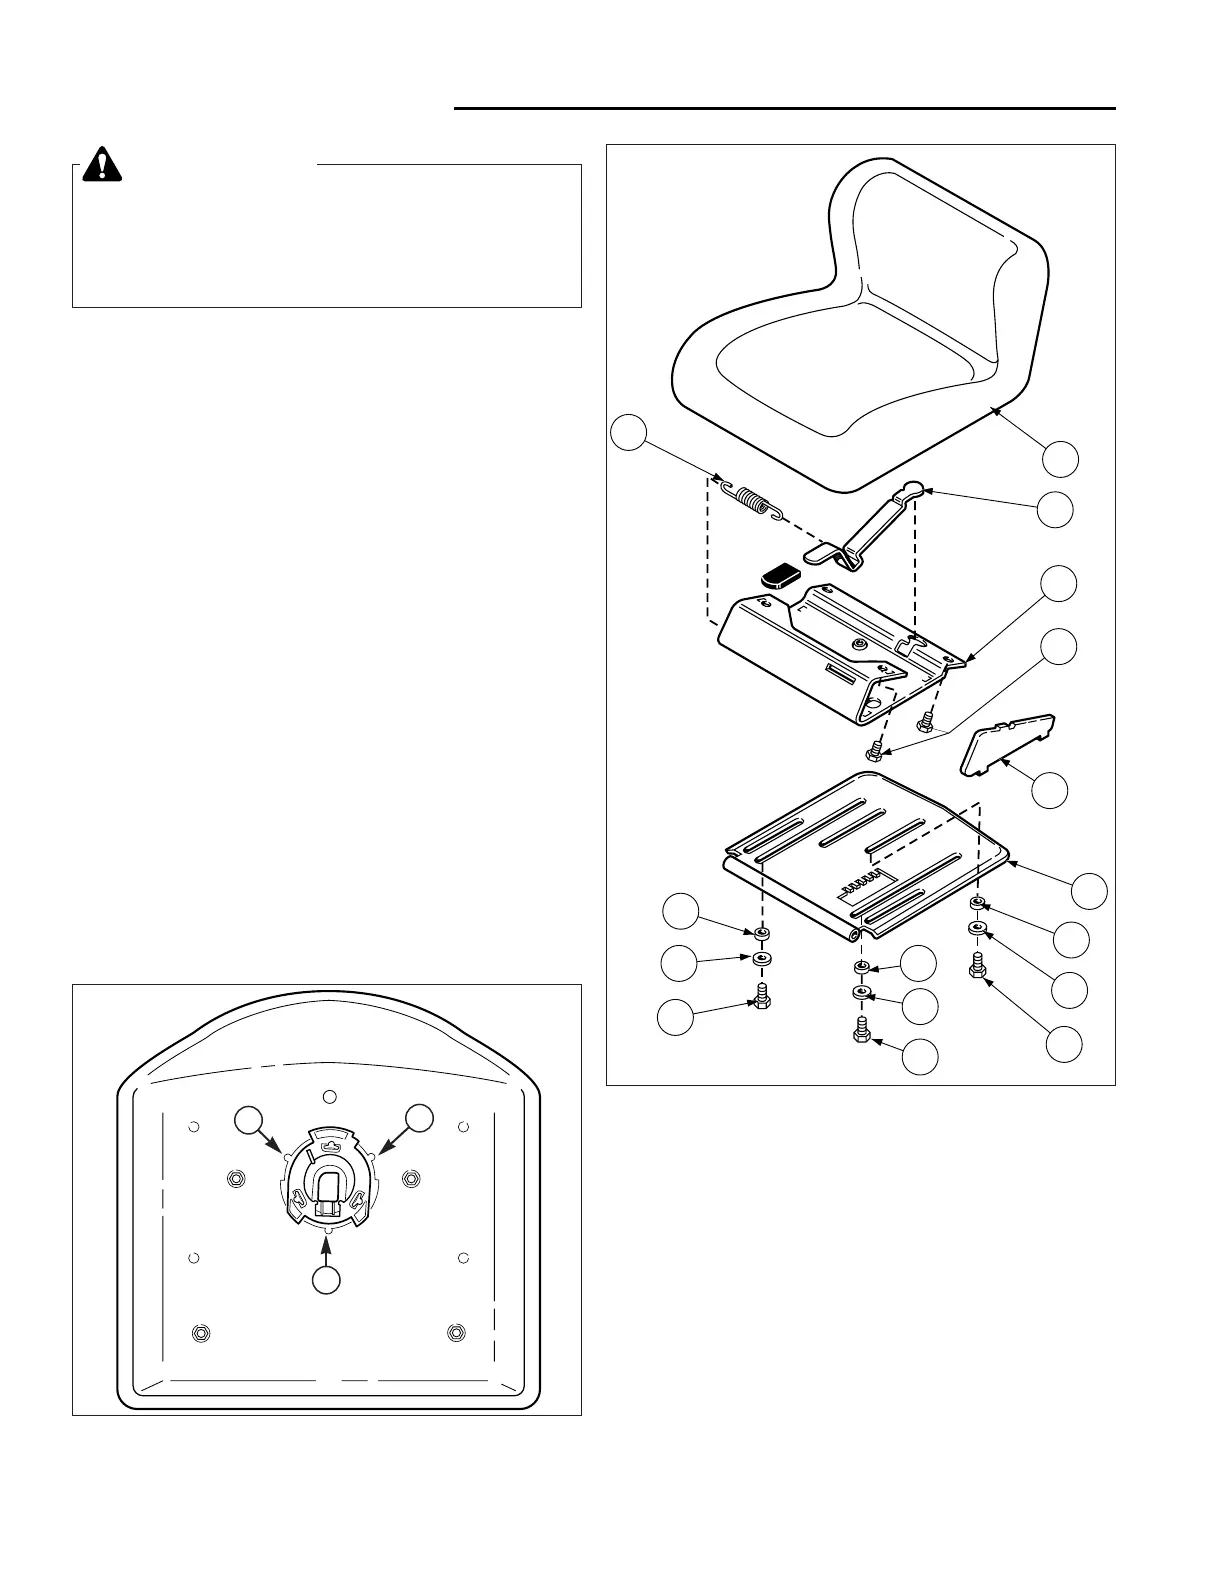
Figure 2. Seat and Slide Assembly
A. Seat
B. Seat Latch Lever
C. Seat Slide
D. Whizlock Capscrew
E. Side Panel
F. Hinge Plate
G. Spacer
H. Washer
I. Capscrew
J. Spring
WARNING
Before beginning any service work, turn the PTO
off,set the parking brake, turn the ignition switch
off, remove the key, disconnect the spark plug
wire, and disconnect the negative battery cable.
SEAT & SLIDE ASSEMBLY SERVICE
Seat Removal & Installation
1. Tilt the seat forward.
2. Remove the three capscrews (I, Figure 2), washers
(H), and spacers (G) securing the seat slide (C) to
the hinge plate (F).
3. Remove the four whizlock capscrews (D, Figure 2)
securing the seat pan (A) to the seat slide (C).
Install in reverse order of removal.
Seat Switch Replacement
NOTE: The seat switch can be tested without removing it
from the seat pan. See SEAT SWITCH TEST, Section 7
for procedure.
1. Remove the seat (see previous procedure) and dis-
connect the seat switch wire harness.
2. Push in the tabs (A, Figure 3) and turn the switch to
unlock it from the seat pan.
3. Install a new switch in the seat pan. Turn the switch
clockwise to lock into place.
4. Reconnect the seat switch and reinstall the seat.
Figure 3. Seat Switch Removal
A. Outer Locking Tabs
A
A
A

 Loading...