HOW
TO
CONTROL
THE
WIDTH
OF
ZIGZAG
STITCH
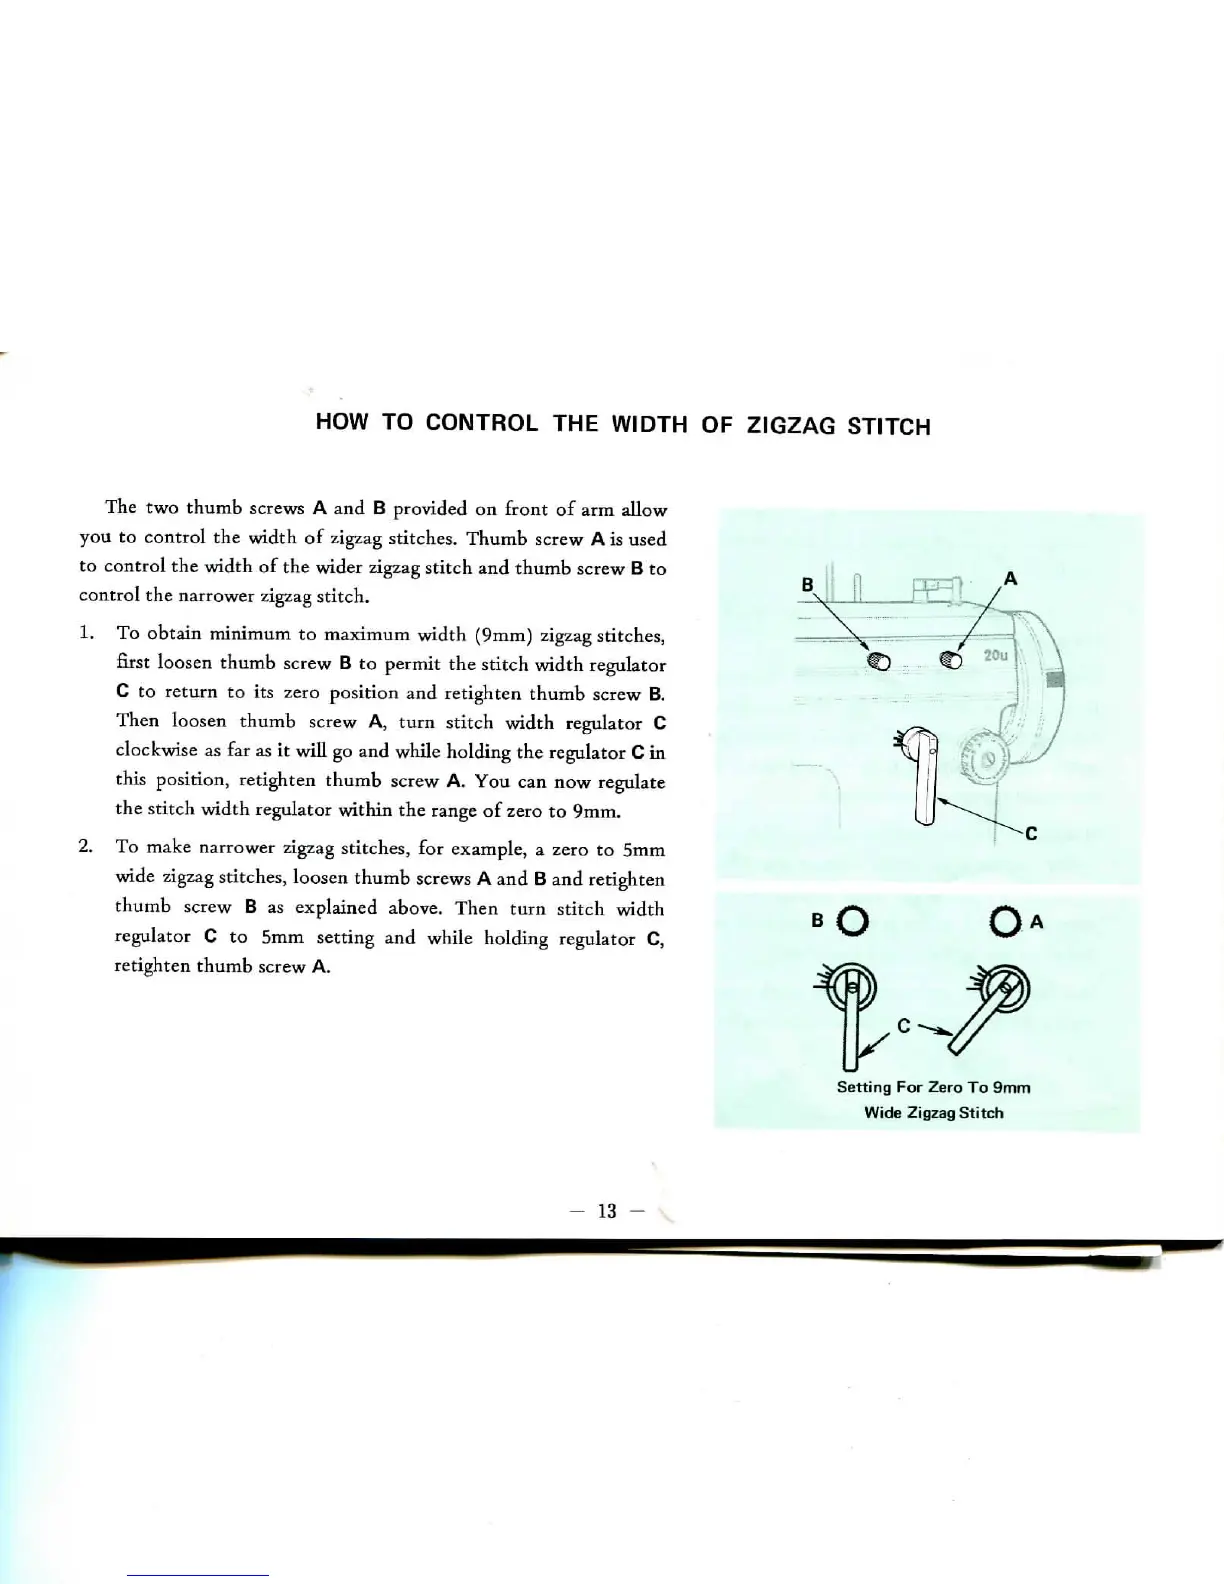
The two
thumb screws
A and B
provided
on
front
of arm
allow
you
to
control
the
width
of
zigzag stitches. Thumb screw
A is
used
to
control
the
width
of the
wider
zigzag
stitch
and
thumb screw
B to
control
the
narrower
zigzag
stitch.
1. To
obtain minimum
to
maximum width (9mm) zigzag stitches,
first
loosen thumb screw
B to
permit
the
stitch width regulator
C to
return
to its
zero position
and
retighten
thumb screw
B.
Then
loosen thumb screw
A,
turn stitch width regulator
C
clockwise
as far as it
will
go and
while holding
the
regulator
C in
this position, retighten thumb screw
A. You can now
regulate
the
stitch width regulator within
the
range
of
zero
to
9mm.
2.
To
make narrower zigzag stitches,
for
example,
a
zero
to 5mm
wide
zigzag
stitches, loosen thumb screws
A and B and
retighten
thumb screw
B as
explained above.
Then
turn
stitch
width
regulator
C to 5mm
setting
and
while holding regulator
C,
retighten
thumb screw
A.
Setting
For
Zero
To 9mm
Wide Zigzag
Stitch
-
13