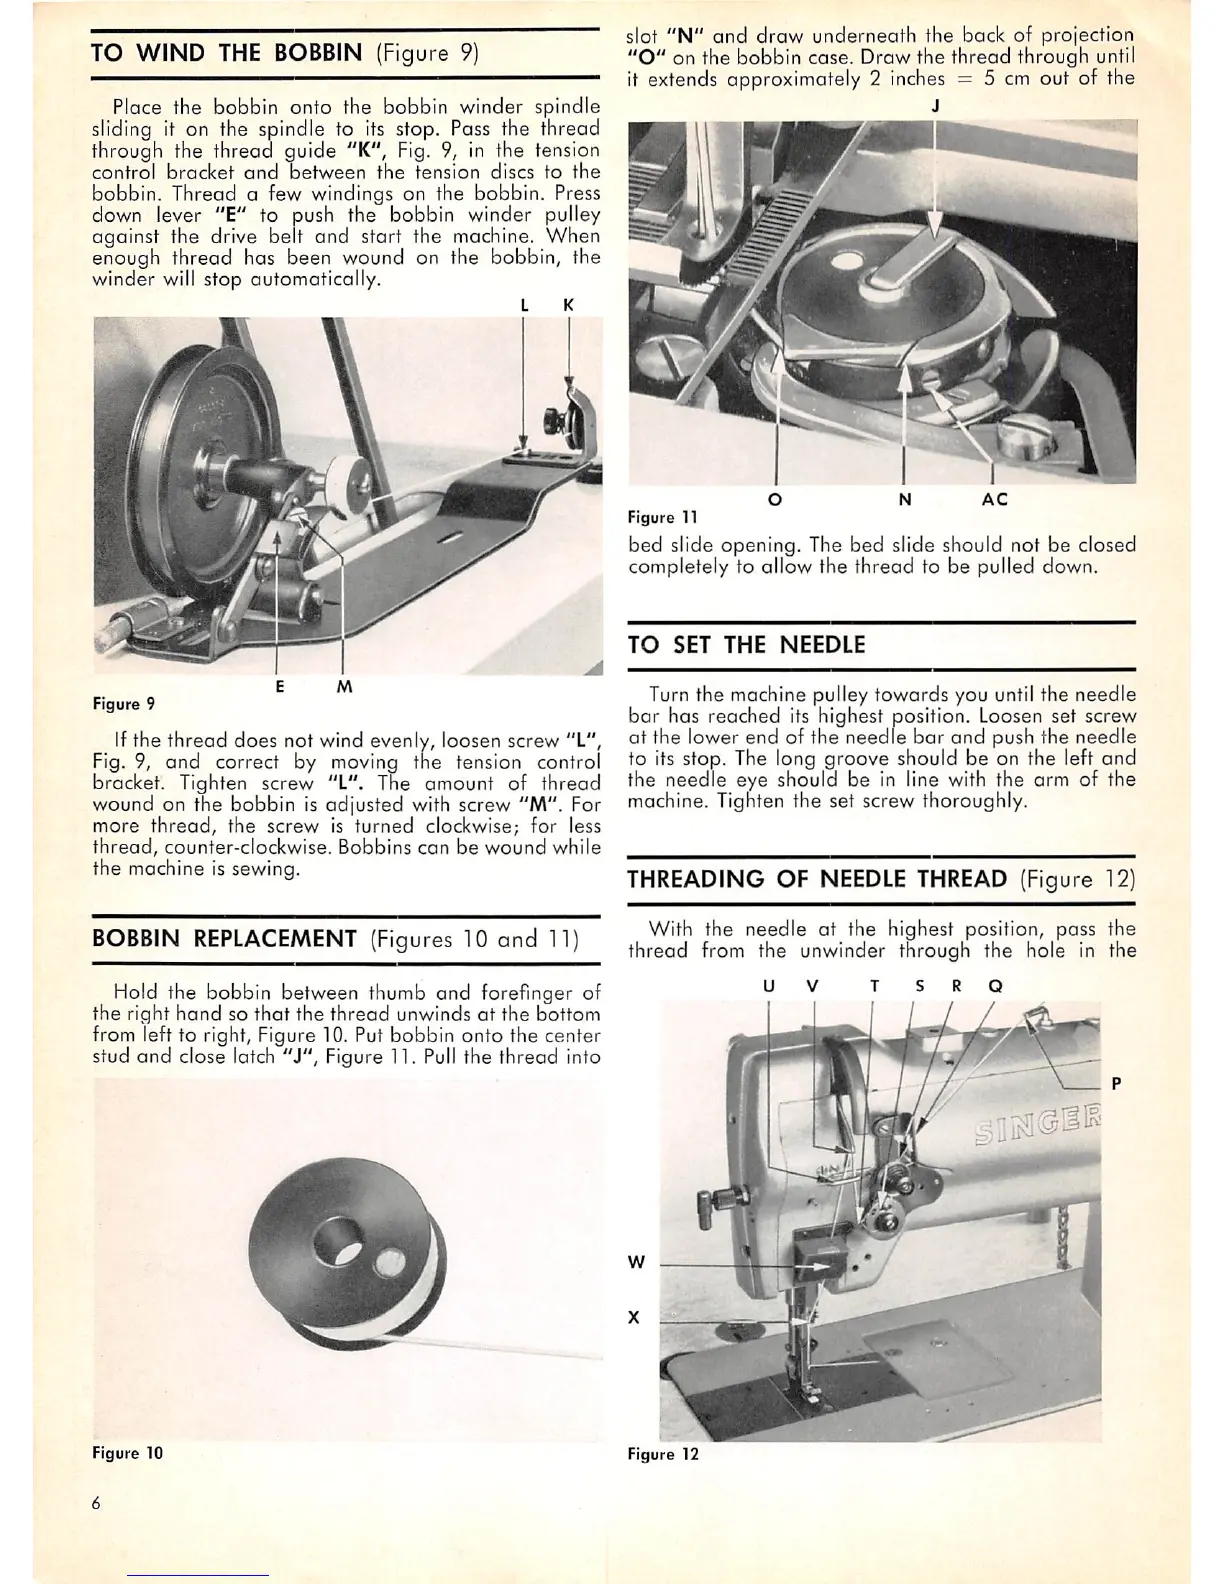
TO WIND
THE
BOBBIN
(Figure 9)
Place the bobbin onto the bobbin winder spindle
sliding it on the spindle to its stop. Pass the thread
through the thread guide "K", Fig. 9, in the tension
control
bracket
and
between
the
tension
discs
to
the
bobbin. Thread a few windings on the bobbin. Press
down lever "E" to push the bobbin winder pulley
against the
drive
belt and start the
machine.
When
enough thread has been wound on the bobbin, the
winder will stop automatically.
Figure 9
Ifthe thread does not wind evenly, loosen screw "L",
Fig.
9, and correct by
moving
the tension control
bracket. Tighten screw "L". The amount of thread
wound on the bobbin is adjusted with screw "M". For
more
thread,
the
screw
is
turned
clockwise; for less
thread,
counter-clockwise.
Bobbins
can
be
wound
while
the machine is sewing.
BOBBIN
REPLACEMENT
(Figures 10 and
11)
Hold the bobbin between thumb and forefinger of
the right
hand
so
that
the
thread
unwinds at the bottom
from left to right. Figure 10. Put bobbin onto the center
stud
and
close latch
"i",
Figure 11.
Pull
the thread into
Figure 10
6
slot
"N"
and
draw
underneath
the back of projection
"O"
on the bobbin case. Draw the thread through
until
it extends approximately 2
Inches
= 5 cm out of the
J
Figure 11
bed slide opening. The bed slide should not be closed
completely to allow the thread to be pulled down.
TO
SET
THE
NEEDLE
Turn the machine pulley towards you until the needle
bar
has reached its highest position. Loosen set screw
at
the lower end of the
needle
bar
and
push the
needle
to its stop. The long groove should be on the left
and
the needle eye should be in line with the arm of the
machine. Tighten the set screw thoroughly.
THREADING
OF
NEEDLE
THREAD
(Figure 12)
With the needle at the highest position, pass the
thread
from the unwinder through the hole in the
Figure 12