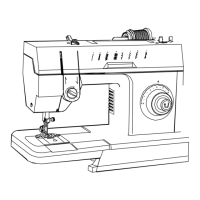
I
ADJUSTING
THE
TENSION
Tension on thread should be
as
light
as
possible
while
still
sufficient to
set
stitches
correctly in mate
rial.
Regulate needle thread tension, as instructed in
Fig. 16. Make certain presser foot is
DOWN
during
tension
adjustment.
Tighten lock nut to maintain
tension
adjustment.
Regulate bobbin thread tension
as
instructed in
Fig. 17.
ADJUSTING
THE
PRESSURE
Correct
presser
foot
pressure
helps insure proper
feeding
of
material.
Pressure
should be as light
as
possible
while
still
sufficient
to
insure
correct
feeding of
material.
Regulate as instructed in Fig. 18 with presser foot
down.
Pressure
regulating
thumb
screw
is fitted with
lock
nut.
Tighten lock nut to maintain pressure adjustment.
REGULATING
THE
STITCH
LENGTH
Changes in stitch length should never be attempted
while
the
machine
is running.
See page 3 for information on
maximum
stitch length
for
your
machine.
Regulate the stitch length, as instructed in Fig. 19.
Button mentioned in Step 4, Fig. 19, drops into
notch
with
an
audible
click.
MORE
TENSION
2.
TURN
THUMB
NUT
1,
LOOSEN
LOCK
NUT
LESS
TENSION
Fig. 16.
Needle
Thread Tension
TURN
REGULATING
SCREW
MORE
PRESSURE
1.
LOOSEN
LOCK
NUT
9
MORE
TENSION
^
LESS
TENSION
Fig.
17. Bobbin
Thread
Tension
-2.
TURN
THUMB
SCREW
LESS
PRESSURE
Fig. 18.
Presser
Foot
Pressure
1.
STOP
MACHINE 3.
TURN
MACHINE
PULLEY
2.
DEPRESS
BUTTON
TOWARD
YOU
SLOWLY
T
4.
UNTIL
BUTTON
5.
THEN
TURN
MACHINE
PULLEY
TO
DESIRED
STITCH
LENGTH
AND
DROPS
INTO
NOTCH
RELEASE
BUTTON
Fig. 19. Regulating
the
Stitch Length