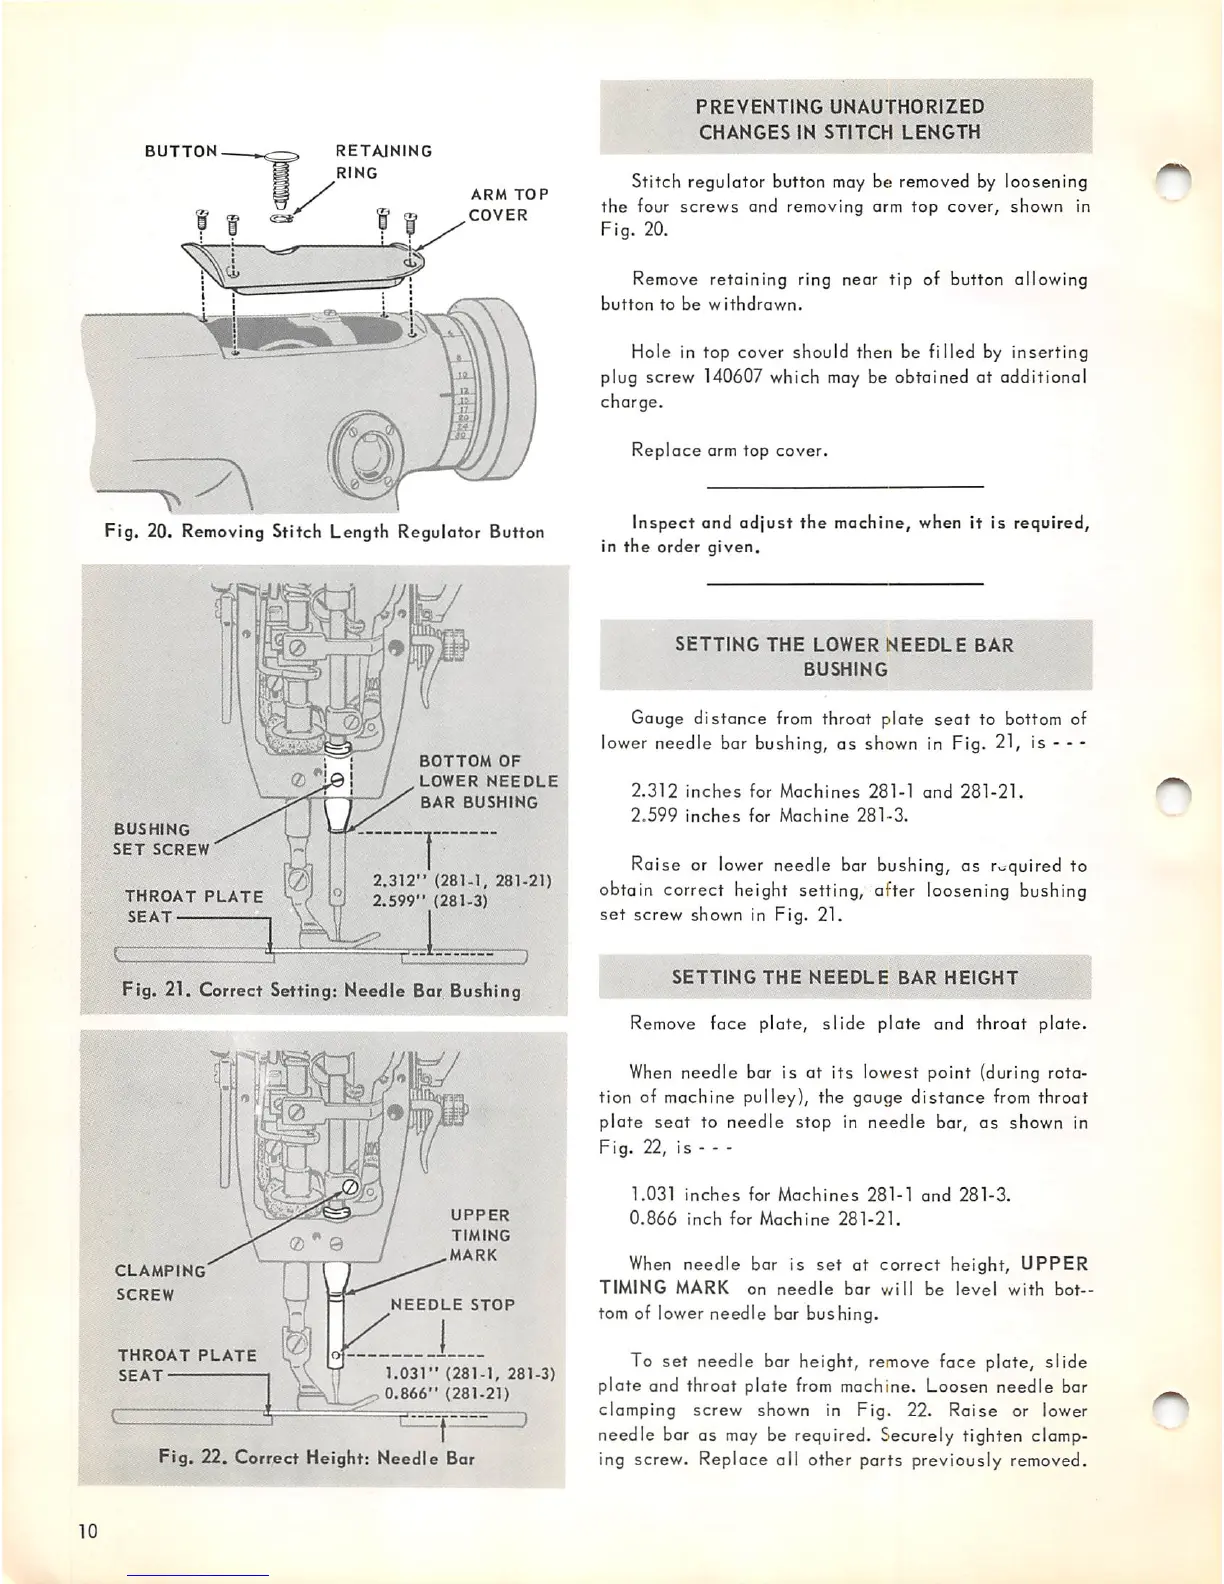
BUTTON
RETAINING
RING
ARM
TOP
I I
.COVER
Fig. 20. Removing Stitch Length Regulator Button
10
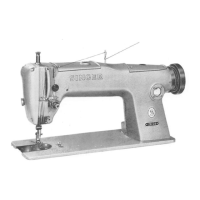
BUSHING
SET
SCREW
THROAT
PLATE
SEAT
BOTTOM
OF
LOWER
NEEDLE
BAR
BUSHING
2.312"
(281-1,
281-21)
2.599"
(281-3)
Fig. 21. Correct Setting: Needle
Bar.
Bushing
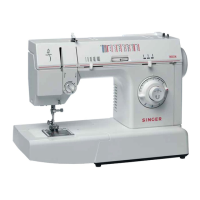
CLAMPING
SCREW
THROAT
PLATE
SEAT
(2)
" ©
UPPER
TIMING
MARK
NEEDLE
STOP
1.031"
(281-1,
281-3)
0.866"
(281-21)
Fig.
22.
Correct
Height:
Needle
Bar
PREVENTING
UNAUTHORIZED
CHANGES
IN
STITCH
LENGTH
Stitch regulator button may be removed by loosening
the
tour
screws
and removing arm
top
cover, shown in
Fig.
20.
Remove retaining ring near tip of button allowing
button
to
be
withdrawn.
Hole in top cover should then be filled by
inserting
plug screw 140607 which may be obtained at additional
charge.
Replace
arm top
cover.
Inspect and
adjust
the
machine, when it is required,
in
the
order
given.
SETTING
THE
LOWER
NEEDLE
BAR
|
BUSHING
I
Gauge
distance
from throat plate
seat
to bottom of
lower needle bar bushing, as shown in Fig. 21, is - - -
2.312
inches
for
Machines
281-1
and
281-21.
2.599
inches
for
Machine
281-3.
Raise or
lower
needle bar bushing, as required to
obtain correct height setting, after loosening bushing
set
screw shown in Fig. 21.
SETTING
THE
NEEDLE
BAR
HEIGHT
f
Remove
face
plate,
slide
plate
and
throat
plate.
When
needle
bar is at
its
lowest point (during rota
tion of machine pulley), the gauge
distance
from throat
plate
seat
to
needle
stop
in
needle
bar,
as
shown in
Fig.
22, is - - -
1.031
inches
for
Machines
281-1
and
281-3.
0.866
inch
for
Machine
281-21.
When
needle
bar is
set
at
correct
height,
UPPER
TIMING
MARK
on
needle
bar
will
be
level
with
bot--
tom of lower needle bar bushing.
To
set
needle bar height, remove face plate,
slide
plate
and throat
plate
from machine. Loosen
needle
bar
clamping screw shown in Fig. 22.
Raise
or lower
needle bar as
may
be required. Securely tighten clamp
ing screw.
Replace
all other
parts
previously removed.