TIMING
THE
MACHINE
Timing the machine
consists
of first
adjusting
the
radial
position
of sewing hook with
relation
to move
ment of
needle
bar and
needle
thread
take-up
lever, to
make certain that loop of thread formed by needle will
be correctly taken by point of hook at proper time.
The check spring and feed
are
then timed to syn
chronize
their
motions
with
needle
and
hook
movement.
TIMING
THE
SEWING
HOOK
Remove slide plate, throat plate, presser foot and
feed dog.
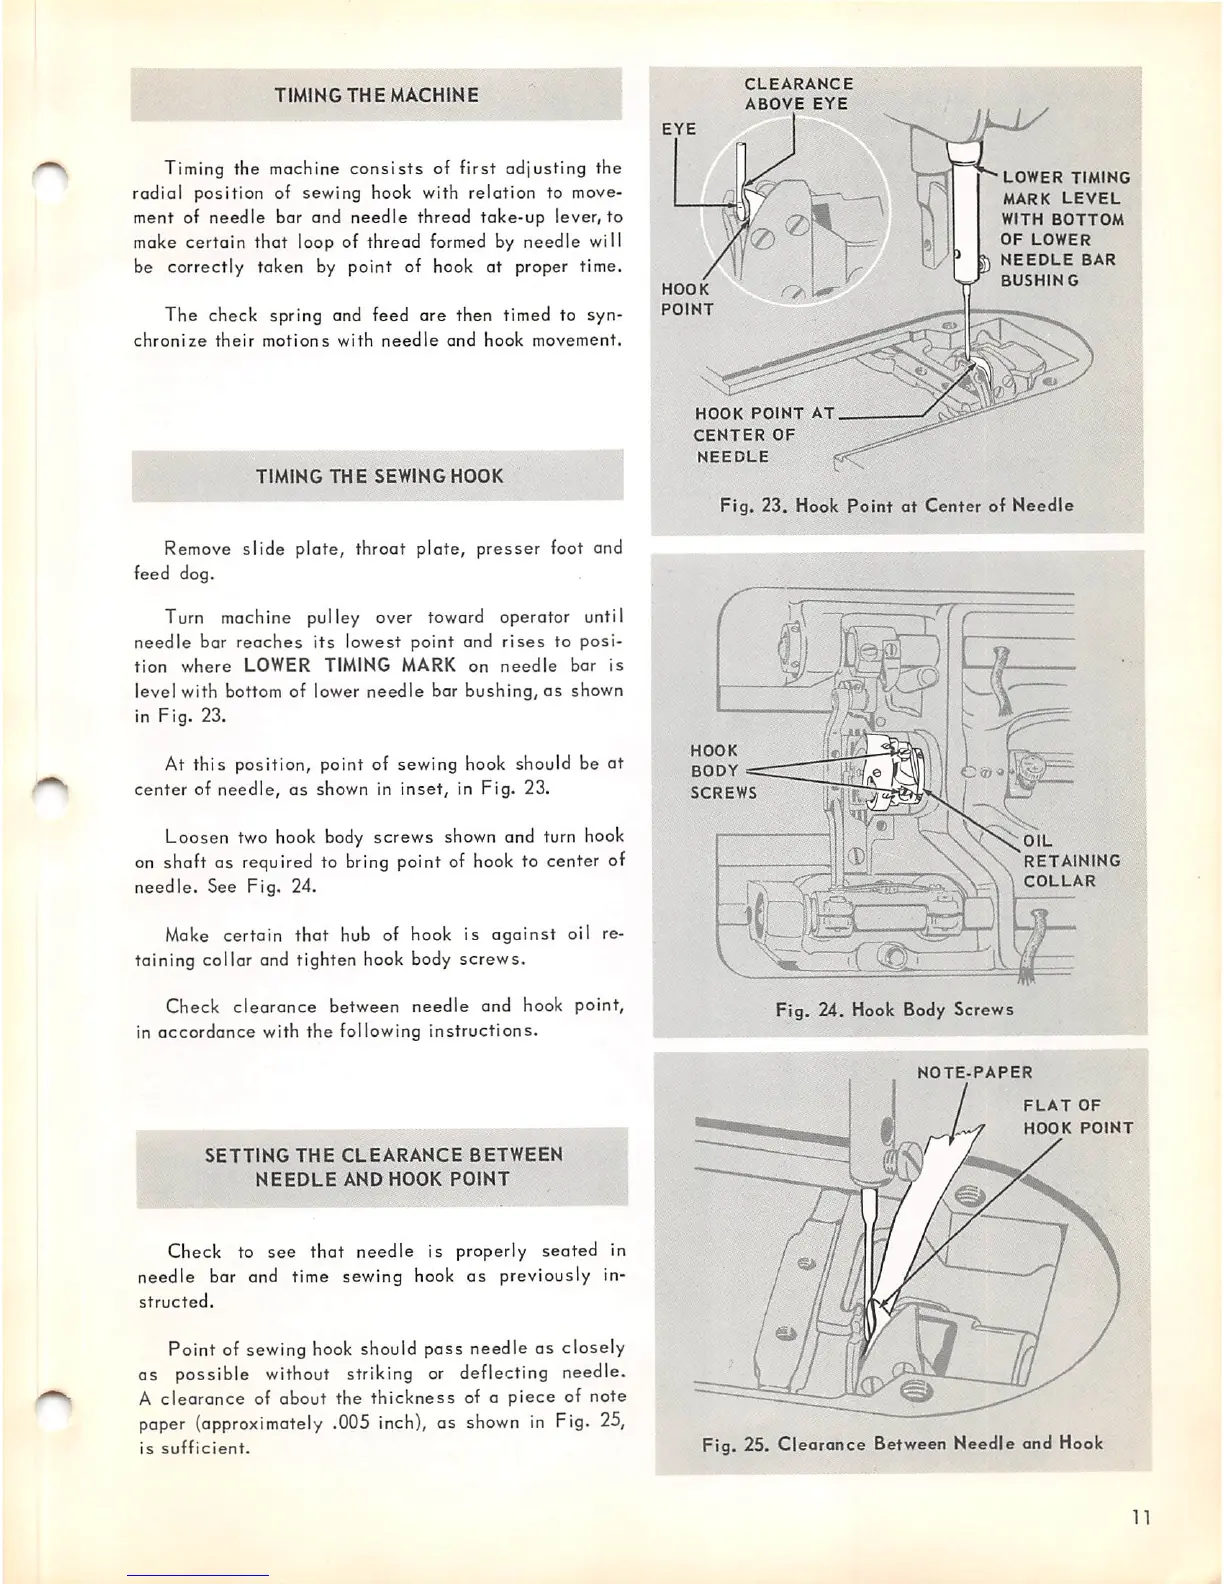
Turn machine pulley over toward operator until
needle
bar
reaches
its
lowest
point
and
rises
to
posi
tion
where
LOWER
TIMING
MARK
on
needle
bar
is
level with bottom of lower
needle
bar
bushing,
as
shown
in Fig. 23.
At
this
position, point of sewing hook should be
at
center
of
needle,
as shown in
inset,
in Fig. 23.
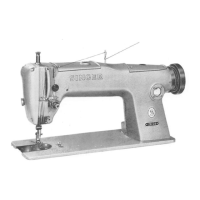
Loosen two hook
body
screws shown and turn hook
on shaft as required to bring point of hook to center of
needle.
See
Fig.
24.
Make certain
that
hub of hook is
against
oil re
taining collar and tighten hook body screws.
Check
clearance
between
needle
and
hook
point,
in
accordance
with
the
following
instructions.
SETTING
THE
CLEARANCE
BETWEEN
NEEDLE
AND
HOOK
POINT
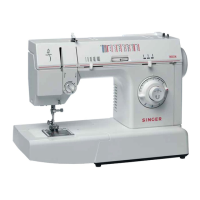
Check to
see
that needle is properly seated in
needle bar and time sewing hook as previously in
structed.
Point of sewing hook should pass needle as closely
as possible without striking or deflecting needle.
A
clearance
of about the
thickness
of a
piece
of note
paper (approximately .005
inch),
as
shown
in
Fig.
25,
is
sufficient.
EYE
HOOK
POINT
CLEARANCE
ABOVE
EYE
HOOK
POINT
AT
CENTER
OF
NEEDLE
LOWER
TIMING
MARK
LEVEL
WITH
BOTTOM
OF
LOWER
^
NEEDLE
BAR
BUSHING
Fig.
23. Hook
Point
at
Center
of
Needle
HOOK
BODY
SCREWS
Fig.
24. Hook Body Screws
OIL
RETAINING
COLLAR
NOTE-PAPER
FLAT
OF
HOOK
POINT
Fig. 25. Clearance Between Needle and
Hook
11