10.
TO
SET
CHECK-SPRING
(Cont'd)
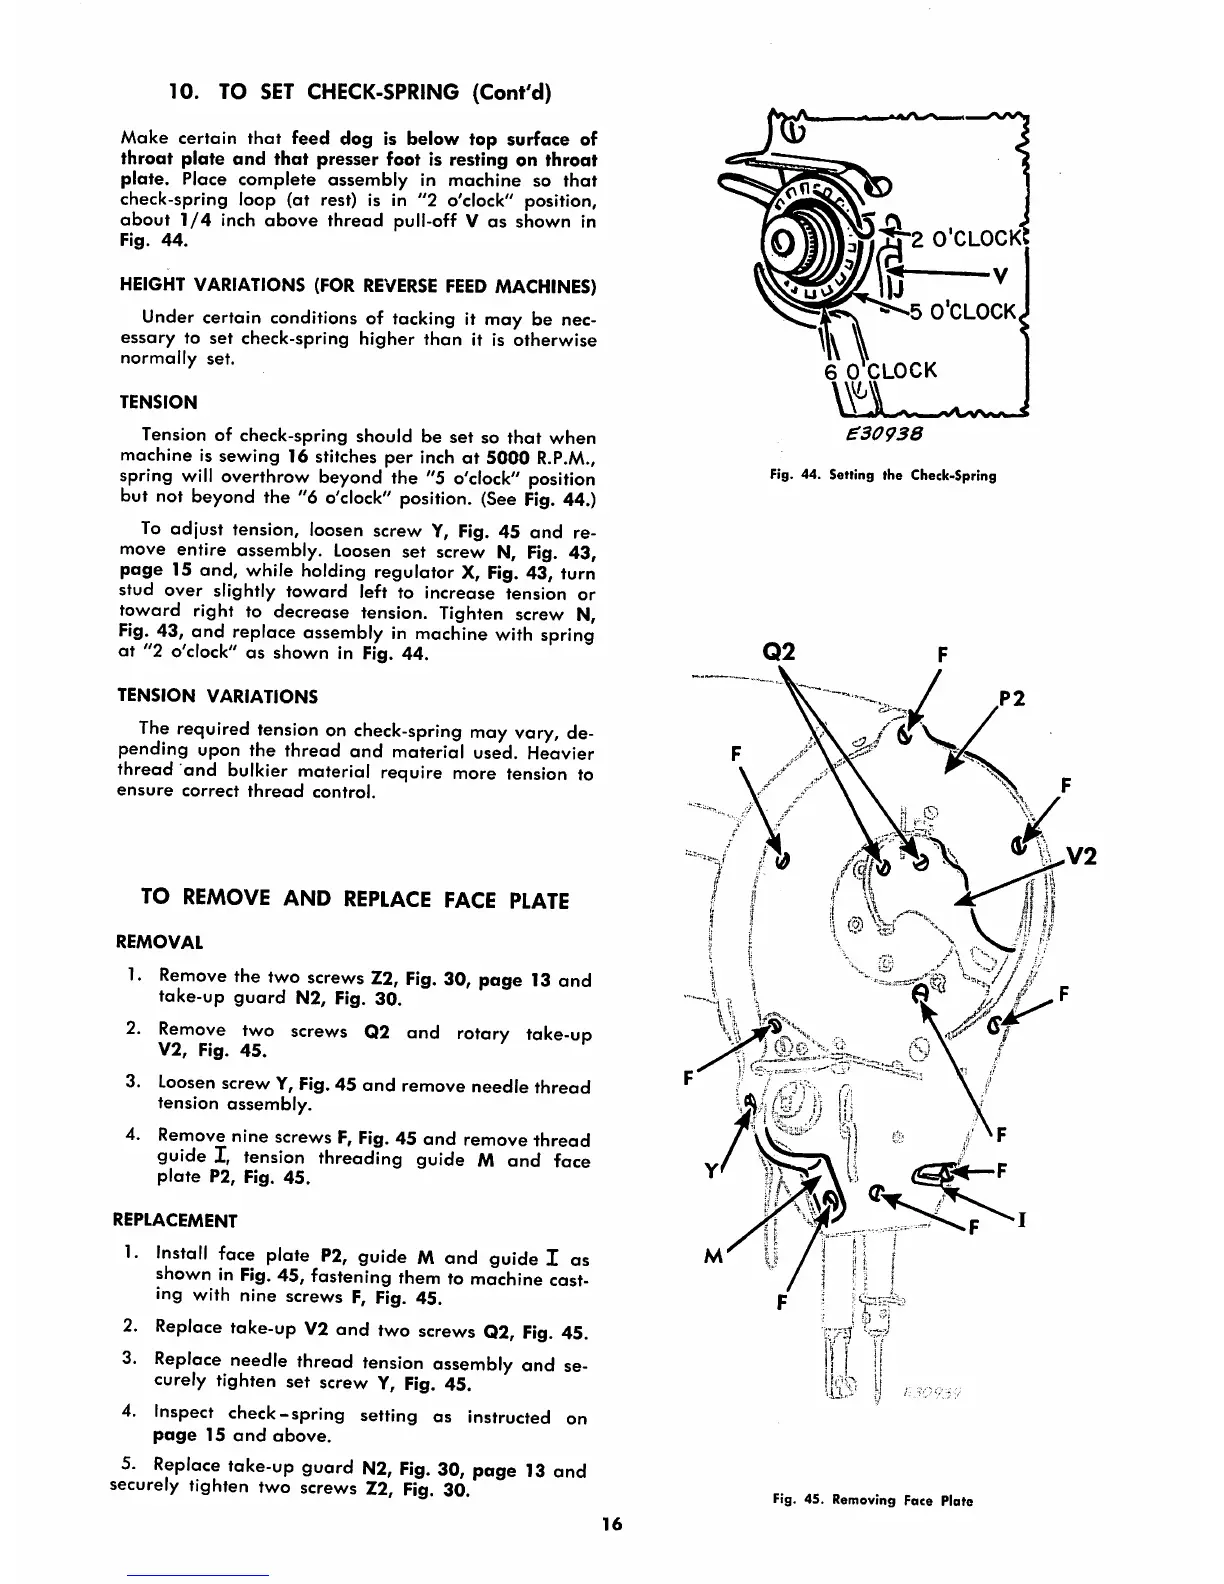
Make certain that feed dog is below top surface of
throat
plate
and
that
presser foot is resting on
throat
plate. Place complete assembly in machine so
that
check-spring loop (at rest) is in "2 o'clock" position,
about
1/4
inch
above
thread
pull-off V
as
shown in
Fig.
44.
HEIGHT
VARIATIONS (FOR
REVERSE
FEED
MACHINES)
Under certain conditions of tacking it may be nec
essary
to
set
check-spring
higher
than
it is
otherwise
normally
set.
TENSION
Tension of check-spring should be
set
so
that
when
machine is sewing 16 stitches per inch
at
5000
R.P.M.,
spring will overthrow beyond the "5 o'clock" position
but not beyond the "6
o'clock"
position.
(See
Fig.
44.)
To
adjust tension, loosen screw
Y,
Fig. 45 and re
move entire assembly.
Loosen
set screw N, Fig.
43,
page 15 and, while holding regulator X, Fig. 43, turn
stud over slightly
toward
left to increase tension or
toward right to decrease tension.
Tighten
screw N,
Fig.
43, and replace assembly in machine with spring
at "2 o'clock" as shown in Fig. 44.
TENSION
VARIATIONS
The
required
tension
on
check-spring
may vary, de
pending upon the
thread
and
material used. Heavier
thread and bulkier material require more tension to
ensure
correct
thread
control.
TO
REMOVE
AND
REPLACE
FACE
PLATE
REMOVAL
1.
Remove
the
two
screws
Z2,
Fig.
30, page 13 and
take-up
guard
N2, Fig. 30.
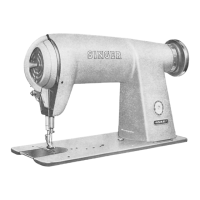
2.
Remove
two screws
02
and rotary take-up
V2,
Fig.
45.
3. Loosen screw Y, Fig. 45
and
remove needle
thread
tension
assembly.
4. Remove nine screws F, Fig. 45
and
remove thread
guide I,
tension
threading guide M and face
plate
P2, Fig.
45.
REPLACEMENT
1.
Install
face plate
P2,
guide M and guide I as
shown in
Fig.
45, fastening them to machine cast
ing with nine screws F, Fig. 45.
2.
3.
4.
Replace
take-up
V2
and
two
screws
Q2,
Fig.
45.
Replace
needle
thread
tension
assembly
and se
curely tighten set screw
Y,
Fig.
45.
Inspect check-spring setting as instructed on
page
15
and
above.
5.
Replace
take-up
guard
N2,
Fig.
30, page
13
and
securely
tighten two
screws
Z2,
Fig.
30.
16
Q2
2 o'clockI
^^>^5
O'CLOCKJ
u
6 0
CLOCK
^30938
Fig. 44. Setting the Check-Spring
P2
Fig. 45. Removing Face
Plate