IrrtK-cc-c
1 ! i p
llirr
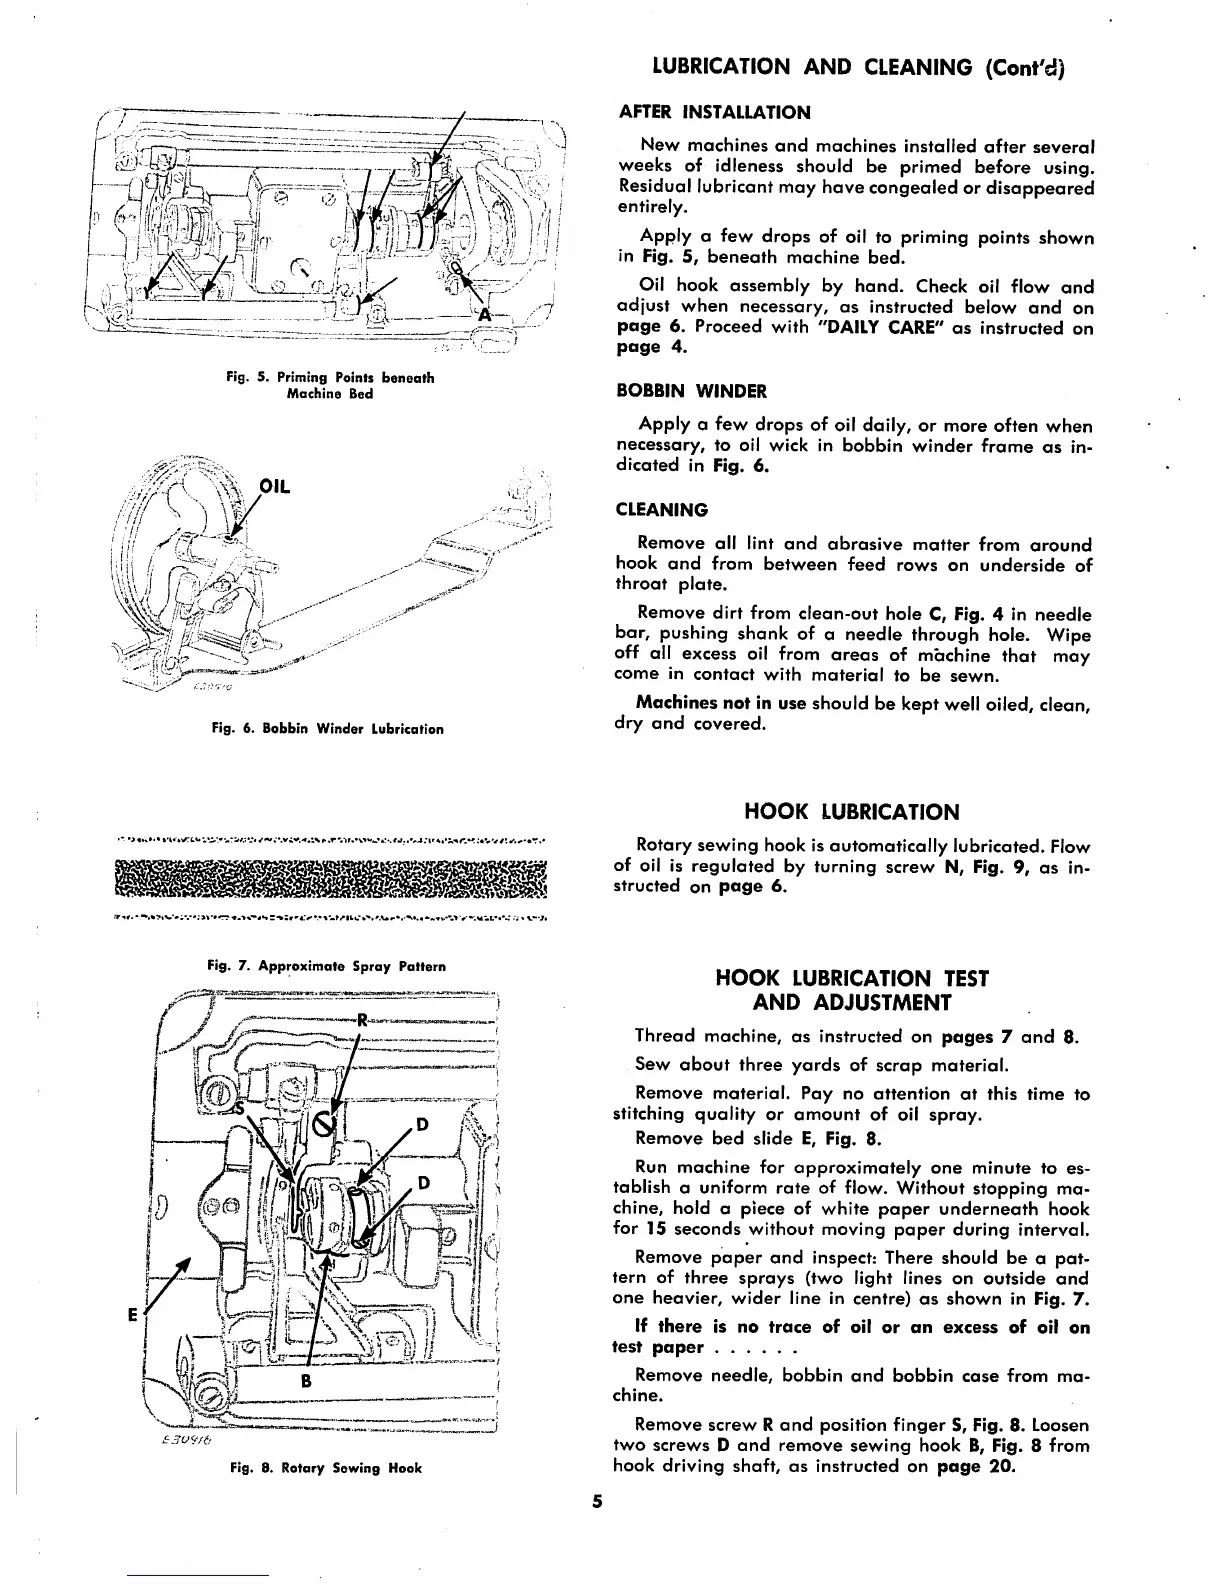
Fig. 5.
Priming
Points
beneath
Machine
Bed
OIL
/W\\
'•
///
) \l
/•///
I \
/ •!; a
ii
,^ir'
J
{r-
Fig. 6.
Bobbin
Winder
Lubrication
Fig. 7. Approximate Spray Pattern
p) I
Id
W Y y ^j
-•''—^^.-^^11
fX'
i
j ^
)7^
TTW-A11 \ti I
ir\¥4^zl±^Hi
''SU9/6
Fig. 8.
Rotary
Sewing
Hook
Cy
LUBRICATION
AND
CLEANING
(Cont'd)
AFTER
INSTALLATION
New
machines
and
machines
installed
after
several
weeks of idleness should be primed before using.
Residuallubricant may have congealed or disappeared
entirely.
Apply a few drops of oil to priming points shown
in Fig.
5,
beneath
machine
bed.
Oil hook assembly by
hand.
Check oil flow
and
adjust
when necessary, as instructed below
and
on
page
6.
Proceed
with
"DAILY
CARE"
as
instructed
on
page
4.
BOBBIN
WINDER
Apply a few drops of oil daily, or more often when
necessary,
to oil
wick
in
bobbin
winder
frame
as
in
dicated in Fig. 6.
CLEANING
Remove
all
lint
and
abrasive
matter
from
around
hook
and
from
between
feed
rows
on
underside
of
throat
plate.
Remove dirt from clean-out hole C, Fig. 4 in
needle
bar, pushing shank of a needle through hole. Wipe
off all excess oil from areas of machine that may
come
in
contact
with
material
to
be
sewn.
Machines not in use should be kept well oiled, clean,
dry
and
covered.
HOOK
LUBRICATION
Rotary sewing hook is automatically lubricated. Flow
of oil is regulated by turning screw N, Fig. 9, as in
structed
on
page
6.
HOOK
LUBRICATION
TEST
AND
ADJUSTMENT
Thread machine, as instructed on
pages
7
and
8.
Sew
about
three
yards
of scrap material.
Remove
material.
Pay
no
attention
at
this
time
to
stitching quality or
amount
of oil spray.
Remove
bed
slide
E, Fig. 8.
Run
machine
for
approximately
one
minute to es
tablish a uniform
rate
of flow. Without stopping ma
chine, hold a piece of white
paper
underneath hook
for 15 seconds without moving
paper
during interval.
Remove
paper
and
inspect: There should be a
pat
tern of
three
sprays
(two light lines on
outside
and
one
heavier,
wider
line in centre)
as
shown
in Fig. 7.
If
there
is
no
trace
of
oil
or
an
excess
of
oil
on
test
paper
Remove
needle,
bobbin
and
bobbin
case
from
ma
chine.
Remove screw R
and
position
finger
S, Fig. 8. Loosen
two
screws
D
and
remove
sewing
hook
B, Fig. 8
from
hook driving shaft,
as
instructed on
page
20.