TIMING
AND
OTHER
ADJUSTMENTS
The instructions on the following pages ore for Ad
justers and Mechanics only.
TO
SET THE THREAD
TAKE-UP
SPRING
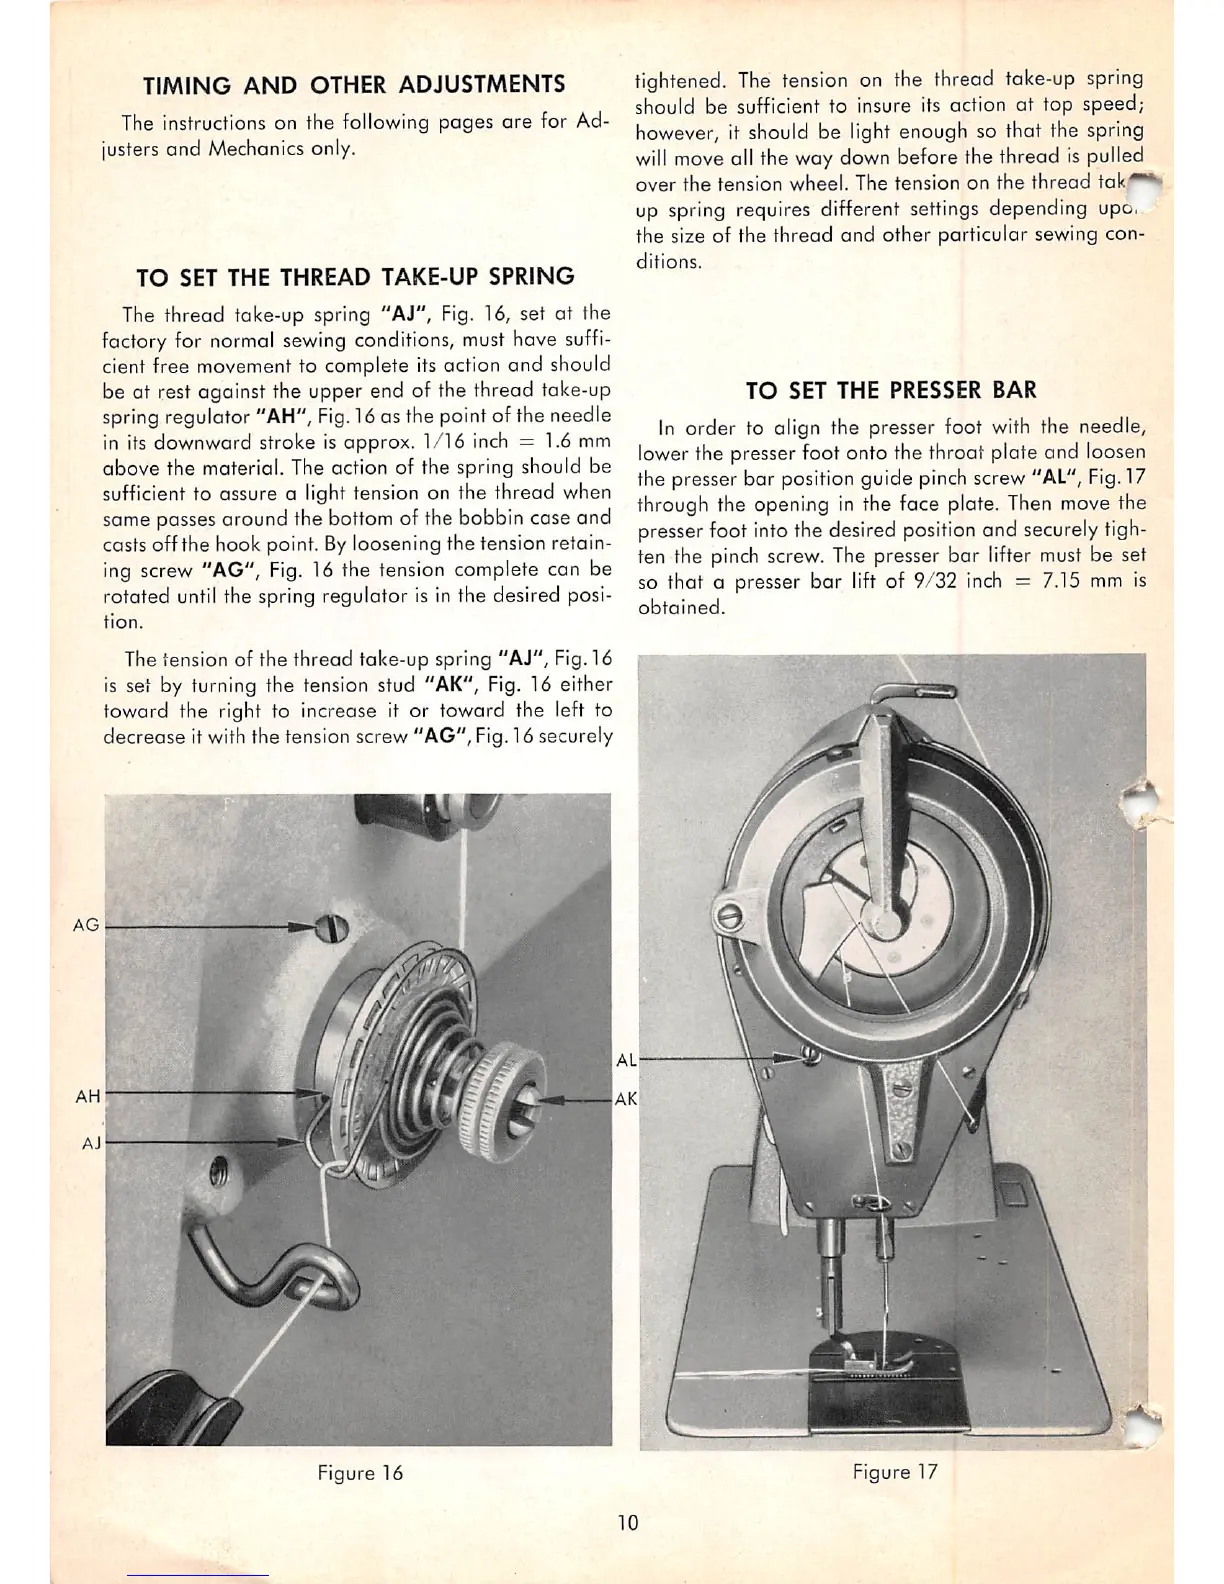
The thread take-up spring "AJ",
Fig.
16, set at the
factory for normal sewing conditions,
must
hove
suffi
cient free movement to complete its action and should
be at rest against the upper end of the thread take-up
spring regulator
"AH",
Fig.
16as the pointof the needle
in its downward stroke is opprox.
1/16
inch = 1.6 mm
above the material. The action of the spring should be
sufficient to assure a light tension on the thread when
same passesaround the
bottom
of the bobbin cose and
casts off the hook point.
By
loosening the tension retain
ing screw "AG",
Fig.
16 the tension complete can be
rotated
until
the spring regulator is in the desired posi
tion.
The tension of the
thread
take-up spring
"AJ",
Fig.16
is set by turning the tension stud
"AK",
Fig.
16 either
toward the right to increase it or toward the left to
decrease Itwith the tension screw "AG", Fig.16 securely
Figure 16
tightened.
The
tension
on the thread take-up
spring
should be sufficient to insure its action at top speed;
however, it should be light enough so that the spring
will
move
all the way
down
before the thread
is
pulled
over
the
tension wheel. The tension on
the
thread
tok*
up spring requires different settings depending upo.
the size of the thread
and
other particular sewing con
ditions.
TO
SET
THE
PRESSER
BAR
In
order to align the presser foot
with
the needle,
lower the presser foot onto the throat plate and loosen
the presser bar position guide pinch screw "AL", Fig.17
through the opening in the face plate.
Then
move
the
presserfoot
into
the desired
position
and securely tigh
ten the
pinch
screw. The presser bar lifter
must
be set
so that a presser bar lift of 9/32
inch
= 7.15 mm is
obtained.
0
Figure 17
10



 To Next Page