14 | Sinterit Lisa printer SHORTENED USER GUIDE
STOP!
• Watch out for the elements of the Heating module of the machine.
• Do not clean the glass under running water!
• The cleaning process should be carried out outside of the machine.
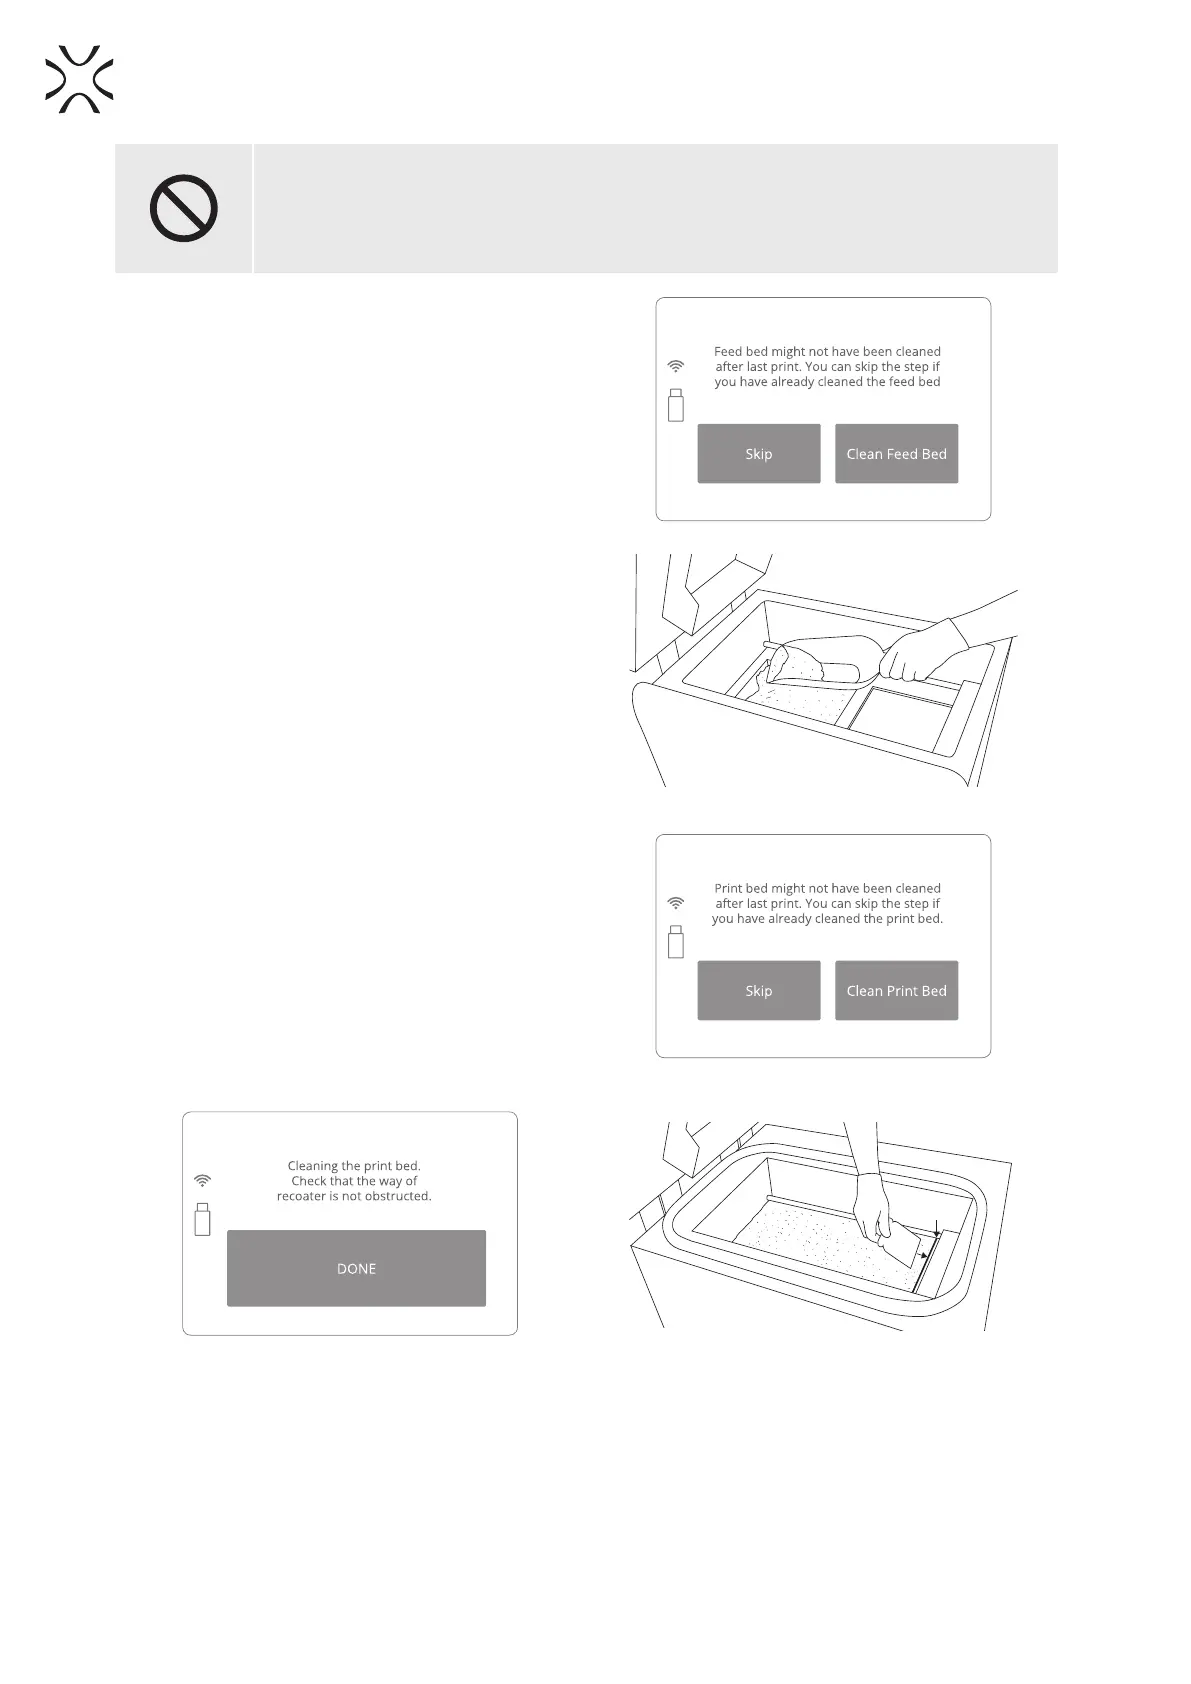
3. “FEED BED MIGHT NOT HAVE BEEN CLEANED
AFTER LAST PRINT” message will appear.
4. Conrm it by pressing “CLEAN FEED BED” button
(Image 43).
5. Check that the way of the RECOATER is not
obstructed. Conrm with the “DONE” button.
6. The BEDs and the RECOATER will change position.
The PRINT Bed will be lowered and the FEED Bed
will be raised.
Image 43. Clean FEED Bed screen.
7. Precisely clean the FEED Bed from the remaining
unsintered powder including the BEDs
surroundings and placed into the PRINT Bed. Use
the scoop, brush and spatula (Image 44).
8. “DONE” button can be pressed if cleaning process
had been already done.
9. Next, the “PRINT BED MIGHT NOT HAVE BEEN
CLEANED AFTER LAST PRINT” message will appear.
10. Conrm, by pressing “CLEAN PRINT BED” button
(Image 45).
11. Ensure that the workspace of the RECOATER is not
obstructed and remove all objects from the printer
chamber. Conrm by clicking “DONE” button
(Image 46).
12. The RECOATER and the PRINT Bed will change
position. The PRINT Bed will be raised.
13. Thoroughly clean the PRINT Bed from the
remaining unsintered powder including the BEDs
surroundings. Move it to the OVERFLOW BIN
through the gap. This can be done with the use of
a spatula and paintbrush (Image 47).
Image 44. Removing the powder from the FEED BED.
Image 45. Clean PRINT Bed screen 1.
Image 46. Clean PRINT Bed screen 2.
Image 47. Removing powder from PRINT Bed
to OVERFLOW BIN.
 Loading...